
 Lessons: 23Length: 2.5 hours
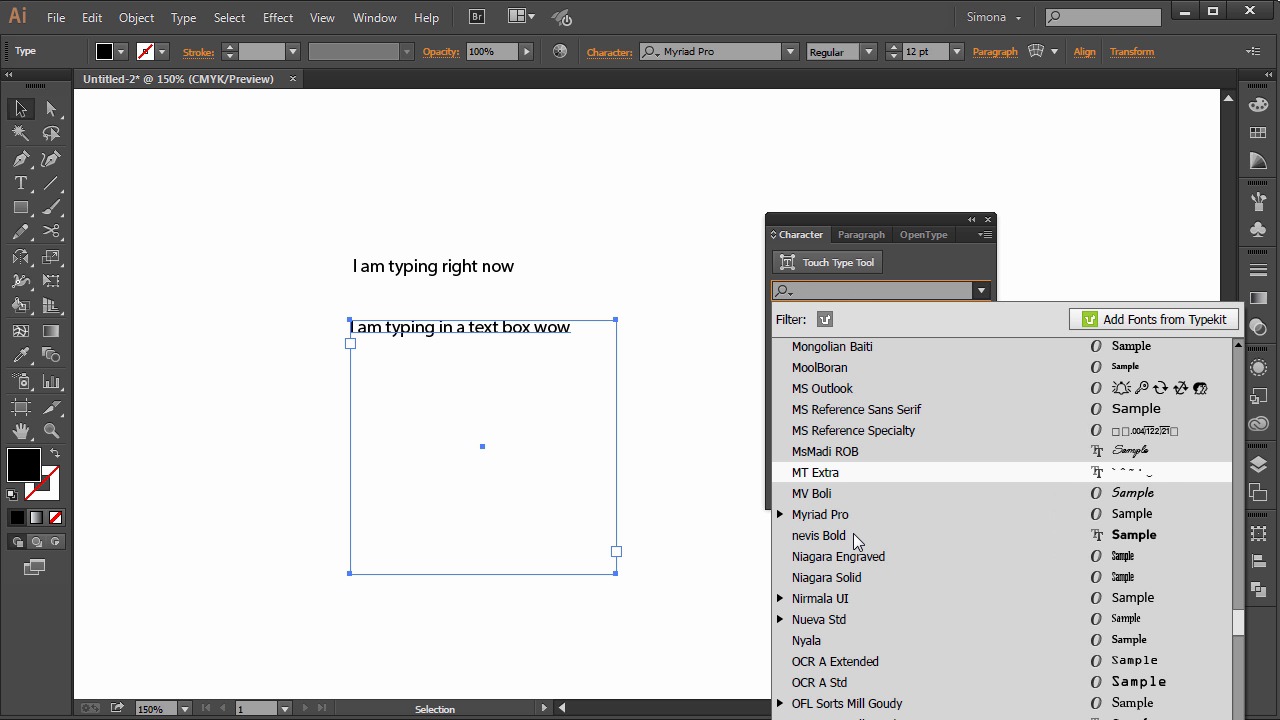
- Overview
- Transcript
6.1 The Type Tool
There will always come a time when you will need to add some text to your designs. So in this lesson you will learn how to use the Type Tool and how you can create a line of text, make paragraphs, and add extra glyphs.
1.Introduction
1.1Introduction01:24
2.Program Overview
2.1Workspace and Document Setup07:21
2.2Adobe Illustrator Tools07:34
2.3Art Boards09:04
2.4Pixels vs. Vector, and the Vector Path Explained10:41
3.Drawing Shapes and Lines
3.1Creating Shapes07:38
3.2Making Lines06:03
3.3Drawing Tools07:42
3.4The Pen Tool08:34
4.Manipulating Shapes and Lines
4.1Select, Align, and Group05:30
4.2The Transform Tools10:24
4.3The Cutting Tools05:37
4.4Special Transform Tools09:27
5.Colors and Effects
5.1The Color Panel09:25
5.2Patterns08:31
5.3The Live Paint Tool06:41
6.The Type Tool
6.1The Type Tool05:23
6.2Formatting Text04:36
6.3Special Text Techniques04:53
7.Save, Export and Print
7.1Saving Your File03:04
7.2Exporting Your File03:00
7.3Printing Your File03:49
8.Conclusion
8.1Conclusion01:35
6.1 The Type Tool
Hi, my name is Simona, and welcome to tuts+. You are watching the course, The Fundamentals of Adobe Illustrator, and this is lesson, The Type Tool. In this lesson, we will learn how to use the type tool and how we can create a line of text, a paragraph, and add some extra glyphs. So, let's get started right away. With Adobe Illustrator open, let's create a new document. Any size will do. So, how can we get text into our document, you might ask. Adobe Illustrator has a big strength and it's the type tool. So first, let's select the type tool here in the tool panel. We have two ways to create text. Either we can click once and then we can start typing like I'm doing right now. And this technique is called point type. Or we can use area type. To do the latter, first we have to either press the Escape key on the keyboard, or select another tool, and then reselect the type tool. Now to create an area type, we simply click and drag, and this way we can create an area, so to speak, where we can put the text. See, I'm starting to type now, and now we're typing into this area. Now, can you see the blinking cursor? That means that we are now able to select the text by clicking and dragging, just like this. Now, with the text highlighted, we can then go up to the Control panel, and there we can choose a different font. And we can change the size. We can also access the Character panel here or the Paragraph panel over there. And if you wanted to have a separate panel, we can go to Window > Type > Character. See? Now we have the panel with character, paragraph, and open type as a separate panel open. Here, we can change the typeface. The type variables, if the font has any. The size, the kerning, which is the space between characters. And the leading, which is the space between lines of text. If we click the small arrow here, we can select Show Options, and then we have even more formatting options on hand. If we deselect the text and then reselect it with the selection tool, we can change the font by clicking here. And in the drop down we can choose a different font, or if you have the cloud, then you can access the Typekit fonts as well. If we choose a font that has a small arrow on the side here, we can click and see what kind of variables the font has, and then directly choose the one we want. We can also see what kind of font it is, either an open font, true type, or postscript. So let's pick a font, change the size, and then the leading. So I'm just picking any kind of font, whatever you have available. And then I change the size here. And then I change the leading. Then, we can click on the Paragraph tab over here, and here we can choose from align left, align center, align right, or justify. And then here, to make a left indent or a right indent, and so forth. I think you are getting the idea. Now if I wanted to select the first text we typed again without having to use the type tool, I can simply select it with the selection tool and then double-click on the line and see the cursor again. Now we automatically enter in to the type tool. Now we can either change the type, add characters, type more, hit Enter and create a new line, and so forth. Or, we can deselect the text. Basically deselect everything and then we choose the type tool again and then just click on one character or onto one line, and see right away we are in the type tool and we can access our text again. We can also add special characters that our keyboard doesn't have or that you do not know the combination for. So when we go to Type > Glyphs, we will get a window with all special characters that the font we chose has to offer. Now to add one of those glyphs to the text, all we need to do is select the type tool, and then either highlight the character we want to change like this and then double-click on the glyph that we want to put there. Or we can place the cursor after the text and then double-click and place the glyph just behind the text. And now we are at the end of this lesson about the type tool. There are many more features to explore, but let's stop here for now. Let's move on to the next lesson and learn more about formatting type with styles.


