
 Lessons: 23Length: 2.5 hours
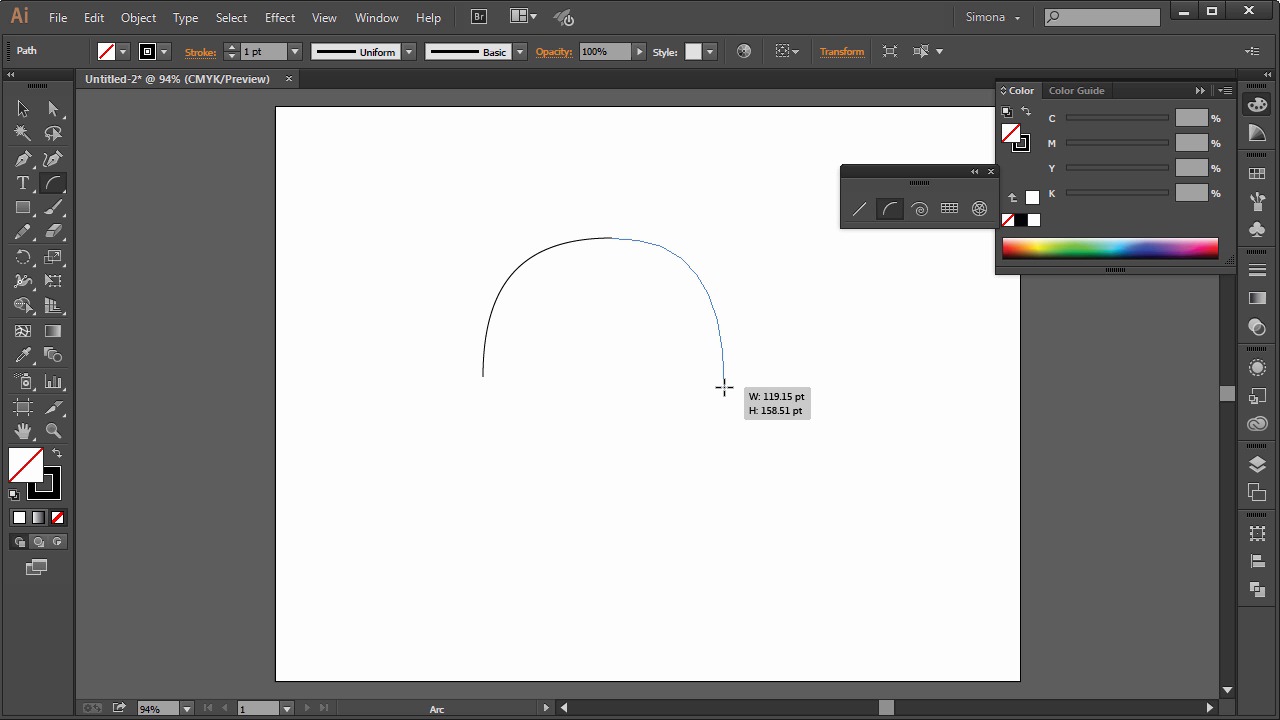
- Overview
- Transcript
3.2 Making Lines
In this lesson we will explore the line tools in Adobe Illustrator CC. These line tools are still simple and basic drawing tools, but let me show you how we can make use of them.
1.Introduction
1.1Introduction01:24
2.Program Overview
2.1Workspace and Document Setup07:21
2.2Adobe Illustrator Tools07:34
2.3Art Boards09:04
2.4Pixels vs. Vector, and the Vector Path Explained10:41
3.Drawing Shapes and Lines
3.1Creating Shapes07:38
3.2Making Lines06:03
3.3Drawing Tools07:42
3.4The Pen Tool08:34
4.Manipulating Shapes and Lines
4.1Select, Align, and Group05:30
4.2The Transform Tools10:24
4.3The Cutting Tools05:37
4.4Special Transform Tools09:27
5.Colors and Effects
5.1The Color Panel09:25
5.2Patterns08:31
5.3The Live Paint Tool06:41
6.The Type Tool
6.1The Type Tool05:23
6.2Formatting Text04:36
6.3Special Text Techniques04:53
7.Save, Export and Print
7.1Saving Your File03:04
7.2Exporting Your File03:00
7.3Printing Your File03:49
8.Conclusion
8.1Conclusion01:35
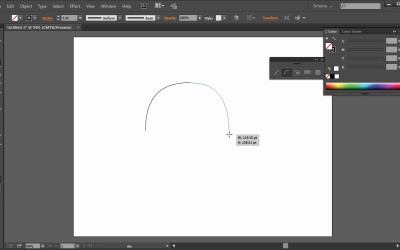
3.2 Making Lines
Hi, my name is Simona and welcome to tuts+. You are watching the course The Fundamentals of Adobe Illustrator and this is lesson Making Lines. In this lesson we will explore the line tools in Adobe Illustrator CC. These line tools are still simple and basic drawing tools, but let me show you how we can make use of them. So let's get started. Let's open up Adobe Illustrator and create a new document. The size doesn't really matter. I am choosing letter size for mine. Now let's have a look at the Adobe Illustrator line tools. When we go over the toolbar and separate the group of line tools, just like this here, we can see that we have five line tools to work with. Again, just like the shape tools, the line tools are basic tools, so let's explore the first one, the Line tool. As the name suggest, it is for creating straight lines. I will set the fill to none first here and then I will draw a line. Just click and drag. If you hold down the Shift key, you will get a straight line on the horizontal or vertical. Next we have the Arc tool. The Arc tool make arcs. So we select it, and then we click and drag, and depending how we drag the arc, it'll either be small or big. Now if you click an drag and then just hold and then you use the up or down arrow key on your keyboard, you can change the arc slope. Watch, I will demonstrate it for you. Here I am hitting the arrow key either up or I'm pressing the arrow key down. Now here's another trick. If you want the arc to be flipped, just hit the F key on the keyboard and see? We can flip it. Let me show you quickly how we could use the Arc tool for drawing. We have options for the Arc tool too that we can change. So let's open up the dialogue box by clicking on the art board once, with the tool selected. And then, here, we can set the length on the x axis, or on the y axis. What type of path. Either open or closed. The base, where it runs along, and the slope. Remember the slope we can change on the fly when we hit the up or down arrow keys on the keyboard. First, I want to turn on my smart guides. Smart guides can help us snapping a line or a path together, and we can turn them on by going to View > Smart Guides. If I was to make an oval shape for example, for the lion's head, I could use the arc just like this. I draw the first arc here. Then I click again, and I flip it by pressing the F key, then another arc, and I flip it again by pressing the F key. And one more over here and another one over there. And now, we have an oval like shape. Now, the line tool we can use for the teeth as an example. Let me show you how. I select the Line tool, then I start drawing lines and because of the smart guide I can get a pretty good row of teeth just like this. All I do is I click, drag, let go. And again, click, drag, let go, and so forth. Next we have the Spiral tool. We can create some spirals just like that. We can change settings by clicking once on the art board and the dialogue box will open. There we can set the radius, the decay, and the segment, and the style. When we create a spiral and while holding the mouse key, we can use the up and down arrow again and either adding segments or reducing segments. Now if I was to create another spiral and then hold down the Ctrl key, or Cmd key on the Mac, and move the mouse sort of up or down. I can increase the spiral density, or decrease it. The Spiral tool can be neat if you want to create swirls and such things. Next we have the Grid tool. As the name says it, we can create a grid either by dragging one out on the art board just like this, or by opening up the options dialogue box. There, we can set the height, horizontal dividers, the skew, vertical dividers, and the outside rectangle to be used as a frame, and the fill of the grid. Next, we have the Polar Grid tool. We can create a shape like this either as an ellipse or a circle. If you hold down the Shift key again while we drag it. Then we open the dialogue box. Here we can set the width and height, the concentric dividers, and the radial dividers. We can create a perfect spiral if you wanted to. Let me show you how. Open up the dialog box and set the width and height to 100 points, then the concentric dividers to ten, and a skew of minus 15%, the radial dividers to zero. And then we hit OK, and here we have a spiral-like shape. And this is it. Now you know more about the line tools that Illustrator has to offer. Remember, this is still basic tools in Illustrator, but they can sometimes help us to create more complicated shapes. They can be a little bit limiting if you are looking for more a drawing or sketching-like appearance, but remember sometimes it can be really helpful. So let's move on to the next lesson and learn more about the drawing tools in Adobe Illustrator.


