
 Lessons: 23Length: 2.5 hours
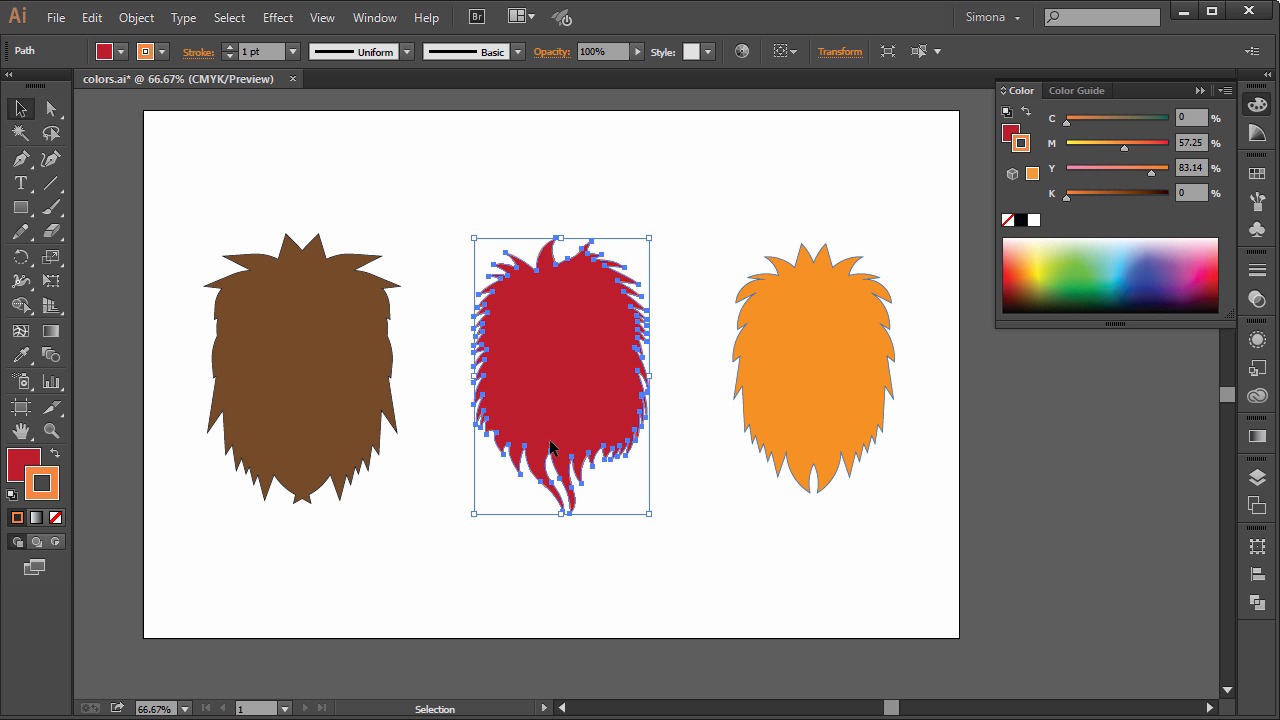
- Overview
- Transcript
5.1 The Color Panel
You will learn all about colors and how to apply colors and gradients to objects.
1.Introduction
1.1Introduction01:24
2.Program Overview
2.1Workspace and Document Setup07:21
2.2Adobe Illustrator Tools07:34
2.3Art Boards09:04
2.4Pixels vs. Vector, and the Vector Path Explained10:41
3.Drawing Shapes and Lines
3.1Creating Shapes07:38
3.2Making Lines06:03
3.3Drawing Tools07:42
3.4The Pen Tool08:34
4.Manipulating Shapes and Lines
4.1Select, Align, and Group05:30
4.2The Transform Tools10:24
4.3The Cutting Tools05:37
4.4Special Transform Tools09:27
5.Colors and Effects
5.1The Color Panel09:25
5.2Patterns08:31
5.3The Live Paint Tool06:41
6.The Type Tool
6.1The Type Tool05:23
6.2Formatting Text04:36
6.3Special Text Techniques04:53
7.Save, Export and Print
7.1Saving Your File03:04
7.2Exporting Your File03:00
7.3Printing Your File03:49
8.Conclusion
8.1Conclusion01:35
5.1 The Color Panel
Hi, my name is Simona and welcome to tuts+. You are watching the course The Fundamentals of Adobe Illustrator and this is lesson The Color Panel. Here we will explore all about the colors and how to apply colors, gradients, and strokes to objects. So, let's get started. Please open up the exercise file called Colors in your source file folder. I have already created several layers here for you and we have three shapes. Right now they only have a stroke applied, and no fill. We can easily tell this by looking in the Tool panel. And on the bottom here, we can see that we have no fill and that we have a black color for the stroke. In order to make the stroke active, all we have to do is click on it and it will bring it to the forefront. At the same time, you can see that we have a stroke applied in the color panel here on the right, as well. And since we are working in the CMYK mode, we get the values for the CMYK, as well. On the bottom, you can find your CMYK spectrum and the color picker. You can easily turn off the stroke by clicking either this icon here for none or the icon here same time in the Tool panel on the right. Another place where you can see that you have either a fill or a stroke applied is on top here in the Control panel. Now since we have a black stroke applied to the object, how can we change the stroke? So let's select the object and go over into our color panel and into the color picker. And then here we can pick any color we like. For example, let's pick a green. So if we click once, we will now have changed the color of our shape. We don't see it right now, here on the artboard, because the shape is selected. But you can easily see it on the bottom left here on the Tool panel, that the stroke has changed now from black into green. The same way we can see it on top in the Control panel, or over in our Color panel. Now if I select another object, I will see now that the green stroke is applied to our shape. Now let's apply another color to the second object for the stroke. For example, let's pick a red. In the same way, it will show up here in the Tool panel, in the Control panel and in our Color panel. We can also change the stroke color with our object selected when we go to the top Control panel. And when we click on the small arrow here, we see a drop-down and it shows us the swatches. These are the default swatches in Adobe Illustrator. So now we can change the stroke color by just simply clicking on any swatch. So let's pick the blue. Another way to change the stroke color is double-clicking here in the Tool panel. You will get the Color Picker pop up, and if you are familiar with Photoshop, I'm sure you have seen a similar window in Photoshop as well. You can change the spectrum by sliding the arrows up and down, or we can set the percentages, for example for CMYK, the hexagram number for web or RGB, or lab color. Now we can apply a fill as well. Since the shape is selected, let's make the fill active, just by clicking on the fill to bring it into the forefront. Now let's open up the Swatch panel here. We can simply add a color by just clicking on the swatch color, and then when we click the fill will be applied to the shape. I am picking an orange one for this shape and another fill in red for the middle shape, and the shape on the left I filled with a dark brown. Now we can see that we've applied three solid colors to our shapes here and we have a stroke of different colors for these objects as well. Now if I want to change the stroke again all we have to do is make it active and then change the color, even set it to none. This is easily done via the Swatch panel. So with the shape selected, we could click None, this icon here, or black or white. So let's make the stroke black. And we apply this to the other shapes as well. Now we explored how to add colors to an object and a stroke. And you can see these colors are solid colors. But what if we would like to apply a gradient? Now if you're familiar with Photoshop, you've heard of gradients and gradients in Illustrator are pretty much the same. Let me show you how. I created on the second layer a shape that we can fill with a gradient. You can find the Gradient panel here on the right. If you don't see it, you can easily find it under Window > Gradient. So let me pull this out so I can demonstrate the gradient better. Now, if we want to apply a gradient, we have to make sure that first, the fill is activated. So, let's do this by clicking on the fill here to bring it to the forefront. Now, we can click the gradient. See, now, we have applied a gradient from white to black to our shape. Here we can also see the gradient slider. We have our color stops, one on each side. And we can select them and drag them along, and this will change the position of the color stops. And as you can see, the appearance of the gradient will change as well on our shape. You can also add color stops to the gradient slider, as many as you'd like. All you have to do is just click, and click again, and one more. And you can remove them simply by selecting them and dragging them away, just like this. Here, this little diamond shaped icon is the midpoint indicator. And if we click it and drag it, we will change the location of the gradient colors and the appearance of the gradients will change again in the shape. You can of course, choose the location setting down here in the drop down, as well. Or we could type a percentage. It's all up to you. We can also change the angle of the gradient. And in the drop down we can choose from a great range of angles. Or we can type an exact number. So for an example let's choose a 90 degree angle, and our gradients switch now from top to bottom, black to white. Or if I choose a 45 degree angle, we will get a diagonal gradient. The default gradient is always black and white, but we can choose the colors of our gradient of course. When we go to the gradient slider and click on the color stops we have to double-click. We will be able to see in the pop-up the Swatch panel, and the Color panel, and we can switch between both. We can change color profiles as well, by clicking on the small arrow here, and in the dropdown, we can select the color profile we want. So let's choose CMYK. And then we will be presented with all the CMYK values. Or we simply select a swatch from the Swatch panel. So let's change the white to orange. And then the black to red. Now we've changed the whole gradients for the shape. Of course we can change the type of gradient from linear to radial as well. Since we know now that we can select gradients from the Gradient panel on the right, we also have the gradient tool here in the Tool panel on the left. Now when we select the shape and then the gradient tool in the Tool panel, we will see a gradient annotator appearing in the shape. This is simply a duplication of the Gradient panel. You can see the midpoint, the color stops, you can grab them and move them around, see what happened? The gradient location has changed, right on the shape. This we cannot do with the Gradient panel. When we grab one of these handles, we can change the perspective of the gradient also. All these settings will be automatically updated in the Gradient panel. The gradient tool has one big advantage. You can work directly on the shape where you want to have your gradient applied or when you want to modify your gradient. And this is it for this lesson about colors and gradients. We know now how to apply colors, strokes, and gradients. Now let's move on to the next lesson and learn about patterns in Adobe Illustrator.


