
 Lessons: 23Length: 2.5 hours
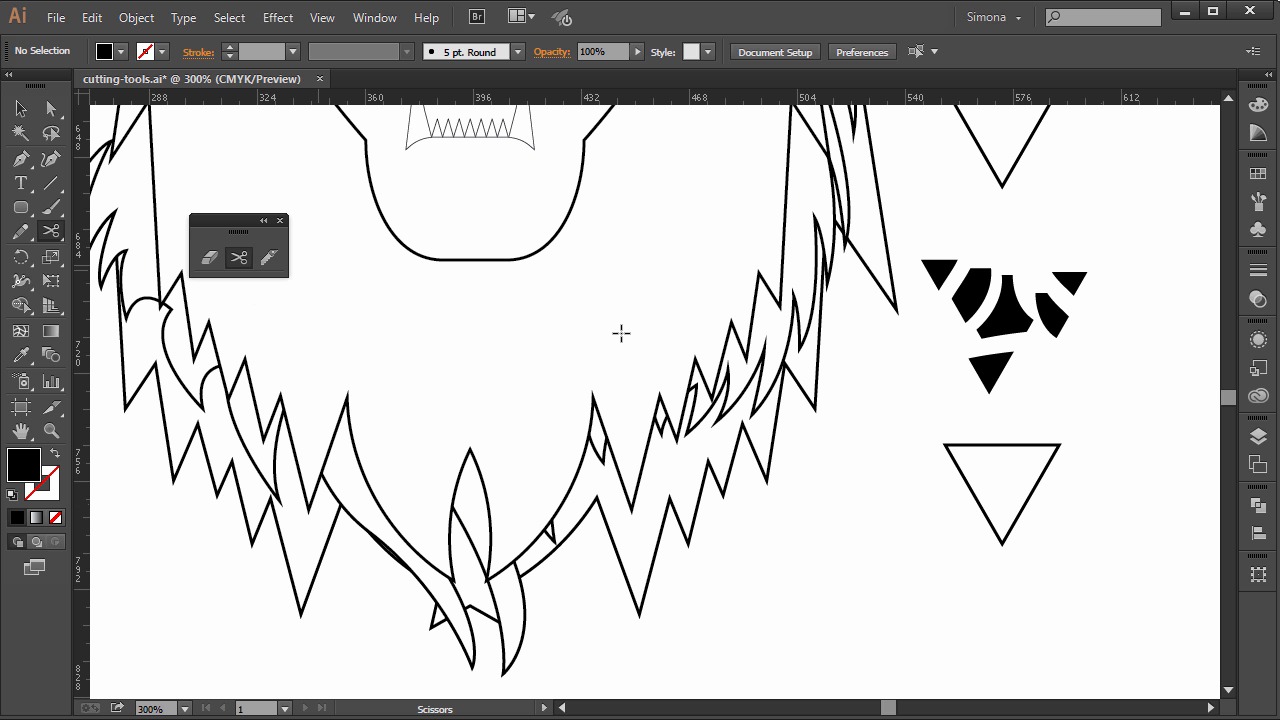

- Overview
- Transcript
4.3 The Cutting Tools
In this lesson you will learn about tools for cutting, dividing and trimming objects.
1.Introduction
1.1Introduction01:24
2.Program Overview
2.1Workspace and Document Setup07:21
2.2Adobe Illustrator Tools07:34
2.3Art Boards09:04
2.4Pixels vs. Vector, and the Vector Path Explained10:41
3.Drawing Shapes and Lines
3.1Creating Shapes07:38
3.2Making Lines06:03
3.3Drawing Tools07:42
3.4The Pen Tool08:34
4.Manipulating Shapes and Lines
4.1Select, Align, and Group05:30
4.2The Transform Tools10:24
4.3The Cutting Tools05:37
4.4Special Transform Tools09:27
5.Colors and Effects
5.1The Color Panel09:25
5.2Patterns08:31
5.3The Live Paint Tool06:41
6.The Type Tool
6.1The Type Tool05:23
6.2Formatting Text04:36
6.3Special Text Techniques04:53
7.Save, Export and Print
7.1Saving Your File03:04
7.2Exporting Your File03:00
7.3Printing Your File03:49
8.Conclusion
8.1Conclusion01:35
4.3 The Cutting Tools
Hi, my name is Simona, and welcome to tuts+. You are watching the course The Fundamentals of Adobe Illustrator, and this is lesson The Cutting Tools. In this lesson, we will learn methods for cutting, dividing, or trimming objects. Illustrator provides quite a few tools to do so. So let's get started right away. Let's open up Illustrator and the exercise file called Cutting Tools, in your Source file folder. Adobe Illustrator has a few cutting tools to offer, so let's look over here and let's separate the Cutting Tool panel first from the toolbar. As you can see, right away we see three cutting tools. But I want to talk about another one before we start. We can use the Divide Objects Below command. It acts as a stencil by using a selected object to cut through another one. And it will delete the original selected object through it. To use it, let's select the rounded shape here and then we'll move it over the triangle. Then we go to Choose > Object > Path > Divide Object Below. See the rounded shape disappears, but the triangle has been cut by the rounded shape and I can pull them apart. Then we can cut path at selected anchor points. This will cut a path at the anchor point or anchor points if you selected more than one. Let me show you how. So I'm selecting two anchor points with the direct selection tool. First I click on the first one and then I hold the Shift key and then click the second one. This will allow me to select both. Then I will locate the Cut Path at Selected Anchor Point button in the Control panel up here. Now the path has been cut and I have the triangle shape here and the line over there. Then we have the knife tool. It cuts objects along a free-drawn path that you draw with the tool, and it will divide the object into components. So let's click and choose this tool. And then I start dragging with the knife over the triangle. You can see that I'm dividing it and the more I cut, the more components of the shape I will have. And then when I select it with the selection tool, I can take all those little cut pieces apart from each other. And then we have the scissor tool. It splits a path at the anchor point, or along a segment. So when I choose the scissor tool here, and then click on the triangle path segment here once and then again, I just cut it. And I can select it and pull it away. Or I can click on an anchor point, and then I can click on another anchor point, and then I will have cut right the segment between those two anchor points. And another tool that we have available is called the eraser tool. With this tool we can erase objects in the following way. We can erase specific objects. We can select an object, and then start erasing parts of it. And we can erase any object on the artboard, if we don't select anything. So be careful with this tool, because nothing is selected, and if you choose to use the eraser tool, let me show you. And I just move over the artboard with artwork, just like this. It will erase where I have dragged. We can also constrain the eraser tool to a vertical, horizontal, or a diagonal line, if I hold down the Shift key and then I drag. As you can see, one's horizontal, one's vertical, and another one diagonal. There's one more thing we can do with the eraser tool. We could delete everything in the marquee that we draw. So just press the Alt or the Option key on the Mac and then start dragging. Of course we still have the eraser tool selected. Let me show you which objects I used to cut those tools we just learned. Here are the teeth. I cut up the big tooth into components with the knife tool and the small one as well. With the small tooth here, I used a trick. I held the Shift key and the Alt or Option key on the Mac and then I clicked and dragged with the knife tool vertically on the tooth and it made a straight line for cutting. And I used the scissors to cut the nose into two parts, just like I showed you earlier. And now we are at the end of this lesson. Using cutting tools can help you create more shapes or erase parts of your artwork that you don't need or want anymore. They can help you with coloring later on if you needed extra shapes because you cut up your little art into more components. And you can also delete extra anchor points, or you can cut something that needs to be apart and then has to be an open path, instead of a closed path. But let's move on to the next lesson and discover more special transform tools in Illustrator, like the pucker or bloat tool.


