
 Lessons: 22Length: 1.4 hours
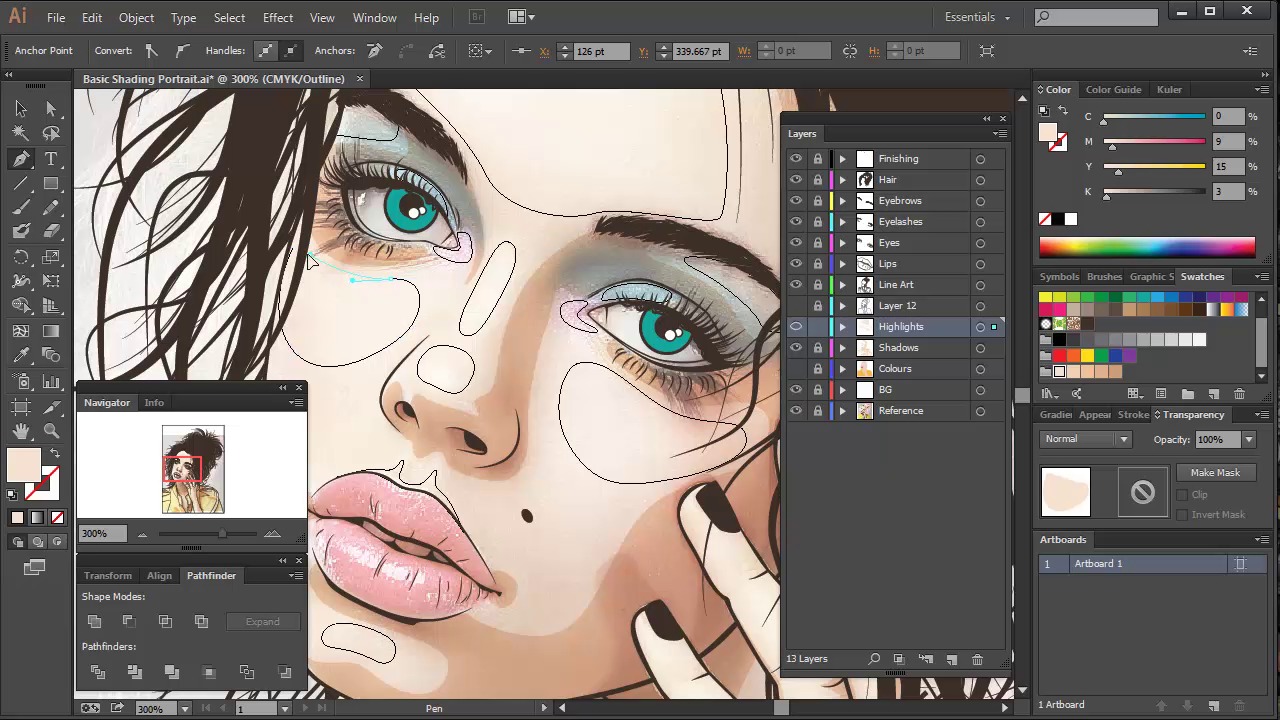
- Overview
- Transcript
4.4 Skin Shading: The Highlights
With the shadows rendered, it’s time to move onto the highlights.
Color Guide
- Skin tone face and hand highlight: #f5e0cd / Blending Mode Normal, Opacity 100%
- Skin tone neck highlight: #f0d0b4 / Blending Mode Normal, Opacity 100%
- Jacket highlight: #fbaf3f / Blending Mode Normal, Opacity 100%
1.Introduction
1.1Welcome and Course Overview02:32
2.Pre Portrait Lessons
2.1Prerequisites to the Course03:05
2.2Choosing the Right Stock03:35
2.3Skin tones and Picking Colors03:49
2.4The Three Brushes04:29
3.Create a Basic, Cartoon/Line Art Style Portrait
3.1Set Up Your Document03:29
3.2Base Shapes05:07
3.3Creating the Line Art06:34
3.4Focus on the Mouth02:43
3.5Focus on the Eyes03:24
3.6Focus on the Eyelashes and Eyebrows02:15
3.7Focus on the Hair04:12
3.8Finishing Touches03:23
4.Create a Basic, Color Portrait with Simple Shading
4.1Introduction04:46
4.2Basic Portrait Theory06:26
4.3Skin Shading: The Shadows05:27
4.4Skin Shading: The Highlights02:00
4.5Lip Shading and Eye Shading03:49
4.6Creating Shadows and Highlights for Hair04:35
4.7Make Up02:15
4.8Final Touches03:01
5.Conclusion
5.1Conclusion00:59
4.4 Skin Shading: The Highlights
Hey all, welcome back to Vector Portraits for Beginners on Tuts+. My name is Sharon Millen, and in this lesson we're going to be adding highlights to our portrait. Let's start by creating a new layer above our shadow layers, and naming it Highlights. We're going to be using the lighter skin tone for the fill. Let's go back into Outline mode, and draw the shapes. The key here is not to overlap the already draw shapes for the shadows. I'm gonna start on the face. First the forehead. Then the brow bone. Two shapes for the nose. The corners of the eyes, and the eyelids. The top of the lip, the chin, and on the cheek. As these shapes don't traditionally overlap the boundaries of the base layer, we won't need to add them to the clipin mask. However, if you are working in a way that they do overlap, you can add these to the already created clipin mask, for the shadows. For now, just group together the shapes and look. Now, add the shading for the neck, the hand, and the jacket. For the jacket, I'm going to be using a light yellow. I've then set all of the shapes for the highlights to screen. You'll need to modify the opacity where required. And, then you're done. Next time on vector portraits for beginners, we will be adding the shading and highlights to the lips and the eyes. Thanks for listening.


