- Overview
- Transcript
3.2 Base Shapes
Base Shapes are important when creating most illustrations in vector, even more so with vector portraits. In this lesson you’ll learn what a base shape is, why we use them and in this project, what base shapes are required.
1.Introduction1 lesson, 02:32
1.1Welcome and Course Overview02:32
2.Pre Portrait Lessons4 lessons, 14:58
2.1Prerequisites to the Course03:05
2.2Choosing the Right Stock03:35
2.3Skin tones and Picking Colors03:49
2.4The Three Brushes04:29
3.Create a Basic, Cartoon/Line Art Style Portrait8 lessons, 31:07
3.1Set Up Your Document03:29
3.2Base Shapes05:07
3.3Creating the Line Art06:34
3.4Focus on the Mouth02:43
3.5Focus on the Eyes03:24
3.6Focus on the Eyelashes and Eyebrows02:15
3.7Focus on the Hair04:12
3.8Finishing Touches03:23
4.Create a Basic, Color Portrait with Simple Shading8 lessons, 32:19
4.1Introduction04:46
4.2Basic Portrait Theory06:26
4.3Skin Shading: The Shadows05:27
4.4Skin Shading: The Highlights02:00
4.5Lip Shading and Eye Shading03:49
4.6Creating Shadows and Highlights for Hair04:35
4.7Make Up02:15
4.8Final Touches03:01
5.Conclusion1 lesson, 00:59
5.1Conclusion00:59
3.2 Base Shapes
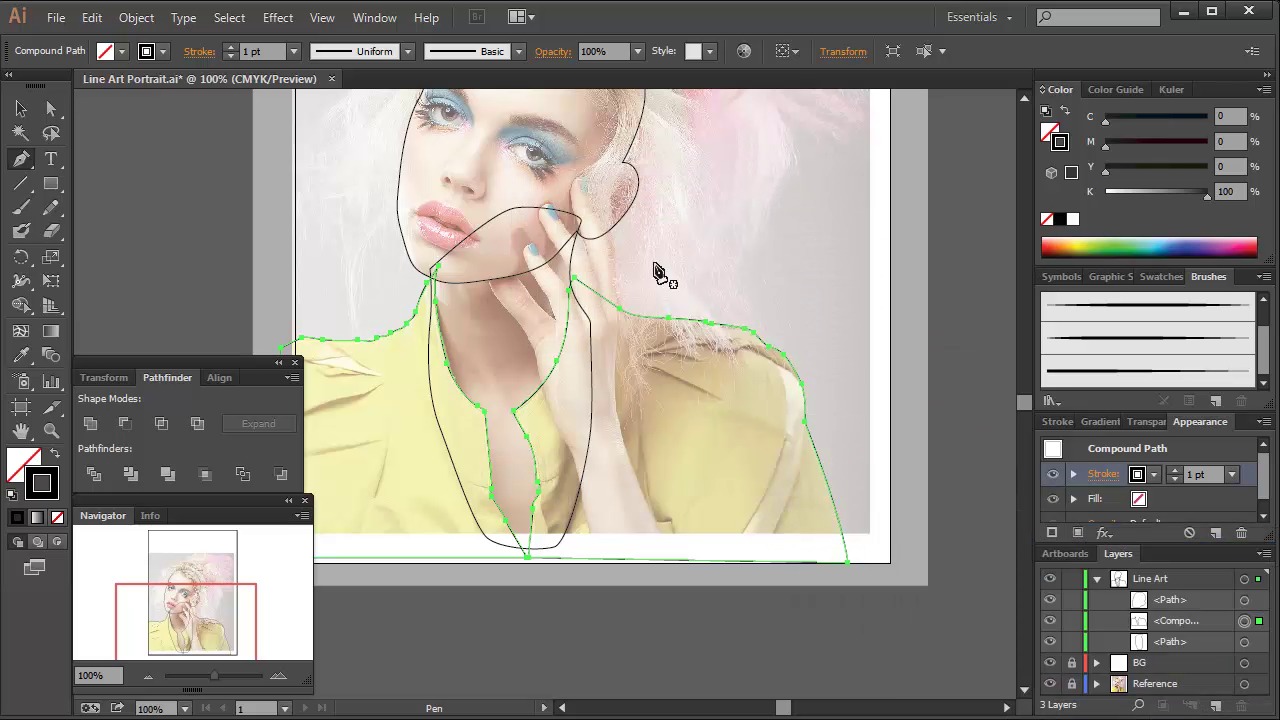
Hey all, welcome back to Vector Portraits for Beginners on tuts+. My name is Sharon Millin, and in this lesson, we're looking at creating the base layers for a simple line art portrait. So what exactly are base shapes? Well, base shapes are shapes that represent large areas or blocks which make up the whole picture. Now they could represent something such as the area for a face, or perhaps a large area of color. What are base shapes actually used for? Well, creating base shapes helps you insure that you cover each recognizable area of an illustration. So it makes sure that you've got every single area covered. For example, in a portrait, you'd have a base shape for the face, for the neck, for the clothing, possibly the eyes, and possibly the lips. It's helpful if you're using multiple lower opacities. If you're drawing several shapes on top of an area, you want to make sure that there's something underneath that's at 100% opacity. This is so you haven't got transparency underneath your already transparent shapes. So let's crack on and have a look at how we're going to create the base shapes for our portrait. So I'm gonna start by using the Pen tool and I'm gonna have a black stroke with a null fill. So you can see exactly what I'm drawing on top of our stock image. You can draw the shapes in any order just as long as at the end they are in the correct order, which you'll see later on. I'm going to start by drawing the face. And, I'm going to include the ear on to this. I'm then going to draw the neck and the chest area. When I'm done, I'm gonna place it under the face shape. I'm then gonna go on to draw the base shape for the jacket. This is made up of two parts, the left side of the jacket, and the right side of the jacket. But as they'll be treated as one area, I'm going to select both shapes and by pressing Ctrl+8 I'm gonna make them into a compound path. Now a compound path is just making multiple shapes into one shape then I'm gonna place this shape below the head and above the neck chest shape. [BLANK_AUDIO] I'm then gonna draw the hand and arm. I'm gonna skip drawing the hidden finger because we can get away with this by covering this area with hair. Hair is a wonderful thing to cover any uncertainties, or anything that you're perhaps not as confident with. Then I'm gonna place the hand shape on top of the face shape. Now I'm just gonna zoom into the illustration here and draw the eye whites or the eye balls. Now let's start drawing the shapes for the hair. The first shape I'm gonna draw is the shape that follows the skull. Now this is important because we want to make sure that we have a shape that realistically keeps the shape of the head. So just draw around the shape of the head. We've got to cut across the face, as you can see. The next shape that I'm gonna place on top will follow the hair line. It's also gonna include any bangs or as they say in UK, the fringe. This hair is also gonna overlap some of the fingers, see. Then you can draw any of the volumes of hair and in this case it's the bow that's on top of the hair. And this is gonna consist of three shapes. Now because I've just drawn the shapes in any order for the hair I don't know if they're in the correct order. So what I'm gonna do is I'm gonna select all of the shapes and change that null fill to a white fill. So when you're viewing it, you can clearly see which order the shapes are. Then go into the Layers panel and play around with the order of the shapes. So when you're finished and all the shapes have a got a white fill and a black stroke, you can clearly see that it's a portrait that we're putting together. I'm just gonna draw some shapes now for the fingernails. And one of the fingernails is actually placed underneath the fringe, I'm gonna go to View > Preview to work in Outline Mode, and I'm just gonna draw the lips. And there we have our base shapes all done. Next time on Vector Portraits for Beginners, we're going to look at actually creating the line art for our portrait. I'm gonna go over creating three different styles of line art which'll all be used to create the final line art of this portrait. Thanks for listening.


