
 Lessons: 22Length: 1.4 hours
- Overview
- Transcript
4.1 Introduction
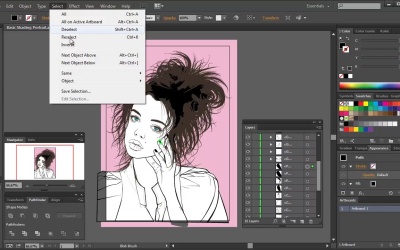
We’re starting off our next portrait project, this time we’re doing simple shading. So what we’re going to do is modify what we already have, ready to be able to add shading on top of it.
Color Guide
- Line art: #3c3029
- Skin tone face and hand base color: #f0d0b4
- Skin tone neck base color: #ebc19b
- Lips base color: #ed2a7b
- Jacket base color: #fbaf3f
- Eye ball and teeth base color: #e6e7e8
- Background color: #bac7da
1.Introduction
1.1Welcome and Course Overview02:32
2.Pre Portrait Lessons
2.1Prerequisites to the Course03:05
2.2Choosing the Right Stock03:35
2.3Skin tones and Picking Colors03:49
2.4The Three Brushes04:29
3.Create a Basic, Cartoon/Line Art Style Portrait
3.1Set Up Your Document03:29
3.2Base Shapes05:07
3.3Creating the Line Art06:34
3.4Focus on the Mouth02:43
3.5Focus on the Eyes03:24
3.6Focus on the Eyelashes and Eyebrows02:15
3.7Focus on the Hair04:12
3.8Finishing Touches03:23
4.Create a Basic, Color Portrait with Simple Shading
4.1Introduction04:46
4.2Basic Portrait Theory06:26
4.3Skin Shading: The Shadows05:27
4.4Skin Shading: The Highlights02:00
4.5Lip Shading and Eye Shading03:49
4.6Creating Shadows and Highlights for Hair04:35
4.7Make Up02:15
4.8Final Touches03:01
5.Conclusion
5.1Conclusion00:59
4.1 Introduction
Hey all, welcome back to Vector Portraits for Beginners on Tutsplus. My name is Sharon Miller and this lesson it's going to be an introduction to the basic shading on a portrait. We're going to start with modifying our basic line art and then from there it will provide a great base to add colors for later on adding shading. Open up the document that you created in the previous chapter and we're going to modify the line art. Go into the Layers panel. We're going to work from the top to the bottom and we're going to recolor the line art to a dark brown. For the hex code for this color, you can find it in the comments area. The reason that we're going to be using a dark brown is that black is a bit too dark, and it's not as natural as brown color is, so we're aiming for a more organic look. So the first layer we're working with is the Finishing Touches layer. Within it, change the fill of the moles to brown, and the eye sparkles to the same brown stroke and white fill. The next layer we're working with is the Hair layer. In that, select all of the strokes and change them to brown. This will inadvertently change the Clipping Mask shapes stroke color to brown. So drill down into the Clipping Mask shape and null the stroke color. Next go into the Eyebrow and Eyelashes layer. Those just need the strokes changed to brown. Next the Eyes layer, so change all the strokes and the fills, where required. For the iris and the pupil shapes, you'll have to drill down into the Clipping Mask shape. Keep the blue-green fill for the iris, but change the other stroke and the fill to brown. I'm gonna drill down into the Lips layer. There is a quicker way for you to select all the fills or all the strokes and change them to the same stroke color. We'll do this by selecting one shape that has got a brown fill and a null stroke. Go to Select > Same > Fill color or Stroke color. This will select similar shapes and then you can just click on the brown fill or the brown stroke. Repeat this for all the shapes within the Lips layer. We're going to repeat the same process for the main line art folder. Then select the pink background folder, and delete it, this won't be needed. Drill down into the Line Art layer and duplicate the hidden original base shapes, then create a new layer below the Line Art layer and paste the base shapes within. We're going to be using these to color the basic shapes. As we want our line art to sit on top, we'll need the colors underneath. When you change each one of the colors for each one of the shapes, remember to remove the stroke where appropriate. First of all change the lips to a bright pink. Delete the shapes for the nail and the hair. I'm gonna stick with the same sort of golden yellow that's on the stock image for the jacket. So change that fill to a golden yellow. [BLANK_AUDIO] Eyeballs aren't actually bright white. So for the eyeballs, we're gonna change that to an off-white. It's time to fill in the skin colors. Within the Swatches panel, go into the drill-down menu and go to Open Swatch Library > Skin tones. You'll have a selection of different skin tones in this window. Select the top swatch, and by clicking on the folder, you'll add the entire palette to your Swatches panel. We're going to color the hand and the face with the second lightest skin tone, and the neck with the middle tone. This is because the neck is in a subtle shadow. All of the colors that I've used in this lesson will be noted in the comments. Zoom in to the lips and use the Direct Selection tool to make sure the pink base doesn't go beyond the boundaries of the line art. It's much more obvious now that you've got such contrasting colors. I'm going to draw an off-white filled shape with the Pen tool for the teeth behind the lips. And there we have our colors are done. [BLANK_AUDIO] Next time on Vector Portraits for Beginners, we're gonna be covering some basic shading theory. We're gonna need to go through this to understand the shading shapes that we'll produce later on. Until next time, thanks for listening.


