
 Lessons: 22Length: 1.4 hours
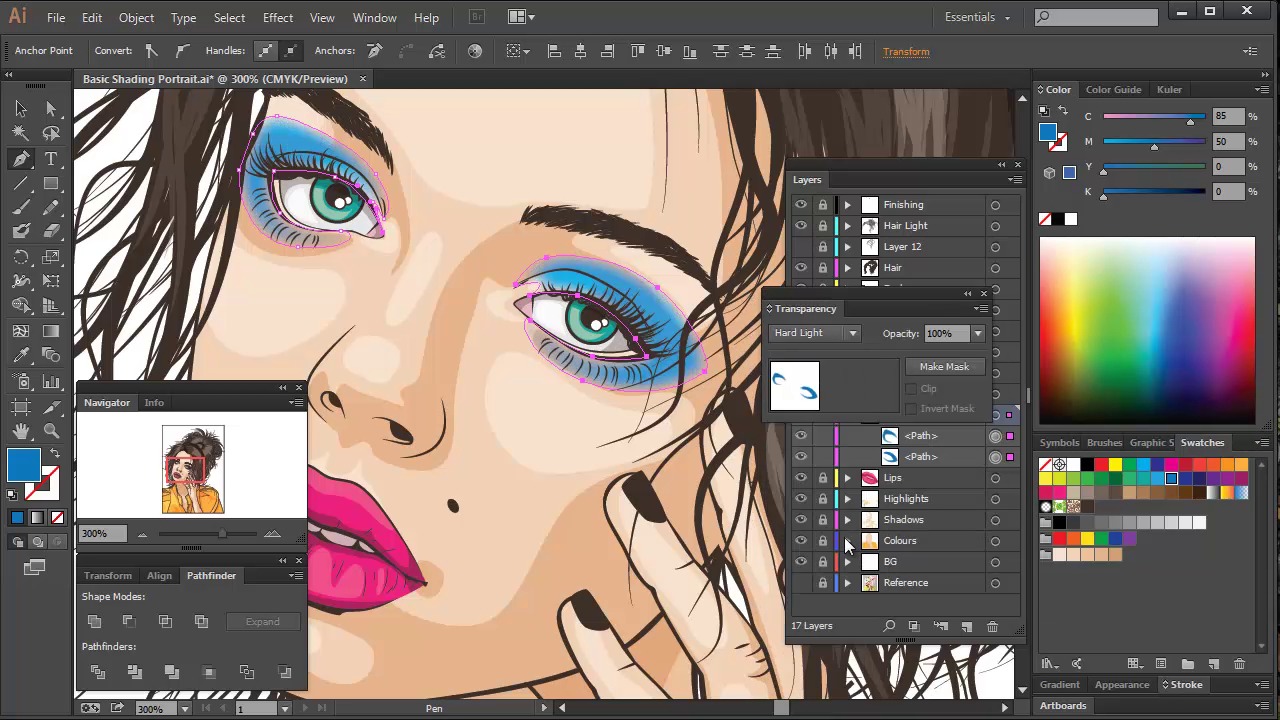

- Overview
- Transcript
4.7 Make Up
Adding make up can help kick you into playing with adding your own spin to a portrait. In this lesson we’ll look at adding eye shadow and blush to the portrait to make it more colourful.
Color Guide
- Eye shadow light: #1b75bb / Blending Mode Hard Light, Opacity 40% / Feather 4pt
- Eye shadow dark: #2a388f / Blending Mode Hard Light, Opacity 40% / Feather 4pt
- Corner of the eyes: #f8ed31 / Blending Mode Hard Light, Opacity 70% / Feather 4pt
- Cheeks: #ed2a7b / Blending Mode Hard Light, Opacity 20% / Feather 6pt
1.Introduction
1.1Welcome and Course Overview02:32
2.Pre Portrait Lessons
2.1Prerequisites to the Course03:05
2.2Choosing the Right Stock03:35
2.3Skin tones and Picking Colors03:49
2.4The Three Brushes04:29
3.Create a Basic, Cartoon/Line Art Style Portrait
3.1Set Up Your Document03:29
3.2Base Shapes05:07
3.3Creating the Line Art06:34
3.4Focus on the Mouth02:43
3.5Focus on the Eyes03:24
3.6Focus on the Eyelashes and Eyebrows02:15
3.7Focus on the Hair04:12
3.8Finishing Touches03:23
4.Create a Basic, Color Portrait with Simple Shading
4.1Introduction04:46
4.2Basic Portrait Theory06:26
4.3Skin Shading: The Shadows05:27
4.4Skin Shading: The Highlights02:00
4.5Lip Shading and Eye Shading03:49
4.6Creating Shadows and Highlights for Hair04:35
4.7Make Up02:15
4.8Final Touches03:01
5.Conclusion
5.1Conclusion00:59
4.7 Make Up
Hey all. Welcome back to Vector Portraits for Beginners on Tuts+. My name is Sharon Milne and in this lesson we're going to be adding cosmetics to our portrait. [BLANK_AUDIO] When adding cosmetics, it's pretty easy. And that easy that you can modify it as you go along. In this lesson, we'll be adding cosmetics to the eyes and to the cheeks. Create a new layer above the lips, but below the line art. First, we're going to create the eyeshadow. As these shapes are above the base shapes, we're going to need to draw around the eyes. So with the pen tool, draw around the eyes and make sure you don't overlap the eyeball. I've given these shapes a blue fill. As eye shadow does not have hard edges, we're going to apply a live effect to them. This will be feather, so go to Effect > Stylize > Feather. And I'm using a four point feather. I've then set the blending mode to Hard Light > Opacity > 70%. Now to add a darker shade on the lid. So as before, draw the relevant shape around the eyelid. Then apply feather and set the blend in mode. Then add some color to the corners of the eyes. I've used a golden yellow, as this is very similar to the color in the jacket. Let's then add some pink blush to the cheeks. This will need to be subtle. You don't want it to end up looking like a clown. So for this, to make the shape softer, I'm going to increase the feather. I'm going to lower the opacity further. Then to keep the edges clean, within the boundary of the base shape, I've added these two shapes to the clipping mask for the shading. To finish it off, I've lowered the opacity for all of the shapes a little bit further, so the look is a lot more subtle. And then you're done. [BLANK_AUDIO] Next time on Vector Portraits for Beginners, we're gonna be doing the finishing touches to this portrait. Thanks for listening.


