- Overview
- Transcript
3.1 Set Up Your Document
In this lesson you will learn how to set up your new document in Adobe Illustrator, ready to begin your line art style portrait from a stock image. You will also learn how to add your custom-made brushes to a new document, ready to be used in future lessons in this course.
1.Introduction1 lesson, 02:32
1.1Welcome and Course Overview02:32
2.Pre Portrait Lessons4 lessons, 14:58
2.1Prerequisites to the Course03:05
2.2Choosing the Right Stock03:35
2.3Skin tones and Picking Colors03:49
2.4The Three Brushes04:29
3.Create a Basic, Cartoon/Line Art Style Portrait8 lessons, 31:07
3.1Set Up Your Document03:29
3.2Base Shapes05:07
3.3Creating the Line Art06:34
3.4Focus on the Mouth02:43
3.5Focus on the Eyes03:24
3.6Focus on the Eyelashes and Eyebrows02:15
3.7Focus on the Hair04:12
3.8Finishing Touches03:23
4.Create a Basic, Color Portrait with Simple Shading8 lessons, 32:19
4.1Introduction04:46
4.2Basic Portrait Theory06:26
4.3Skin Shading: The Shadows05:27
4.4Skin Shading: The Highlights02:00
4.5Lip Shading and Eye Shading03:49
4.6Creating Shadows and Highlights for Hair04:35
4.7Make Up02:15
4.8Final Touches03:01
5.Conclusion1 lesson, 00:59
5.1Conclusion00:59
3.1 Set Up Your Document
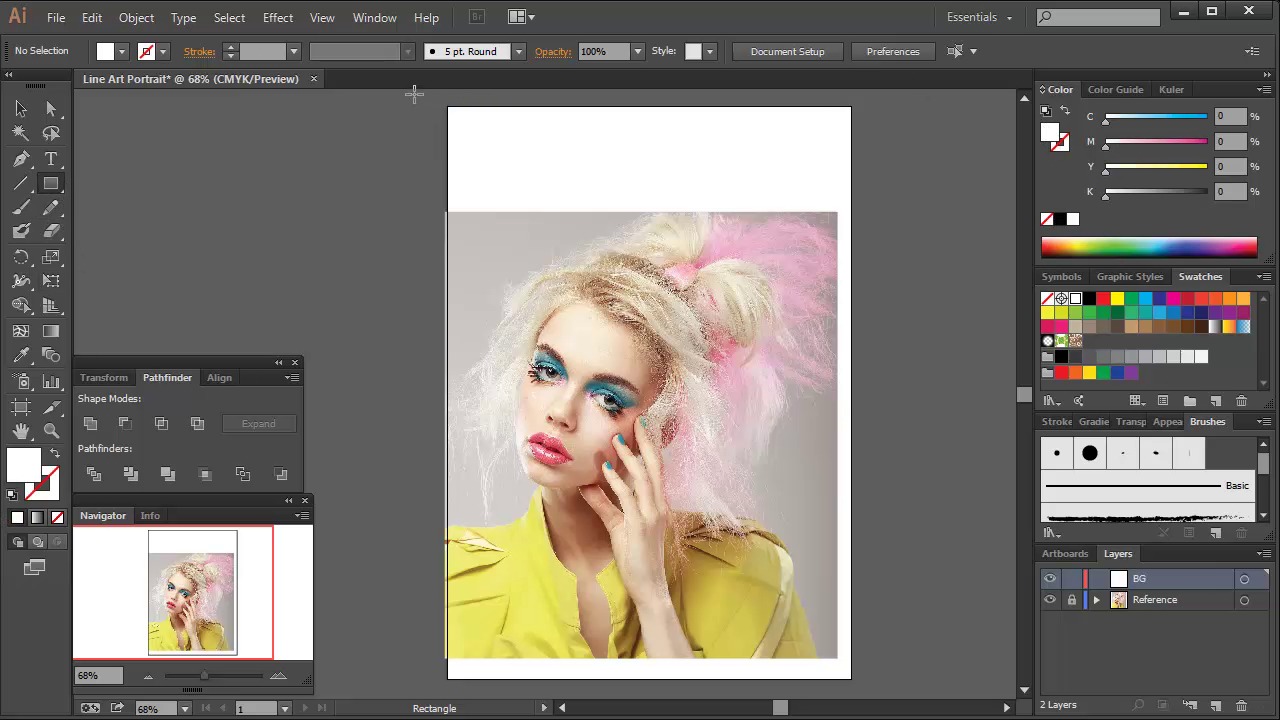
Hi all. Welcome back to Vector Portraits for Beginners on tuts+. My name is Sharon Millin, and in this lesson we're going to be looking at setting up your document ready to create a line art based portrait in Adobe Illustrator. First thing's first. Open Adobe illustrator. We're going to go to File > New. And in the pop-up screen, just name the file something like line art portrait. I'm going to set the profile as Print. This means that the color palette that we're going to be using is CMYK. For the document size, we're going to go for A4. And the orientation should be set to Portrait. Once you're happy with this, click on OK. As we're going to be using a reference image for this tutorial, we're going to want to include our stock image into the document. To do this, go to File > Place, and locate your stock image. Once you've located it, place it in the center of your art board. Often the stock image will be either too large or too small for your art board. So we just want to increase the dimensions of this. Use the Free Transform tool and grab one of the corners of the image. Hold down Shift+Alt and this will increase the size evenly from the center of the image. Once you're happy with the position of the stock image, go into the Layers panel and double-click on the layer and rename it Reference or something that you can remember. Once you've done that, click on the lock symbol. We're going to create a new layer now, and we're just gonna name that BG, or background. And within that, I'm going to draw a white fill rectangle, and set the opacity to 50%. This is so I can mute the colors of the overall stock image whenever I want, just by simply hiding and unhiding this layer. But let's lock it for now. Then I want you to create a new layer again. And let's rename that one Line Art. Guess what's gonna be in there? We've nearly got everything sorted now. But let's bring in those all-important brushes that were created earlier on. In the Brushes panel, click into the drill down menu. Go into Open Brush Library > User Defined > The Brushes. You'll get a little pop up with the three brushes included in there. What we're going to do first, though, is remove all the default brushes that are in your document at the moment. So back in the Brushes panel, click on the drop down menu and select All Unused. This will select all of your brushes. Then click on the Trashcan, or Delete, at the bottom of the panel. This will delete all of the brushes that have not been used in the document. So that's all of them. And then with your three brushes click on them and this will automatically add them to the Brushes panel. So there we have it, we have our documents nicely prepared, ready to start creating line art. Next time, on Vector Portraits for Beginners, we're going to be looking at Bay Shapes. What are Bay Shapes, and what are they used for? And we'll be drawing the Bay Shapes for this specific illustration. Until next time, thanks for listening.


