- Overview
- Transcript
3.4 Focus on the Mouth
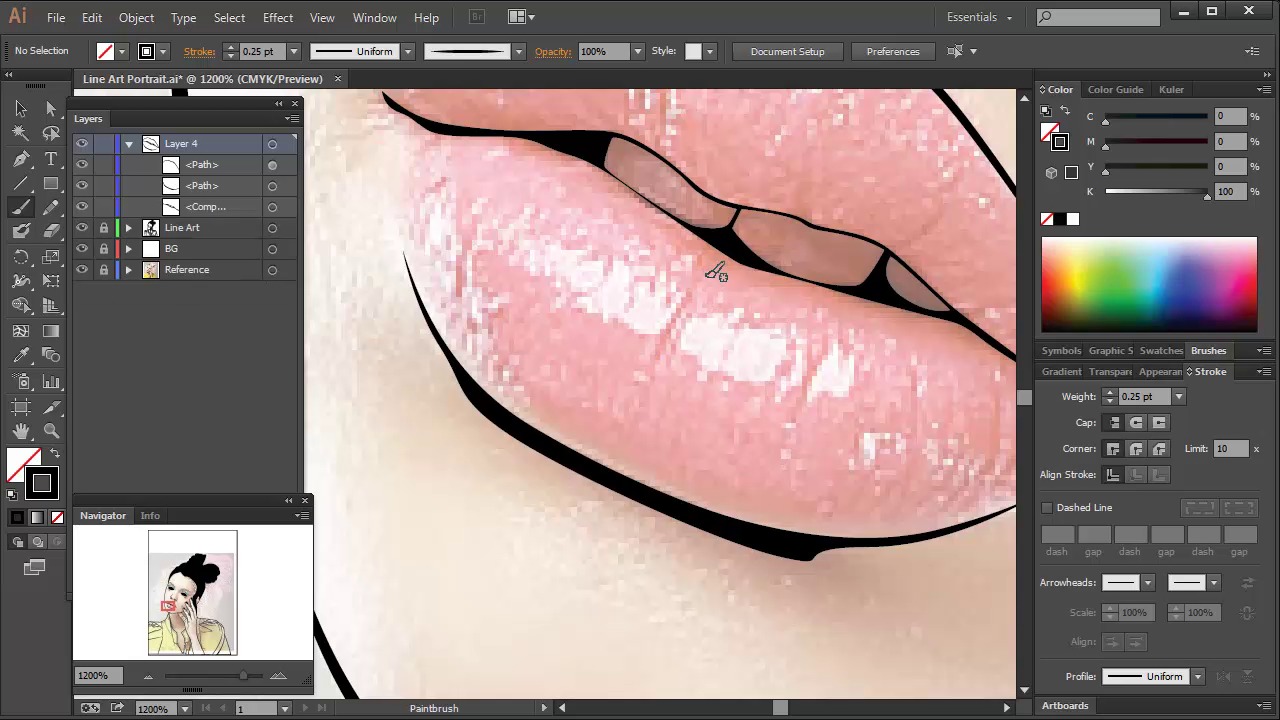
I’ve specifically chosen a stock image with parted lips, so you can see how to do the line art not only for the lips, but also showing teeth. So let’s jump in and see how to create the line art for the teeth.
1.Introduction1 lesson, 02:32
1.1Welcome and Course Overview02:32
2.Pre Portrait Lessons4 lessons, 14:58
2.1Prerequisites to the Course03:05
2.2Choosing the Right Stock03:35
2.3Skin tones and Picking Colors03:49
2.4The Three Brushes04:29
3.Create a Basic, Cartoon/Line Art Style Portrait8 lessons, 31:07
3.1Set Up Your Document03:29
3.2Base Shapes05:07
3.3Creating the Line Art06:34
3.4Focus on the Mouth02:43
3.5Focus on the Eyes03:24
3.6Focus on the Eyelashes and Eyebrows02:15
3.7Focus on the Hair04:12
3.8Finishing Touches03:23
4.Create a Basic, Color Portrait with Simple Shading8 lessons, 32:19
4.1Introduction04:46
4.2Basic Portrait Theory06:26
4.3Skin Shading: The Shadows05:27
4.4Skin Shading: The Highlights02:00
4.5Lip Shading and Eye Shading03:49
4.6Creating Shadows and Highlights for Hair04:35
4.7Make Up02:15
4.8Final Touches03:01
5.Conclusion1 lesson, 00:59
5.1Conclusion00:59
3.4 Focus on the Mouth
Hey all. Welcome back to Vector Portraits for Beginners on tuts+. My name is Sharon Millin and in this lesson we're gonna look at creating the line art for the mouth. We're gonna start by hiding the base shapes. These were drawn mainly to illustrate that there are areas of where there's different color. We'll be using them later on in another tutorial. So for now, just keep them hidden. And we'll start working on the lips. I'm going to be using the Pen tool, and I'm going start by drawing the parting of the mouth. I've specifically chosen this stock image so we can show you how to draw the teeth in. If you don't feel confident about drawing shapes for the teeth, you can always skip this process and leave it a solid black. Once you've drawn the teeth, select them and create a Compound Path. Then, with the shape of the parting of the lips use Path Finder Minus Front. We're next gonna draw a shape at the bottom of the lip. This is gonna show a subtle shadow. Now although you can see both lips, let's have a bit more definition on the top lip. So I'm gonna draw a slim top line on the top of the lip. We want to create this little texture on the lips. These are nice plump lips. So they'll have small creases on them. So get the Paint Brush tool and draw fine lines across the top and bottom lip. Use the Original Tapered Brush. And I'm gonna set the line to about 0.15 stroke weight. [BLANK_AUDIO] Use the Original Tapered Brush for the creases and the Triangle Tapered Brush for the creases which touch the main line out of the lips. [BLANK_AUDIO] I'm just going to modify the stroke weight of the creases to make the texture more subtle. Fine detailing such as this should always use a smaller stroke weight. By going to View > Hide > Edges, you can keep selected your lines and modify the stroke weight without the points obstructing your view. I'm gonna add a stronger line on the bottom of the top lip to create a subtle shadow that's gonna go over the teeth. Once you've drawn it, you can modify it by using the Direct Selection tool and modifying the nodes that are along the line. And there the lips are complete. Next time on Vector Portraits for Beginners, we're going to look at creating the line art for the eyes. Thanks for listening.


