- Overview
- Transcript
3.5 Focus on the Eyes
In this lesson we’ll look at creating the line art for the eyeball, waterline, iris and pupil.
1.Introduction1 lesson, 02:32
1.1Welcome and Course Overview02:32
2.Pre Portrait Lessons4 lessons, 14:58
2.1Prerequisites to the Course03:05
2.2Choosing the Right Stock03:35
2.3Skin tones and Picking Colors03:49
2.4The Three Brushes04:29
3.Create a Basic, Cartoon/Line Art Style Portrait8 lessons, 31:07
3.1Set Up Your Document03:29
3.2Base Shapes05:07
3.3Creating the Line Art06:34
3.4Focus on the Mouth02:43
3.5Focus on the Eyes03:24
3.6Focus on the Eyelashes and Eyebrows02:15
3.7Focus on the Hair04:12
3.8Finishing Touches03:23
4.Create a Basic, Color Portrait with Simple Shading8 lessons, 32:19
4.1Introduction04:46
4.2Basic Portrait Theory06:26
4.3Skin Shading: The Shadows05:27
4.4Skin Shading: The Highlights02:00
4.5Lip Shading and Eye Shading03:49
4.6Creating Shadows and Highlights for Hair04:35
4.7Make Up02:15
4.8Final Touches03:01
5.Conclusion1 lesson, 00:59
5.1Conclusion00:59
3.5 Focus on the Eyes
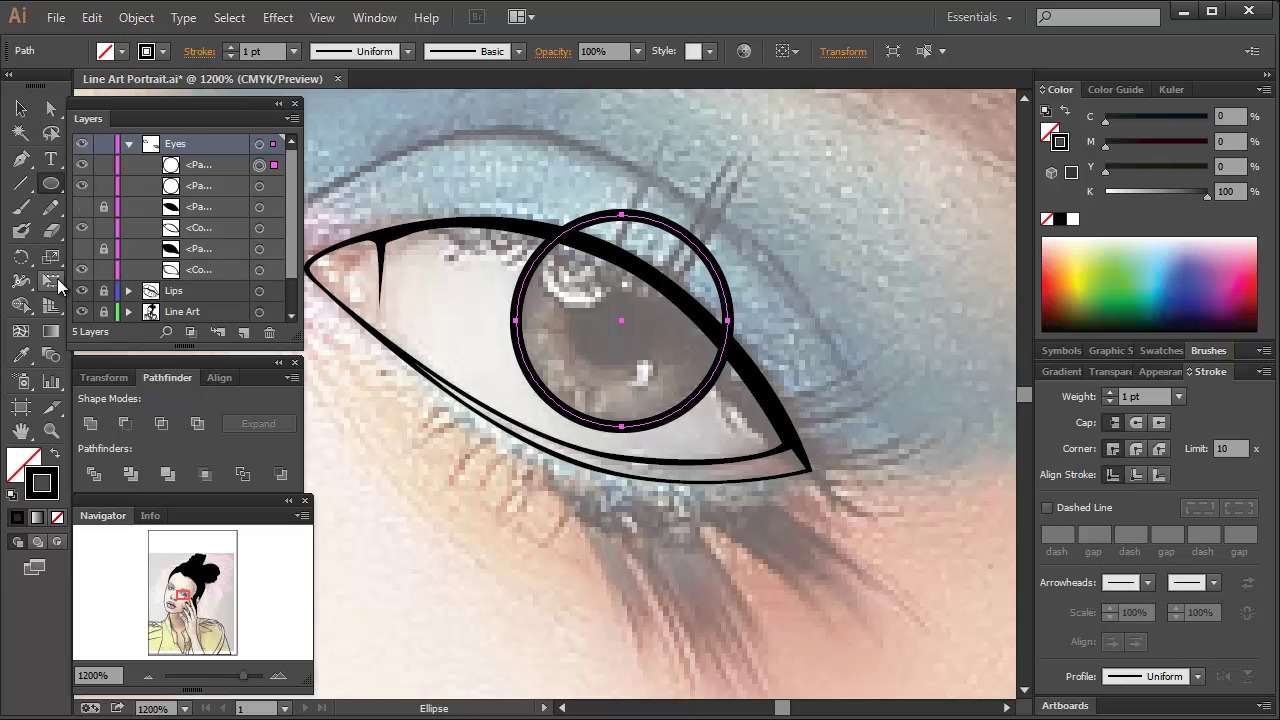
Hey all, welcome back to Vector Portraits for Beginners on tuts+, my name is Sharon Millin, and in this lesson, we're going to look at creating the line art for the eye. First of all, go back into your base shapes and duplicate the shapes for the eyes, so copy them, hide them, create a new layer and then paste in front. We're gonna go back into Outline Mode so we can see the stock image underneath. Now whatever we do to one eye we're gonna repeat the process for the second eye. So once you've finished one section, duplicate your shapes where needed or duplicate the process. Therefore, as you're going along your eyes should look the same. First use the Pen Tool to cut out the inside of the water line where the lower lid is. Then draw a shape for the eyeball and the corner of the eye. Remember to allow a little tapered line to show the boundary between the corner of the eye and the eyeball. I want you to duplicate the shape as we gonna use it further down the line. Then select the original shape for the eye ball and the water line. And I want you to use Path Finder Minus Front and remove them from the base shape for the eye ball. This will create the Chunky Line Art Style for the eye. Then repeat this process for the other eye. Let's move on to create an iris and the pupil. This is pretty simple, we're going to be using the Ellipse Tool. Remember to hold Shift+Alt to create an even circle, drag outwards. I'm gonna use a black stroked circle to create the iris, then use a black filled null stroke circle for the pupil. Group them together, duplicate it so that then you've got exactly the same pupil and iris for the other eye. Remember that duplicate of the eyeball that you created just a couple of moments ago? We're going to be using those to create Clipping Masks. As you may have noticed the iris and the pupil will be overlapping into the waterline or even above on the upper lid. So use the shape to create a Clipping Mask. Duplicate the same process for the other eye. We're going to be using our tapered brushes again. And using the Pen Tool, we'll create creases for the eyes. [BLANK_AUDIO] I'm gonna create a cat eye eyeliner look around the eyes. So create a new layer, then put the background layer with the white filled shape that's at 50% opacity on top of your previous line art. This is so you can clearly see your line art underneath, but you can still be able to see the line art you're about to create on top. I'm going to draw a sort of wishbone like shape with pointed corners around the eyes. Repeat the process for the other eye. Once you remove the background layer and put it back to where it originally came from, you may wish to adjust your lines. Use a Direct Selection Tool for this and that's your eyes done. Next time on Vector Portraits for Beginners, we're gonna look at adding the eyelashes and the eyebrows. Don't worry. This isn't as complex as you think it is. Thanks for listening. [BLANK_AUDIO]


