
 Lessons: 32Length: 4.1 hours
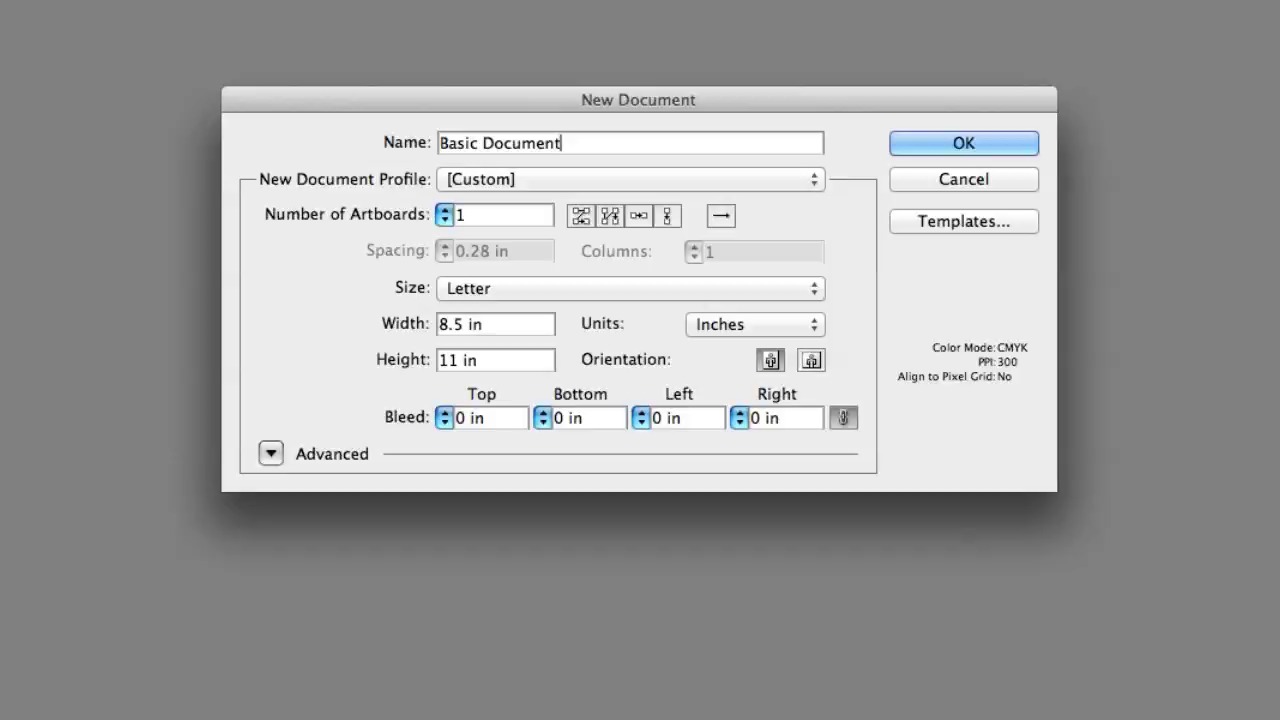
- Overview
- Transcript
2.2 Your First Document
In this lesson we’re going to learn how to set up an Adobe Illustrator document.
1.Introduction
1.1Introduction01:11
1.2Getting Started06:56
2.Get to Know Illustrator
2.1Illustrator Interface04:52
2.2Your First Document05:02
2.3Basic Tools11:27
2.4Creating Objects09:26
2.5The Pen Tool11:54
2.6Selection Tools06:41
2.7Settings04:43
2.8End of Week One00:26
3.Object Oriented Design
3.1Object-Oriented Design04:02
3.2Grouping11:34
3.3Layerless Thinking11:51
3.4Locking & Hiding05:21
3.5Saving Files09:02
3.6End of Week Two00:24
4.Powerful Palettes
4.1The Align Palette11:24
4.2Pathfinder Palette11:38
4.3The Type Palette11:05
4.4The Stroke Palette16:09
4.5Symbols Palette09:35
4.6The Magic Wand04:23
4.7Art Boards06:14
5.Effects and More
5.1Gradients12:53
5.2Using Masks06:05
5.3Vector Effects13:53
5.43D Tools09:38
5.5Gradient Mesh and Shading09:59
5.6Tracing and Live Paint09:24
5.7End of Week Four00:35
6.Final Project
6.1Your Final Project05:23
7.Conclusion
7.1Conclusion00:35
2.2 Your First Document
Now we're gonna learn how to set up a document. We're used to, now, the interface, or maybe not used to but certainly we've seen it at least once before, and we've talked about vector and raster graphics. So now let's set up a document and we can start using Adobe Illustrator. Now, the most traditional way of course in all of programs like this is go to File and then New. You can see there are some other options there, we're not going to worry about those. Now, if you're on Windows, Ctrl-N will get you here and if you're on Mac, Command-N will do this for you. Now you're seeing a lot of stuff here, and this advanced stuff we're not even gonna worry about, for a second. Right away, you're asked to make some decisions that maybe you don't know what they are yet. We're not gonna worry so much about a lot of the options on this screen, except for saying your number of artboards should be one. We're only gonna have one surface or one document that we're working on. Your document profile, you can choose from some standard sizes here. Maybe if I'm going to do something for the web, you can see the size picker lets me do 800/600, 1024, not exactly up to date sizes, but certainly sizes. Or if you're going to do something in print, and you can see we have a letter sized document, the legal tabloid, A4, so different paper sizes. We're also asked here to choose what units we're going to be creating in. Now, units can be points, pixels, whatever you want. You can see Picas is even a used unit of measurement here. But for our European friends, we have the metric system. We have inches. I generally use inches if I'm quickly just jumping into Illustrator to try something out. You can see a letter is eight and a half, 11. So that's a normal one pieced sheet of paper. And right here we can name our document. Now, if you forget to name it here, or you leave it untitled, you have the opportunity to change that afterwards. So, you can just hit OK right away, or you can start naming your document. We're just gonna call this basic document. You type right in there. Now if you really want you can come and change the size and let's do that too just so we can get a feel for it. We're going to do a ten inch wide by six inch high, so this going to be wider than it is taller, right? And then we have these bleed settings. Now, bleed is a print setting that basically says, how much of your document is gonna hang off the edge when it gets printed? We don't really ever want to mess with that, especially getting out of the gate. But if you do, if you are asked by a publisher or a designer or somebody that needs a file, hey can that have a one inch bleed for example, you can change this number. And it will kind of change your margins, but we want to leave these. Just delete that. And type zero. And you can see when I click in somewhere else, it kind of populates. Now, we will just peek at the Advanced, cuz it has some kind of important stuff. The most important, and this is Illustrator CS5 I'm using. Is CMYK and RGB. Now, this seems like a small thing, but it kind of affects a lot, like by default how you would pick colors from the color palate and it affects what kind of document you're going to be making. If you're going to make something for printing you really want CMYK. If you're gonna make something for the Internet or a computer screen, or it's gonna be on a mobile device, that's RGB all the way. I tend to make a lot of things in RGB. I just find that it is better for most of the stuff I do. So I have it set to RGB. You can see it to CMYK, or RGB. I'd suggest matching me here so you'll have some idea of what's going on, and here our final option is Align New Objects to Pixel Grid. We're just gonna kinda stay away from that, for more advanced web design. We can tuck that away and say let's make a basic document. Now, with all that being said, work up the courage. Come over here and hit OK, because we're about to get to lesson number four.

