
 Lessons: 18Length: 1.3 hours
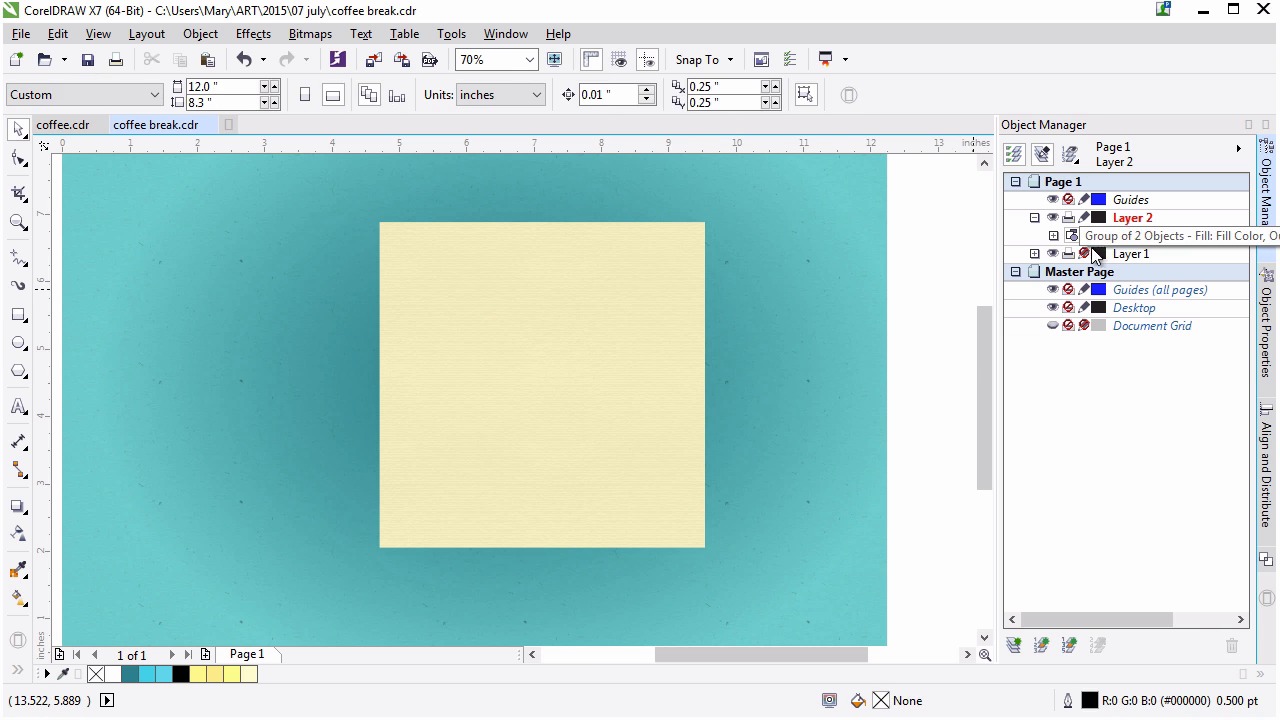
- Overview
- Transcript
2.2 Rendering the Napkins
This lesson gives a brief exploration of choosing the right texture for the right object as well as showing how a quick drop shadow and change in blending modes can speed up the design process.
1.Introduction
1.1Introduction00:59
2.The Background and Napkins
2.1Creating the Background03:14
2.2Rendering the Napkins03:28
3.The Coffee Cup
3.1Rendering the Cup Saucer04:30
3.2Creating a Cup05:43
3.3Creating Additional Elements for the Cup04:43
3.4Filling the Coffee Cup04:32
3.5Finishing Up the Coffee Cup04:26
4.The Sprinkled Donut
4.1Creating a Basic Donut05:14
4.2Creating the Frosting04:47
4.3Rendering the Frosting04:20
4.4Finishing the Frosting03:58
4.5Creating the Sprinkles06:54
5.The Office Supplies
5.1The Pen06:59
5.2The Eraser04:57
5.3The Thumbtacks04:55
6.Conclusion
6.1Finishing Touches04:11
6.2Conclusion01:27
2.2 Rendering the Napkins
Welcome back to Advanced Techniques in Corel Draw. I'm Mary Winkler for tuts+. In this lesson we'll create our first objects within our composition, a couple of napkins. Like the background, we're going to use a prepared texture but we'll kick things up a bit by adding some depth to our image and establishing our light source with the drop shadow tool. In your working document, create a new layer in the object manager docker. This should be above our background layer. Use the rectangle tool to draw a simple square within our composition. This will be one of our napkins. Place it towards the center of the document for now. Taking a look at my original illustration, I've zoomed in on the texture used. As you can see, I opted for something that is paper-like with a lot of tooth to it. That is to say, this texture looks like a paper towel or a watercolor paper. It looks like it has a porous surface. Since it's a bitmap, you can always have the option of scanning in an actual paper towel or porous piece of paper and placing it within your image. I think it's important to know when to speed up your process and when to take the time to customize something. Using resources available to you leads to efficiently creative design. Back to our working document. Apply a paper like bitmap texture in the fill object properties stacker. Note that my square does not have an outline. No objects will have an outline path in this course. I wanna keep this illustration from looking cartoony. Like the background, I've chosen my texture from Corel's Content Exchange after searching for the term paper under the Texture section. Let your texture load and duplicate your square with Ctrl+D. Switch the filter Uniform fill and choose a light, buttery yellow as the square's color. Under transparency, choose multiply as the blending mode. Select both squares, and in the align and distribute docker, align the two objects to the left and the bottom edge of the first square. Group the two objects together by hitting control G. Using the drop shadow tool, drag the shadow outward from the center of the object. Lower the feathering rate in the property docker to 8 or so, and adjust the transparency to 16 or something that looks good to you. Adjust the shadow as you see fit. Duplicate the napkin group and click it twice with the Pick Tool to rotate it slightly to the right side. Deselect. And use the pick tool to move the copied napkin to the placement you want. I want the napkins to be centered, since it's too static for our design. Give your new napkin a matching drop shadow so they no longer blend into each other. I decided I wanted my napkins to be a bit lighter and wider and less yellow in color. This is an easy fix. Select each napkin group, and with the drop shadow tool, hit clear drop shadow in the property bar. How annoying, we just made those. No worries, select each of your uniformed filled squares and change their color in the object properties docker. Then give one of your napkins a drop shadow. Adjust it's feathering and transparency as we did before. Mine is a bit bolder this time around. What a perfect shadow. Select the object group without a drop shadow. And with the drop shadow tool, hit copy, shadow, properties in the property bar. Then with the black arrow, select the drop shadow, not the object you want to copy. Bam. Identical shadows made easy. It takes such little time to quickly and efficiently change colors, shadows, gradients, whatever. Our napkins are ready to have stuff placed on top of them. Thank you so much for watching the full seminar on applying textures, shadows and blending modes to objects in Corel Draw. Now that we have our background in napkins done, let's move on to our next chapter of our course. Specifically, we're gonna use the Mesh tool to render a coffee cup saucer.


