
 Lessons: 18Length: 1.3 hours
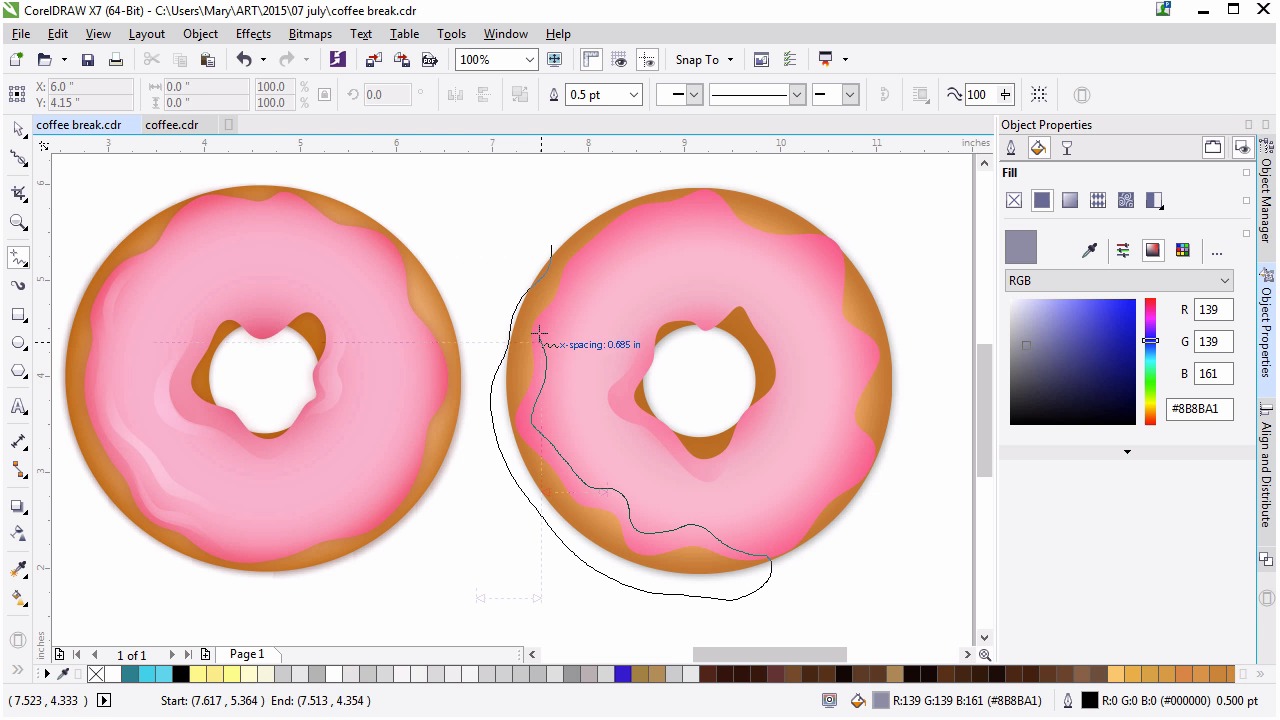
- Overview
- Transcript
4.4 Finishing the Frosting
In this lesson we’ll use drawing tools, blending modes, and fountain fills to further render the frosting so it has more depth.
1.Introduction
1.1Introduction00:59
2.The Background and Napkins
2.1Creating the Background03:14
2.2Rendering the Napkins03:28
3.The Coffee Cup
3.1Rendering the Cup Saucer04:30
3.2Creating a Cup05:43
3.3Creating Additional Elements for the Cup04:43
3.4Filling the Coffee Cup04:32
3.5Finishing Up the Coffee Cup04:26
4.The Sprinkled Donut
4.1Creating a Basic Donut05:14
4.2Creating the Frosting04:47
4.3Rendering the Frosting04:20
4.4Finishing the Frosting03:58
4.5Creating the Sprinkles06:54
5.The Office Supplies
5.1The Pen06:59
5.2The Eraser04:57
5.3The Thumbtacks04:55
6.Conclusion
6.1Finishing Touches04:11
6.2Conclusion01:27
4.4 Finishing the Frosting
Welcome back to Advanced Techniques in CorelDraw. I'm Mary Winkler for tuts+. In this lesson, we'll continue rendering your frosting with the help of other objects, fountain fills, blending modes, and various levels of transparency. Picking up where we left off from the last lesson, I've unhid some of my fountain filled shapes from my original donut design. As you can see, we have a mix of shadow and highlight shapes that help define the frosting edges, curves, and more. We're going to create shapes similar to these in this lesson with help from drawing and shaping tools. Let's start with a shadow shape. Draw a shape that overlaps a portion of the center of the frosting with the freehand tool. Make sure it's a closed curve. Notice how close to the inner edge of the frosting the shape is drawn and how it follows the contour of the frosting. Zooming out, I'm going to reference the blend we created earlier. I'll be using it quite a bit. Grab the darker color and set it as your new shape's fill color. Grab the transparency tool, and use it like you would the interactive fill tool, dragging up the fountain fill within your shape and adjusting the transparency settings in the property bar. I've chosen to use an elliptical fountain fill for the transparency. In the shaping docker, intersect the two objects. I have both leave original source object and leave original target object selected. In case I want to reuse something I've drawn for intersecting later. You can deselect leave original source object if you'd rather speed up your process. Delete extraneous shapes. Let's explore an alternate transparent fountain filled method. Hidden under the property bar with the transparency tool selected and apply fountain filled to the curb. Select the right color, make sure the color is the same as the left and set it's transparency to 100%, effectively rendering it transparent. Now you can use the interactive fill tool to adjust the fountain fill and change how this shadow shape interacts with the rest of the frosting. Let's repeat this technique for a shadow shape on the outer edge of the frosting. Once again, use the freehand tool to draw a shape that follows the contour of the lower left side of the frosting object. Intersect it with the original shape. Delete any extraneous shapes, and use the attribute eyedropper to copy the fountain fill for the first shadow shape under this new one. For my next shape, I'm going to change my freehand tools options. Double-click the toolbox, select Freehand/Besier tool and set smoothing to 55. If you're not using your graphic tablet or stylus I suggest keeping the smoothing higher. I want more control over my shapes, however, especially smaller shapes. Draw a small wiggly shape that once again follows the contour of the icing. Use the attributes eye dropper to copy the other shadow shapes fountain fill. This time, however, change the right color to a light pink. This is one of our highlight shapes. Consider the shadow and highlight shapes to the crests, high points, and troughs, low points of a wave. Wavy, wavy frosting shapes. Under transparency set the blending mode to Screen and the transparency to 40 or so. Continue creating thin, wiggly shapes drawn with the tool of your choice in order to create shadow and highlight shapes within the icing. I've sped up my process here, not only to speed up the video itself, but also drawing multiple shapes at once, and changing their attributes in one go, highly defining each shape as a highlight or shadow. How many shadow and highlight shapes you create is up to you. Remember that we will be creating certain sprinkles in the next lesson. So you don't wanna overwhelm the design with too many wavy shapes within the frosting object. Additionally, you want viewers to be able to see that the frosting has a sort of texture, now that you've spent the time to render it further. Balance it as you see fit. Once that is better your design select all of your shadow and highlight shapes in the object manager and glue them together by hitting control g. Keeping your object manager organized goes a long way into making it much easier to edit and add componet slider. Thank you so much for watching this lesson on creating shadow and highlight shapes in CorelDraw. In our next lesson we'll finish up this chapter and create a custom artistic media brush in order to add sprinkles to our donut design.


