
 Lessons: 18Length: 1.3 hours
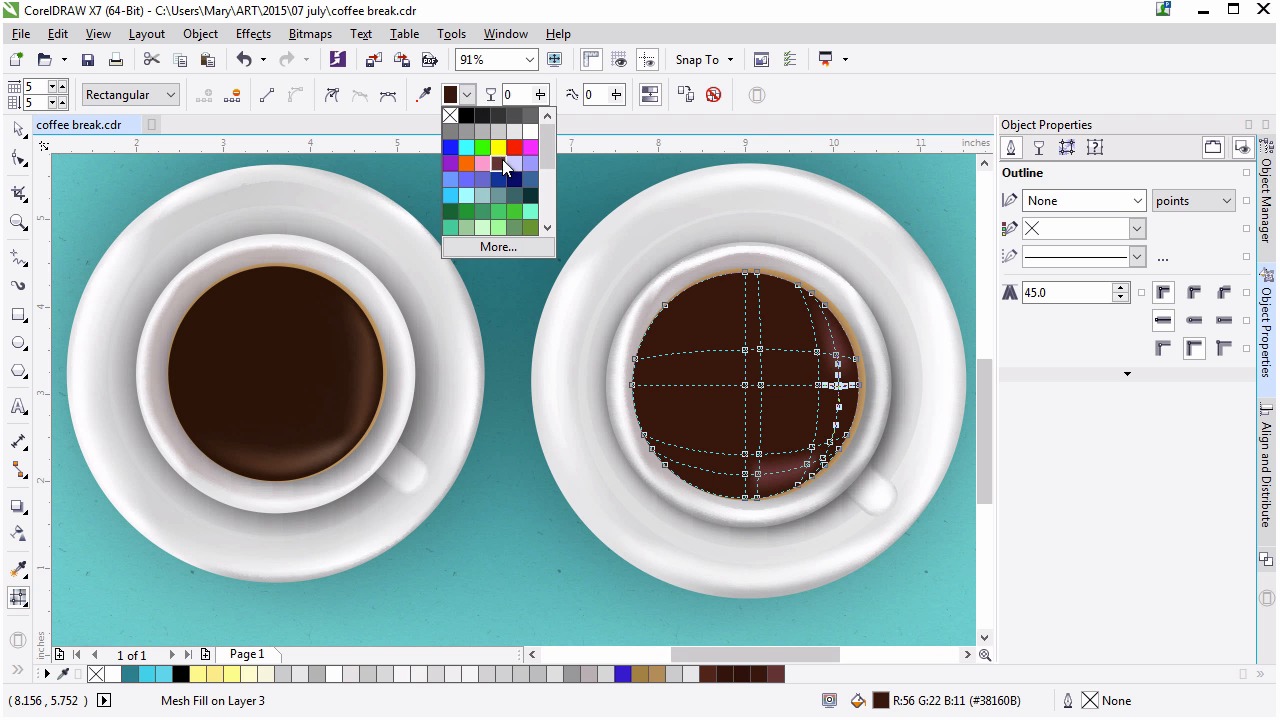
- Overview
- Transcript
3.4 Filling the Coffee Cup
Now we’ll render the liquid within the cup with gradient mesh and fountain fill gradients.
1.Introduction
1.1Introduction00:59
2.The Background and Napkins
2.1Creating the Background03:14
2.2Rendering the Napkins03:28
3.The Coffee Cup
3.1Rendering the Cup Saucer04:30
3.2Creating a Cup05:43
3.3Creating Additional Elements for the Cup04:43
3.4Filling the Coffee Cup04:32
3.5Finishing Up the Coffee Cup04:26
4.The Sprinkled Donut
4.1Creating a Basic Donut05:14
4.2Creating the Frosting04:47
4.3Rendering the Frosting04:20
4.4Finishing the Frosting03:58
4.5Creating the Sprinkles06:54
5.The Office Supplies
5.1The Pen06:59
5.2The Eraser04:57
5.3The Thumbtacks04:55
6.Conclusion
6.1Finishing Touches04:11
6.2Conclusion01:27
3.4 Filling the Coffee Cup
Welcome back to Advanced Techniques in Corel Draw. I'm Mary Winkler for tuts+. In this lesson we'll continue filling up our coffee cups with circles and mesh shapes. It's amazing how simple shapes can transform an image into a completed illustration. Let's get to it. Unhide your coffee components in the object manager. As you can see I have a fair few objects to show against so we can get going on this lesson. Make sure you don't mess up the order of your objects. It should go, saucer components, handle, cup, and cup contents. Group together components, unlike objects, with Control G, in order to keep your object manager organized. We created some cup contents in the previous lesson, but now we want to continue working on filling up the mug with freshly brewed dark coffee. I'll unhide my original mesh object to show you what we'll be creating, with some additions in this lesson. Draw a circle with the ellipse tool as we've done so many times at this point. It should be nearly as large as the light brown circle below it. You can scale it and reposition your circle with the pick tool. You want a small sliver of the tan circle to be showing beneath the top circle around the outer edge of the right side of the newly drawn circle. It may take a small bit of trial and error to place the circle correctly. You can, of course, always readjust your object placement to where you want it to be within your illustration. Once you like the placement of your circle, head on over to the object properties docker, our old and faithful friend and eliminate that pesky outline if it's showing up for you. I keep mine as a default so you can easily see the placement of the boundaries of nearly drawn objects. Select the fill color to a rich, dark brown. We're going to go darker than this in the mesh, but I like this as a fresh starting point. Here's my original mesh, it's fairly simple. There's a half circle of nodes on the right side that have a lighter brown applied to each. We're going to add some additional nodes to ours, but this is the basis of the coffee design, much easier than the cup and saucer for sure. Using the mesh tool double click on the bottom right side and lower right corner of the mesh to add three nodes to the design. As usual, additional nodes pop up in each new cross section within the mesh. Select five of the lower right mesh nodes, not those on the outer edge, we're only working on the inside of the mesh in this lesson. Now apply a light brown to them. You can check out the default color palate, or hit more to bring up the color picker. Initially, I chose a lighter brown that had a reddish tone. This isn't the tone I want for this illustration however. I want my browns to be on the tan side, rather than reddish. It's an easy fix. If you choose a brown you didn't like, select your notes again and bring up the color picker from the property bar. Slide the bar upward from red to orange. The tone of the bottom of the rectangles and the upper right is the new one you're choosing. Check out your new color, or try out a couple of other hues in order to get it just right. Deselect your mesh in order to see it clearly when deciding on the colors used within it. Make sure to highlight colors, the light browns, for more of a half circle within the mesh object and connect in the lower right corner. You can use the eyedropper in the property bar to add a color to a node that's already within your document. Select the node in question, select the eye dropper, and then select the node whose color you want to copy. Select some of the edge nodes on the left side of the object and apply much darker brown to them than the one currently in use. I want the rich, dark coffee we're creating to be more dramatic than the example on the left. Adjust the nodes of the coffee body next to the highlight nodes by moving them closer towards the outer edge. I'm doing this in order to create a thinner highlight. Select the upper and central nodes, and use the eye dropper from the property bar once again in order to apply the dark brown chosen earlier. Be careful to not miss nodes when selecting groups of them, and always hold down shift if you're trying to select more than one node. Select the pick tool from the toolbox to quickly deselect the mesh and admire your handy work. Look how dark and full bodied this cup of coffee looks compared to my first example. You can of course go with a lighter brew if you wish. Look at the mesh of the original piece and the mesh newly created. You can see that while they look quite different, as a completed illustration, their meshes are quite a bit alike. Color choice can make or break a rendered design. Adjust your mesh as you see fit and make sure to continue saving your work often. Thank you so much for joining me in this lesson on creating a coffee portion of our coffee cup. In the next lesson, we'll finish it off with some quick techniques to make your coffee shine and look a bit more realistic still.


