
 Lessons: 18Length: 1.3 hours
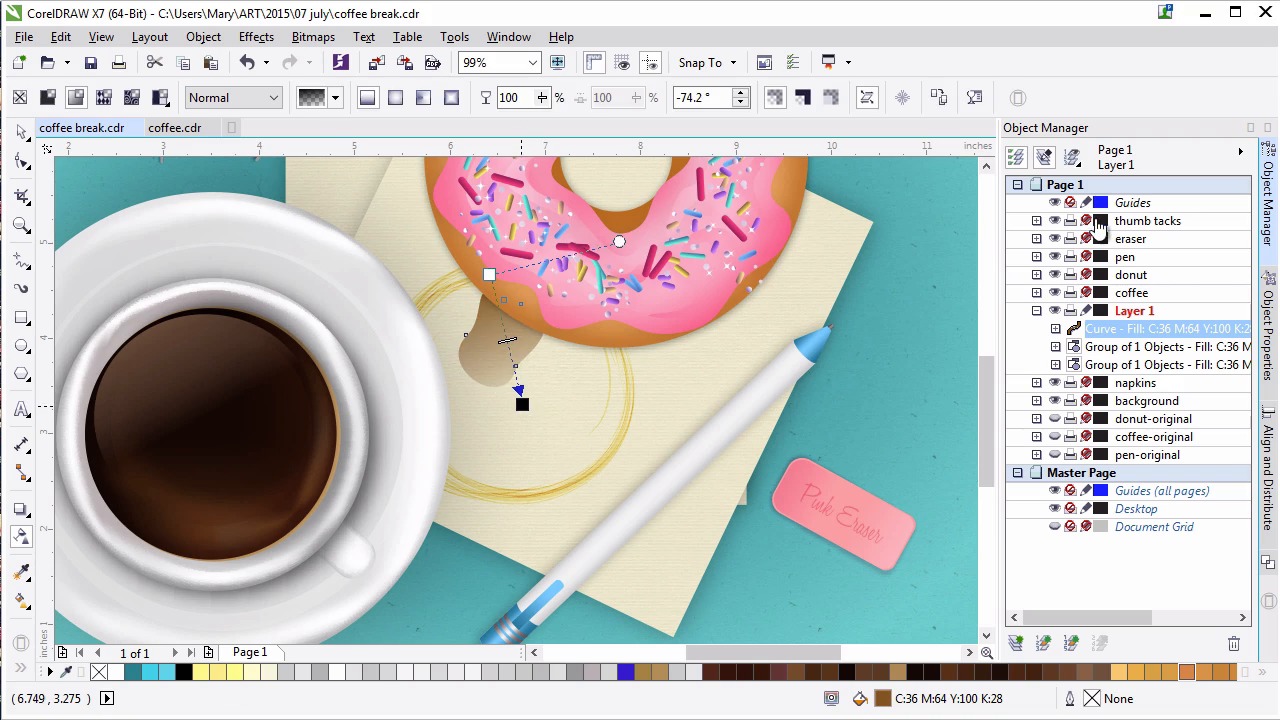
- Overview
- Transcript
6.1 Finishing Touches
It’s time to add some final textures, touches, and details to the illustration. These include coffee splashes and rings on the napkin as well as pen doodles, both created with the Artistic Media Tool and various object properties.
1.Introduction
1.1Introduction00:59
2.The Background and Napkins
2.1Creating the Background03:14
2.2Rendering the Napkins03:28
3.The Coffee Cup
3.1Rendering the Cup Saucer04:30
3.2Creating a Cup05:43
3.3Creating Additional Elements for the Cup04:43
3.4Filling the Coffee Cup04:32
3.5Finishing Up the Coffee Cup04:26
4.The Sprinkled Donut
4.1Creating a Basic Donut05:14
4.2Creating the Frosting04:47
4.3Rendering the Frosting04:20
4.4Finishing the Frosting03:58
4.5Creating the Sprinkles06:54
5.The Office Supplies
5.1The Pen06:59
5.2The Eraser04:57
5.3The Thumbtacks04:55
6.Conclusion
6.1Finishing Touches04:11
6.2Conclusion01:27
6.1 Finishing Touches
Welcome back to Advanced Techniques in CorelDRAW. I'm Mary Winkler for Tuts Plus. In this final chapter and final lesson, we'll add some finishing touches under composition by way of coffee stains and pen doodles created with the artistic media tool. Let's take a look at our composition. We've got thumbtacks in the upper left. A coffee, a donut, some napkins, and a pen. An eraser in the bottom right. There's something missing, however. Clearly, the eraser and thumbtacks are there to make a little card. You'll need a fourth however, to go for it. I find it odd that a pen would be out without the intention to doodle or take notes during coffee break or meeting of some sort. Additionally, napkins are done without a single bit of coffee spilled on it or any sort of coffee ring? Let's remedy all of this in this final lesson in our course. Zoom in on the napkin in the center of the composition and grab the artistic media tool. With it, you'll want to select artistic in the property bar. Select calligraphy for brush type. Create a new layer in the objects manager to work on. We're going to play around with the different types of calligraphic brushes until we find one we like for the coffee ring. Draw a series of circles and half circles, deleting those you don't like, as you trial and error your way to the perfect coffee ring. You want something that looks like it was the imprint of the bottom of the coffee cup or saucer, multiple times over. Something with a bit of texture, to mimic the bottom edge of a ceramic plate. You can also adjust the brush settings in the property bar itself. Convert your shape to curves, and change the fill color to a tan or brown that's similar to a much lighter version of your coffee color in the Object Properties docker. In the transparency docker, set your coffee rings blending mode to Color Burn and your transparency to 67 or so. Place your rings below the coffee cup within your object manager duplicate the coffee rings and rotate them so they look a bit more varied. Lets make some more coffee stains in the tool box grab the free hand tool. Draw a crazy wiggly shape you can also use the smear and smooth tool to make is look more organic. Set the fill color to the same brown as your coffee rings and the blending mode to color burn. Make sure any coffee stains you draw are placed above the napkins or below the other objects with in the object manager. Repeat this process of drawing, coloring, applying attributes to, and placing droplets, splashes and other coffee stained shapes onto your napkins. Place the coffee rings in the coffee cup, or have them all over your napkins as if you´ve had to muttle the spill recently. Group together your coffee stain components when you´re satisfied with the style and placement. Next, we´re gonna use another artistic media tool to dry some pen doodles on our napkins. On the same working layer, grab the artistic media tool. Choose the calligraphic pen option. Set your field color to blue, and change the pen to a 90 degree angle. Change the pen's size to something small but fitting of your pen itself. I've been playing with the pens, as I described my actions to you. Zoom in on your napkin, and write out some simple hatch marks, phrases, or draw something. Hearts, zen doodles, stars, and assorted shapes work wonderfully for something like this. Maybe you should make up some office notes for your designer. Sign your name, if you'd like. Convert your artistic media shapes to curves, and then group together your doodles. Set their blending mode to multiply under transparency in the object properties docker. Set transparency itself to about 12 or so. Zoom out, pan to the left, and let's add some final doodles to the other napkin. Draw some scribbles. Write down a phone number, preferably something fictitious. And once again, convert your objects to curves, group them together, and set their blending mold to bright and transparency to 12. Finally, make sure they're placed above and below the correct object in the object manager. Zoom back out and admire your handiwork. You just completed this entire course. Thank you so much for watching this lesson on adding some final touches to our design. In our final video, we'll conclude this course together with a quick review.


