
 Lessons: 18Length: 1.3 hours
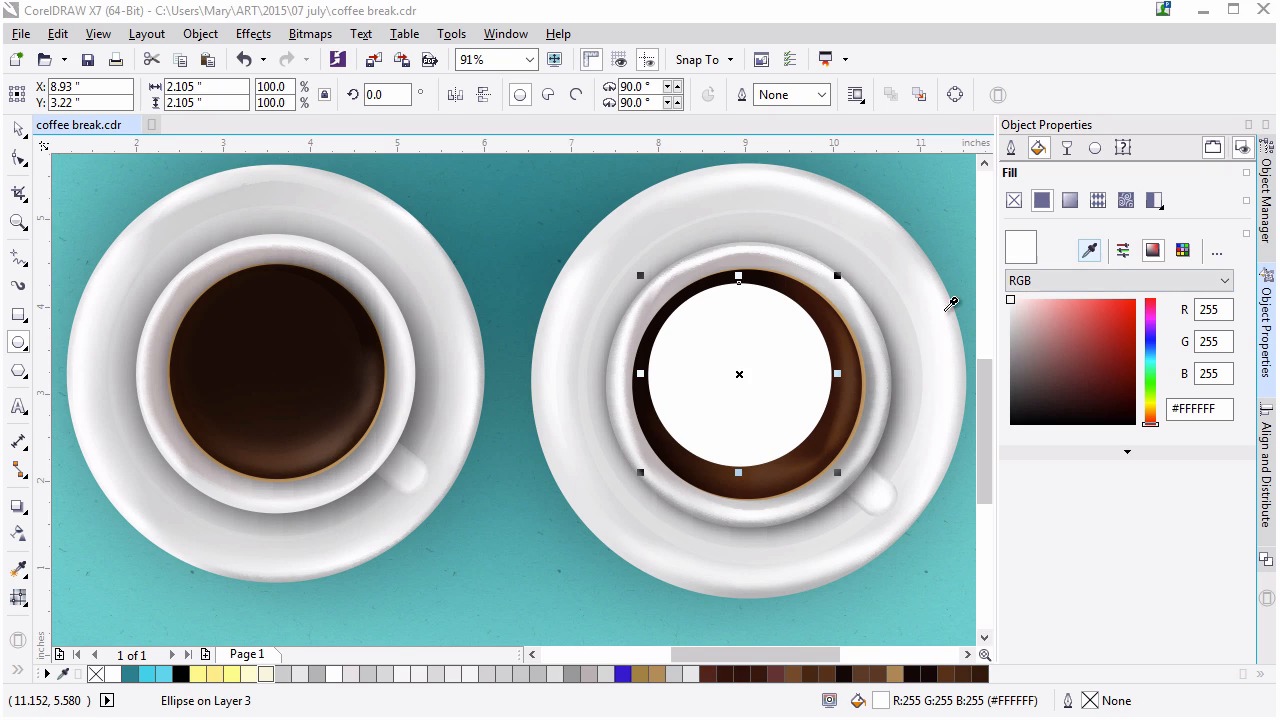
- Overview
- Transcript
3.5 Finishing Up the Coffee Cup
In this lesson we’ll render the liquid within the cup with gradient mesh and fountain fill gradients.
1.Introduction
1.1Introduction00:59
2.The Background and Napkins
2.1Creating the Background03:14
2.2Rendering the Napkins03:28
3.The Coffee Cup
3.1Rendering the Cup Saucer04:30
3.2Creating a Cup05:43
3.3Creating Additional Elements for the Cup04:43
3.4Filling the Coffee Cup04:32
3.5Finishing Up the Coffee Cup04:26
4.The Sprinkled Donut
4.1Creating a Basic Donut05:14
4.2Creating the Frosting04:47
4.3Rendering the Frosting04:20
4.4Finishing the Frosting03:58
4.5Creating the Sprinkles06:54
5.The Office Supplies
5.1The Pen06:59
5.2The Eraser04:57
5.3The Thumbtacks04:55
6.Conclusion
6.1Finishing Touches04:11
6.2Conclusion01:27
3.5 Finishing Up the Coffee Cup
Welcome back to advanced techniques in Corel Draw. I'm Mary Winkler for Tuts+. In this lesson, we'll finish filling our cups with deliciously brewed coffee. Much of this lesson is optional, but I wanted to include it because it contains my thought process when creating illustrations like the one featured in this course. Back where we left off, we have our coffee cup. Now, as I said in the intro, this is entirely optional. You can follow along, or watch this video and take the techniques and ideas throughout this lesson and apply it in a different manner to your illustration. With the idea that you're following along, let's play around with our coffee mesh, just a bit. In my original illustration I layered multiple mesh objects on top of each other. I decided to nix this, this time around because it really renders a rendered object mute. I like to think that when re-creating something improvements can be made. When I was reminded of the next object that I rendered, I realized I could add a couple nodes to my coffee mesh and be just as satisfied with this design. Let´s do that now. Using the mesh tools over select your working mesh object. I'll be adding a lighter brown to the lower left side of the circle. Consider how fluid liquid is. It's very fluid, it is a fluid. Select one of the darker brown nodes around the lower left and use the eye dropper from the property bar to select a lighter brown and instantly this coffee looks pretty delicious. Almost as if though I've mixed the tiniest bit of cream in it and I'm ready for that first sip. Add another node to the left side if you wish and lighten up the center a bit more. Note the variation in the shape of the mesh now. It's not going to a uniform, simply blended mesh, this is an organic fluid within a container. In reality, it could easily move. Show that by creating some variants within the mesh as I've done here. I find this new version of the coffee to be such an improvement. Next we're going to add another dark shape within the coffee. You'll be drawing an ellipse in the upper left portion of the coffee. My original shape is a blended gradient object with a drop shadow. I've moved it aside so you can clearly see it. Grab the ellipse tool and draw your ellipse starting in the upper left of the coffee cup. Eliminate the outline and use the eye dropper under fill in order to grab that dark brown from the coffee cup used earlier. You'll also find any previous colors used in the document palette docker, which I've placed in the bottom of my window. Go to transparency and choose uniform fill. Set the transparency to 79. Next use the drop shadow tool to add a slight drop shadow headed to the upper right of the object. I decided to lighten up the object itself so that it looks a bit more reflective for my tastes. Totally optional. Speaking of reflections, let's make another now. I'll show the original reflection object created earlier in the object manager. As you can see, it's an indented ellipse, which we'll create together with a fountain fill transparency attribute applied. Draw an ellipse in the upper left corner of the coffee cup. In the property bar, hit convert to curves. Using the shape tool, you can now manipulate the nodes of the curve. Select the bottom node and push it upward towards the center of the curve. Notice how this creates a bean-like shape. Use the pick tool to rotate the curve about 45 degrees. Place it in the upper left corner of the coffee cup and adjust the curve's shape as you see fit. Set the outline to none and the fill color to light brown. Using the interactive transparency tool, drag the effect toward the lower right of the shape. Make sure the black box doesn't extend past the shape, and let the fountain filter gradually fade away before hitting the shapes boundaries. Play with the color as you see fit. Group together all of your coffee cup components in your object manager. Let's unhide our other illustration components and place the coffee cup within our composition. I want the coffee cup to be on the left side of the composition, so I'll use the pick tool to drag the group over to that side of the document page. I'm using the placement of our other coffee cup to place my newly created cup. Of course you can just place it wherever you want it to be. In my case, I want it to overlap the napkins on the lower left. As we create more objects our composition will take shape and we'll be able to negotiate the space within the document more efficiently, as we'll be aiming to balance an entire illustration verses simply moving a coffee cup around a rectangle. Thank you so much for watching this lesson on creating additional reflections and shadows within our coffee cup. Now that we've completed this object, let's move on to the next. In the next lesson, we'll start chapter four in which we'll begin to create and render a delicious doughnut.


