
 Lessons: 18Length: 1.3 hours
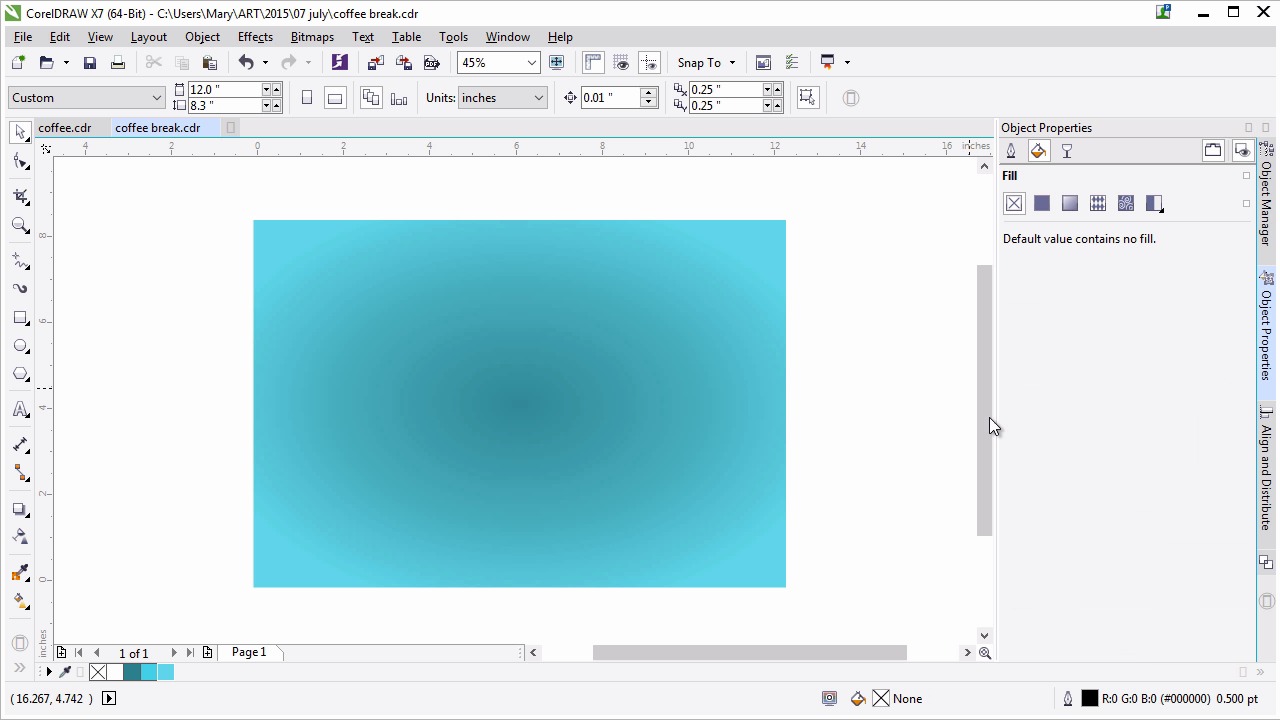
- Overview
- Transcript
2.1 Creating the Background
In this lesson we’ll set up the document and create a textured background with help from CorelDRAW's texture library.
1.Introduction
1.1Introduction00:59
2.The Background and Napkins
2.1Creating the Background03:14
2.2Rendering the Napkins03:28
3.The Coffee Cup
3.1Rendering the Cup Saucer04:30
3.2Creating a Cup05:43
3.3Creating Additional Elements for the Cup04:43
3.4Filling the Coffee Cup04:32
3.5Finishing Up the Coffee Cup04:26
4.The Sprinkled Donut
4.1Creating a Basic Donut05:14
4.2Creating the Frosting04:47
4.3Rendering the Frosting04:20
4.4Finishing the Frosting03:58
4.5Creating the Sprinkles06:54
5.The Office Supplies
5.1The Pen06:59
5.2The Eraser04:57
5.3The Thumbtacks04:55
6.Conclusion
6.1Finishing Touches04:11
6.2Conclusion01:27
2.1 Creating the Background
Welcome to advanced techniques in CorelDRAW. I'm Mary Winkler for tuts+. In this lesson I'll introduce your course project, the digital still life. Then we'll get started with a textured background to set the stage for the rest of our design. Let's get to it. To start lets take a look at my final illustration which I created earlier and is the basis for this course. Its a pretty simple scene, showcasing several items you might find on your desk while having a coffee and doughnut break. The final image we create together will look a little different for variety's sake. This was created with the same techniques we will explore in this course. I definitely encourage you to take whatever artistic liberties you see fit when finalizing your design. But, for now let's create something together. Create a new document minus 12 inches by 8.3 inches. It's fairly arbitrary but, it's what I used in the original design. Give it a name. Make sure it's set at 300 DPI and hit OK. Make sure to save your document periodically throughout this lesson and the rest of this course. Use the rectangle tool, shortcut F6, to draw a large rectangle over your page's boundaries. In the Object Properties docker, select a fountain fill. I was already playing with shades of teal in my document, so I have them at the ready. You can choose a flat fill color from the color picker. It'll be applied to the gradient automatically. Set the right color as a darker shade of teal choose elliptical fountain fill for the fill type. Using the interactive fill tool, shortcut G, adjust the radius of the elliptical fountain fill, so it's less circular, and more elliptical. It's difficult to adjust what's essentially a shadow of that objects. So, we're using this as a general guide for where objects will be placed in the future. Next let's draw another rectangle over the first. You can also just copy and paste it or simply duplicate it by hitting Ctrl+D. Make sure there is no outline and underfill, we're gonna choose a bitmap pattern fill. Well we could scan a texture or create our own texture for this part of the course, I really encourage you to check out what Corel's content exchange holds. Users are creating useful vector and bitmap textures in this section all the time. And while it might take a minute to load it's worth the wait for sure. Let's take a proper look at the content exchange. I'll resize my window so you can see the entire menu. You're find a few options to choose from. Favorites, upvotes, content exchange, and personal. In the content exchange, there are assorted textures from users all over the world. Under texture, which is where the recycled paper texture I use with sorted, you'll find many, many designs that would be a great addition to your illustration. Let's get back to our document. I'll be choosing a recycled paper-like texture for my image. You can try whatever takes your fancy, paper, wood, grainy, whatever. Consider lighter or neutral colors for your background texture, because it will show through the bright teal we use for the initial rectangle. Choose your texture and wait for it to load. Once it does, we'll move on to completing our background. In Object Properties under Transparency, choose Multiply for the blending mode and reduce the opacity of the textured rectangle as you see fit. My transparency is set to 41. That's it for a simple background. Applying a texture to kick things up a bit is rather easy. Thank you so much for joining me in this quick lesson in creating a background for a digital still life. In our next lesson we'll start in on our first objects, a couple of napkins.


