
 Lessons: 18Length: 1.3 hours
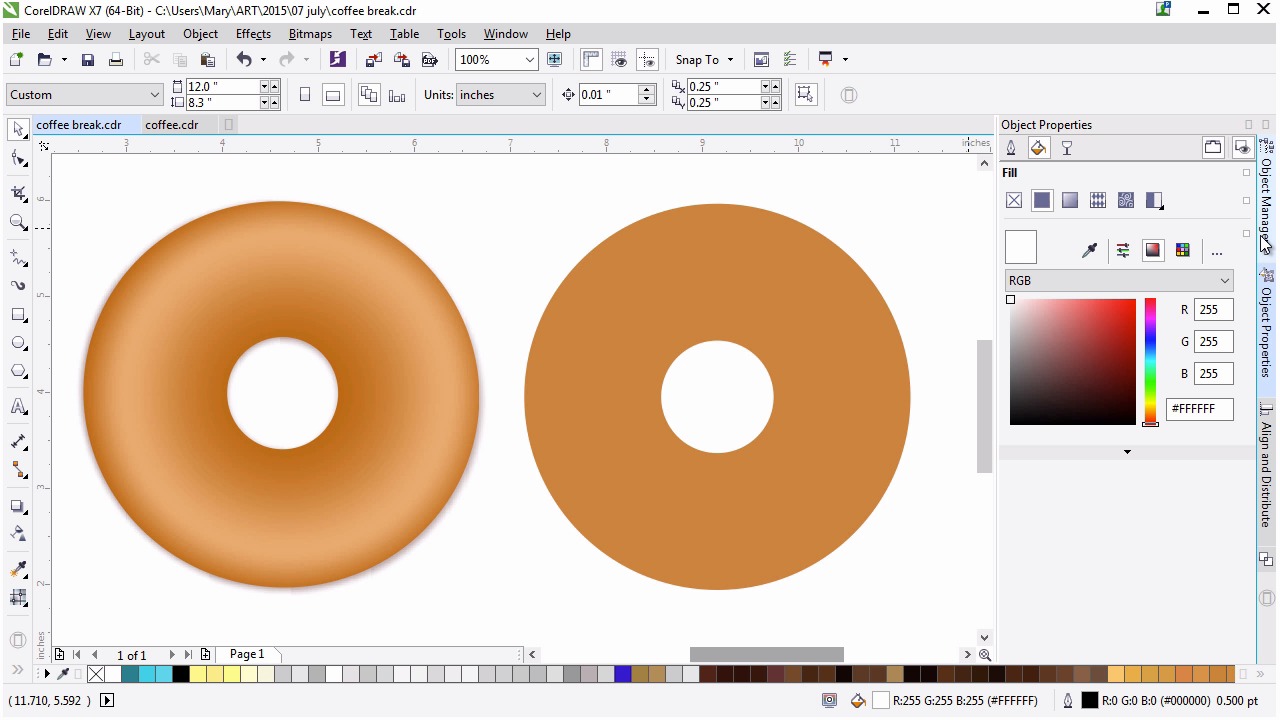
- Overview
- Transcript
4.1 Creating a Basic Donut
Learn to create and render a simple torus shape. This lesson goes over choosing the right rendering style for an object as well as choosing colors for a cake-type donut and making it work with the existing background and objects.
1.Introduction
1.1Introduction00:59
2.The Background and Napkins
2.1Creating the Background03:14
2.2Rendering the Napkins03:28
3.The Coffee Cup
3.1Rendering the Cup Saucer04:30
3.2Creating a Cup05:43
3.3Creating Additional Elements for the Cup04:43
3.4Filling the Coffee Cup04:32
3.5Finishing Up the Coffee Cup04:26
4.The Sprinkled Donut
4.1Creating a Basic Donut05:14
4.2Creating the Frosting04:47
4.3Rendering the Frosting04:20
4.4Finishing the Frosting03:58
4.5Creating the Sprinkles06:54
5.The Office Supplies
5.1The Pen06:59
5.2The Eraser04:57
5.3The Thumbtacks04:55
6.Conclusion
6.1Finishing Touches04:11
6.2Conclusion01:27
4.1 Creating a Basic Donut
Welcome back to Advance Techniques in CorelDRAW. I'm Mary Winkler for Tuts+. In this lesson we open up chapter four with our deliciously drawn donut. We'll create the donut shape and render it together. We'll also discuss choosing colors and working off our pallet for this illustration. First up, this is basically the final product of this chapter. A delicious and bright colored sprinkled donut. Our sprinkles will be different this time around, since I want to bring some of the colors with the rest of the illustration into them to really unify our final product. That said, I'm gonna hide the frosting and sprinkle components, so we can focus on the base donut, itself. This will also give you an idea about what each lesson in this chapter contains, albeit, in reverse. Okay, our basic simple donut. It could easily be turned into a bagel or an assortment of donut types. I really love creating something that has some versatility so that can be reuse as an asset or be featured in the series of illustrations. Let's get going. Start with a circle drawn with the ellipse tool. As ever, hold Control to keep the circle uniform. Make it whatever size you want. My original donut was approximately four and one-eighth inch in diameter. So I'll scale my circle up slightly to match. Really I want the donut to be of a similar size as the coffee cup saucer in the final illustration. For now, set your fill color to a tan or light brown. The exact shade is up to you. This fill color serves as a simple guide to work with and sort of keeps the look of a plain donut in mind while we work on additional shapes. We'll render it later. Next, we need to draw the donut hole. You can draw with ellipse tool again or simply duplicate your first circle and scale it down to about an inch or so, or 25% of the original size. Place the new circle within the center of the first. Use the align and distribute docker to get them centered perfectly. I changed the color of the smaller circle so it's more easily seen by you. Once your smaller circle is centered, open up the shaping docker. We'll be using this docker a fair amount throughout the rest of this course. You can also access these options in the property bar when you select two or more objects. I like using the docker since there's more control over what each of the actions within it do. Select both of your objects and under Simplify hit Apply. Delete the smaller circle. Alternatively you can hit back minus front. Really it's up to you. Take the other actions in the docker for a spin if you wish, as well. Otherwise let's move on. Under object properties let's get to rendering our donut. We're going to apply and an elliptical fountain fill to the newly shaped object. Sadly, the mesh tool isn't so fond of curves like this one. Lucky for us, however, rendering a two dimensional torus-like shape is pretty easy with an elliptical fountain fill. Now, I did say we'd have a small chat about color choices within this illustration. As you can see, my browns are quite orange. This was done purposefully. My background is a bright, bright teal, or turquoise. It's far more blue than green. As such, I want the neutral tones I used to be warm, but not very red. Since orange is the complement of blue on the color wheel, they play off each other nicely. Whatever color you've made your background, consider a brown that leans towards its complement. Using complementary colors in this way helps balance an illustration and really unifies the entire piece. Select fountain fill and use the eyedropper to duplicate your first color as your second. This will give you a perfect base for the colors used in your donut. Double click at another color and make this a lighter shade of the browner tan that you're using. Slide the color in the right slider over to the left a bit. Let's darken up the outer and inner edge of the donut. We want it to really pop from the page. Under blend transitions, hit Smooth so your fountain fill blends smoothly together within your object boundaries. Instantly my donut's fountain fill is already almost where it needs to be. I'm going to continue playing with the intensity of the colors I've chosen. Most of the donut will be covered with icing and sprinkles so I think this design would benefit from dramatic contrast versus something more subtle. Only a small portion will show and for the parts of the donut that do, I want the viewer to understand its form without a lot of visual information from the donut itself. Let's add some dimension to the donut with a drop shadow, as we're doing with most of the items within this illustration. Grab the drop shadow tool, and drag the shadow out from the left to the right on your donut object. My default is pretty feathered, so I'm going to reduce that to single digits. Additionally, I'd like the shadow to be a little more prominent on the right side. I'm going to increase the shadow fade, and play with the transparency, shadow placement, and feathering a bit more. When you have a more prominent shadow, especially in this position, it really stands out. Play with the intensity of the shadow in the manner you see fit. Personally, this is too much for my illustration. Take a look at the donut on the left of the page. It has a very subtle shadow in comparison to what's going on currently on the right. Let's knock this down a bit. I've dragged my shadow to the right once more, and we'll tone down the intensity overall. The placement, however, is more of what I wanted in the first place. I'm going to kick the transparency down a little and call it a completed donut, ready for some frosting in the next lesson. Thanks so much for drawing and rendering the basic donut shape with me. In the next lesson, we'll draw some deliciously drippy frosting playing with various drawing and manipulation tools, in addition to rendering the frosting in a manner similar to what we've done with this donut shape.


