
 Lessons: 16Length: 2.3 hours
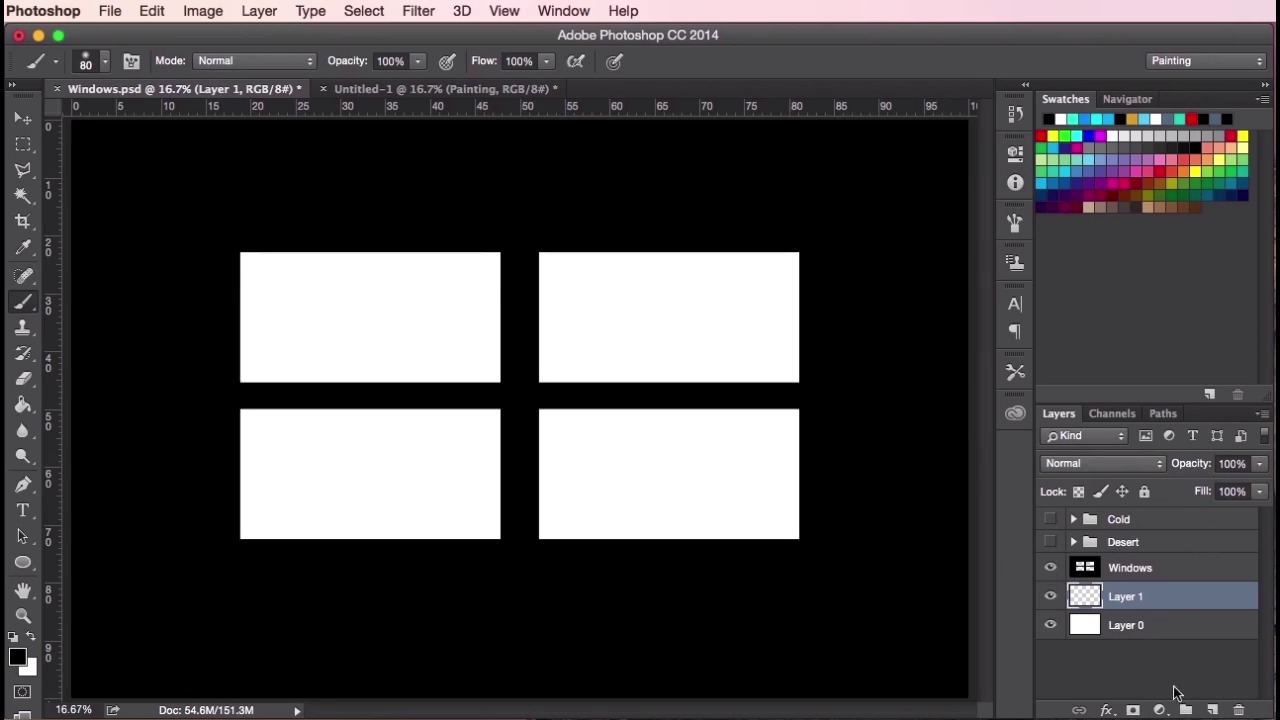
- Overview
- Transcript
2.3 Thumbnail Setup
In this lesson you will learn how to gather different photographic references and how to use those references successfully. You will learn the first steps of creating a thumbnail setup, which will help prepare you for creating value studies, and we’ll also cover the basics of depth, composition, and lighting.
1.Introduction
1.1Introduction01:31
1.2Adobe Photoshop Setup05:28
2.Shapes and Thumbnail Design
2.1Experiment With Shapes08:20
2.2Designing Shapes10:20
2.3Thumbnail Setup05:46
2.4Value Studies12:39
3.Painting
3.1Translating the Thumbnail08:19
3.2Initial Painting09:22
3.3Adding Texture08:31
3.4Design Development10:28
3.5Lighting and Colour10:19
3.6Clouds10:18
3.7Composition Adjustment10:56
3.8Adding Detail11:14
3.9Final Touches11:52
4.Conclusion
4.1Conclusion01:44
2.3 Thumbnail Setup
Hey guys and welcome back to the concept art tutorial for games. In this video, we're going to go through a quick way to start setting up your file for thumbnails and to start placing your composition ideas down quickly. So, the first thing we're going to do is we're going to go to File > Create a new document, so International Paper, A3 is fine. Just click OK. Now go to Image, we want to rotate the canvas, so go to Image Rotation > 90 degrees Clockwise, zoom in a little bit. And I'm just going to use the crop tool here. On the left, we're just going to widen it a little bit so that it fits the whole screen. Click Crop. I'm gonna fill it with white. And let's name this layer Background. Okay, once that's done, create a new layer. We want to fill this layer with black. And from there we're going to select marquee tool by clicking here, making sure it's the rectangular marquee tool. And then we're going to drag out some shapes, which will be the areas your thumbnail ideas will go in. So, to create the second or more shapes, you just hold the Shift key when you're dragging these shapes. And then once you're happy with the placement, make sure you're in the black layer and then just hit the Delete key to create these holes or view finder windows. Let's call this layer Windows. So once you've done that, what you should do next is hit the lock key so you can lock the layer. Which means you can't modify any further. So if I had this layer selected and I tried to paint here, it simply wouldn't work. But if I was to create a layer below, let's call it painting, then it will work just fine. So now we have a nice little window here, which gives us some borders for our thumbnail composition. The next step is to go ahead and show you how we come up with the ideas for starting your thumbnail paintings. So, the best way I find is to literally just surround yourself with the ideas and reference images that would help inspire what you're trying to go for. So, what I usually do is just go out and find these images and then just save them into a folder. And then just copy and paste them or drag and drop them into Photoshop. So you'll see that I've got a folder of stock images here, which I just click, drag and drop. Resize them down so they fit into my working area. I'm making sure that the images on top of the windows there, otherwise you won't be able to see them, like so. Then just placing them around the canvas, so that they're constantly in your field of vision when you're creating your thumbnail ideas. So, ideally, the type of images that you'd want to surround yourself with should ideally be the type of images that you want to create the same or similar feeling for the painting that you've got in mind. So here, you can see I've got a whole folder of grassy mountain type, rocky landscape reference images which I'll just place around here. It'll help inspire you, the composition and the type of shapes that you want to create for your thumbnails. So once you've got them all arranged like so highlight all of the pictures, hit Ctrl+G or Cmd+G to group them up. And let's call this group Mountains. So here you can see that I've got some other folders here as well. I've got a cold landscape folder here to inspire my cold thumbnails. And I've got a desert landscape here to inspire my desert style of thumbnail ideas. So doing your research like this is a good way to get started with the ideas process, especially if you don't have anything specific planned. It's good to take into account the color palette, the mood, perspective, to help create some interesting and unique paintings. So that's it for setting up the file to create your thumbnail paintings. In the next video we'll go through on how to create some value studies using this setup. And we'll also start thinking about bringing some of those shapes in that we created from the previous videos. See you there.


