
 Lessons: 16Length: 2.3 hours
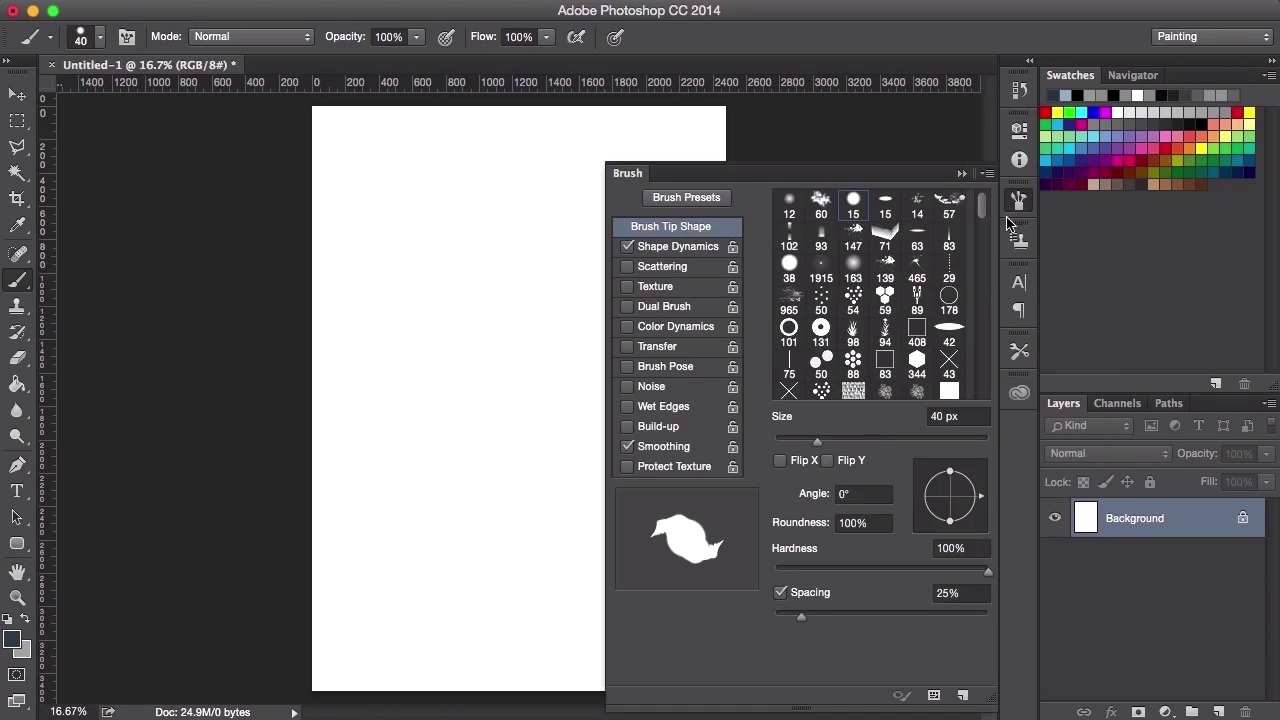
- Overview
- Transcript
1.2 Adobe Photoshop Setup
In this first lesson you will learn how to navigate your way around Adobe Photoshop and how to set up an effective workspace. You will also learn how to set up your brushes, and you’ll pick up some tips and tricks to help get you started with digital painting.
1.Introduction
1.1Introduction01:31
1.2Adobe Photoshop Setup05:28
2.Shapes and Thumbnail Design
2.1Experiment With Shapes08:20
2.2Designing Shapes10:20
2.3Thumbnail Setup05:46
2.4Value Studies12:39
3.Painting
3.1Translating the Thumbnail08:19
3.2Initial Painting09:22
3.3Adding Texture08:31
3.4Design Development10:28
3.5Lighting and Colour10:19
3.6Clouds10:18
3.7Composition Adjustment10:56
3.8Adding Detail11:14
3.9Final Touches11:52
4.Conclusion
4.1Conclusion01:44
1.2 Adobe Photoshop Setup
Hey guys, and welcome to the first lesson of creating an environment concept art for games. In this lesson we'll just be going through just a general set up of Photoshop so we can get ready to start on our paintings. So to begin with, let's just take a quick look at how to set things up and what things might be useful to get us when we're painting. So let's start off with creating a new canvas by going to File > New. It doesn't really matter what size we use for this. I usually use a standard international paper. But you can change this and customize these settings to whatever you feel comfortable with. I usually always set my resolution to 300 dpi, which is a habit because I come from a printing background. Usually when you want to send images off to be printed, your images have to be set to 300 dpi. However for digital stuff it really is just your screen resolution. So 72 dpi is fine, plus you could always up resolution later. This is my setup. If your Photoshop setup doesn't look like this, just go to Windows > Workspace > Painting. So first thing I'm gonna show you is how I work with brushes. You can see that I'm making the brush size smaller and larger. This is done by using the square bracket keys on your keyboard, or if you have a Wacom tablet, which would help you significantly with digital painting, so I highly recommend you using one. You could set up your tablet to do the same thing as well. Now, with the brushes, as you can see I've got loads of brushes here, which has been built up over a long period of time whilst looking around on the Internet. The way I've set my pen up is that if I click on one of the buttons, it will actually act as a right-click. So, when I right-click on Photoshop, you can view all my brushes like that. Or I can just click on the button here and view them that way, too. You can always, you can also change the way you can view your brushes by clicking on the little cog on the top right, so you can see them as a list, or you can see them as big or small thumbnail brush shapes. It's entirely up to you. So now, just a quick introduction on the brushes I like to use. First up is the hard round brush. This is the standard brush you use in Photoshop. It paints normal, flat color with a hard, round edge. All the standard settings can be seen up here. 100% opacity, 100% flow, nothing has changed. And then the other brush that I like to use is the airbrush, which is actually the same thing as the hard rim brush, except the hardness has been set all the way down to 0%, so it's really, really soft. A lot of the other brushes that I use for digital painting have actually been taken from all over the Internet. What I usually do is I just search for things like texture brushes or if you want something more specific you can search for things like a grass brush or a cloud brush or a rock brush. And just go ahead and experiment with using them in your paintings and perhaps discovering a favorite brush to use. So, yeah, if you just go into brush settings here, you can have a look at how each brush has been set up. We'll go further into this a little bit later in the course. But I think the best way to learn about brushes is to just have a play and to experiment with them. Go into the settings here. Tick and uncheck the boxes and you can click on the names and experiment with all of the settings here. So, yeah, that's brushes. In the next video, we'll start to use these brushes and start experimenting with different shapes and actually start thinking about how we can use these shapes in our painting. See you then.


