
 Lessons: 16Length: 2.3 hours
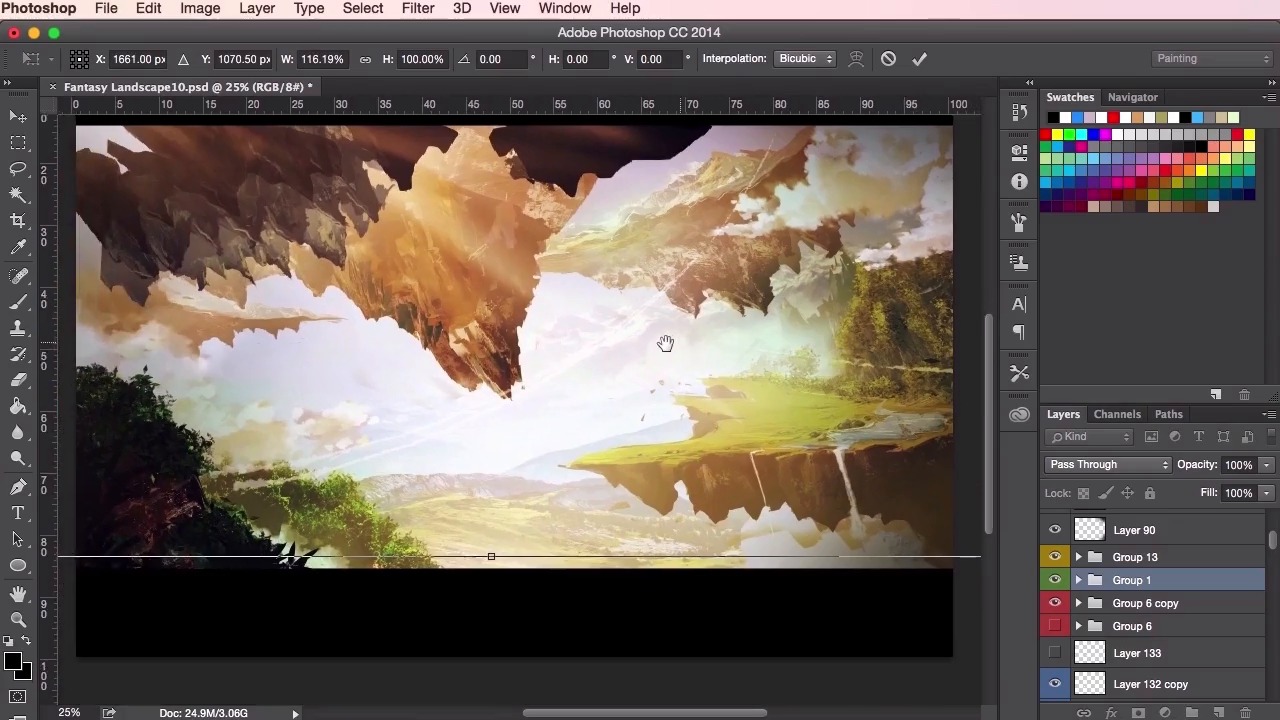
- Overview
- Transcript
3.7 Composition Adjustment
In this lesson we’ll reach the final stages of the painting and go through some composition adjustments. I’ll take you through the reasoning behind each of the changes, so that you can understand how important they are in creating a more striking painting.
1.Introduction
1.1Introduction01:31
1.2Adobe Photoshop Setup05:28
2.Shapes and Thumbnail Design
2.1Experiment With Shapes08:20
2.2Designing Shapes10:20
2.3Thumbnail Setup05:46
2.4Value Studies12:39
3.Painting
3.1Translating the Thumbnail08:19
3.2Initial Painting09:22
3.3Adding Texture08:31
3.4Design Development10:28
3.5Lighting and Colour10:19
3.6Clouds10:18
3.7Composition Adjustment10:56
3.8Adding Detail11:14
3.9Final Touches11:52
4.Conclusion
4.1Conclusion01:44
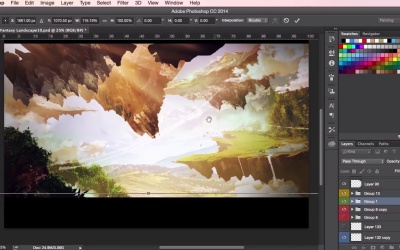
3.7 Composition Adjustment
Hey guys and welcome back to the Concept Art Environment for Games course. In this video we're just gonna go through some more composition adjustments to the painting. Evaluating exactly what's worked and especially what hasn't been working, as we take it through to the final stages of its design evolution. So here at this point I'm still just playing about with the colors and the lighting. I'm not 100% happy with the composition, but I'm also not sure what I would like to change exactly, yet. So as you can see again, this video has been sped up. The painting up to this stage has taken up to most of a day's worth of work. So this is the type of thing that when you're working in production. You should be at a stage where you should be able to get something like this done within a day. So again just going through the lighting, checking the values, and changing things, tweaking things here and there. Trying different colors out, and And just having a look at the composition, zooming in and zooming out. So I'm just getting the feeling that when I'm looking at the painting, that the sense of scale and the epicness that I was going for originally in our original thumbnail painting is not quite there yet. Just checking through all the different layers and value settings that we've got here. Painting in some more clouds in Just seeing whether or not I can If I can sort of change anything. If any of these tweaks and changes that I make to the clouds here can help change the feeling of this painting It's at this point here when I start painting in class, that I realize that perhaps a more drastic change is needed to help this painting. So, throughout this entire process here I'm just It seems like I've been avoiding making this drastic change, but I'm thinking what exactly I can do to save it. What sort of compositional elements can I put in here? Perhaps there's just some cloud lines to help the composition just to give it another sense of scale. And just painting in some clouds there and seeing what how it helps, just duplicating it, stretching it. Same tricks as before when it comes to positioning these elements. So, at this point here, I'm still looking at this painting and and I'm just struggling with it, really just working through this almost artist's block of struggling with this composition. Just thinking how I can make it work and enlarging the focal point here, and just giving it a bit more space to play, and then taking things back with a soft round brush, and minimizing certain elements. At the moment it's It's feeling a little bit too crowded with all of these elements here, all of these clouds, bushes, and rocks, and landmasses. So I'm just going to take these clouds out as much as I love them when I painted them I'm just going to shrink them down, and just play about with where I can position them and how I can just give the painting a little bit more breathing space as we go along. These clouds have now merged the entire layer. I can easily move them around, and using the warp tool to give it a little bit of a curvature there to help with the composition. And just stepping back, taking a look at it again. Just seeing how these changes have helped, and what further changes need to be made to the composition of the piece. So from here now I've started to take some more drastic steps just moving the actual landmasses now and just transforming them, and turning them. Seeing what works. Just stretching them out. And just giving this focal point here on the top left a little bit more breathing space. So giving it a little bit more prominencey by enlarging it. So now that it's a little bit more room for things to breathe, but the problem we have now is all the separate elements that were very well connected before. Now look like they're just separate pieces. You've got one piece on the top left, one piece in the top right, one in the bottom left and one on the bottom right. It's just not working together as a landscape piece anymore. Just thinking of ways in how we just connect things together again. How we can just piece it all back and make it work. So, I'm just further adjusting things. Just turning things around. using the exact previous techniques that we have used of transforming and changing the size, twisting and turning using Cmd+T, and then using the eraser tool to sculpt in the shapes. Just experimenting with the background there as well. We're just trying to get it all to work. So yeah, I'm just getting rid of some of the lighting here. Just to give my eyes a fresh view of the painting. I'm just seeing what I can do and how I can tidy up some of these layers down here just to give myself a fresh start when I make some changes. So it's at this point that I've realized that I needed to extend the area of the land on the bottom right here, so that I could get a greater sense of depth and a greater sense of scale to the painting. Just going through my brush tool here, and using the Alt key on my keyboard to just use the color picker and pick out the right color for the grass. Then just exploring and extending the land mass on the bottom so that it reads well. So you can see here I'm using the transform tool here again just to, adjust the angles of the land and to see if I can get it to connect in a more natural way and just, just sort of balance it out within the composition. Here, I'm just using the same techniques as we did before at the very beginning of the course. And just using the brush tool to just feel out those shapes and just try and come out with a original and just interesting shapes for the composition. Again using the lasso tool to help me define those particular shapes. Just switching in between both of those tools, just going back and forth between the lasso tool and the brush tool. So yeah, just using that lasso tool to really increase that landmass there. And just zooming in and zooming out to check. These land masses, fixing these cliffs here as well. Just extending parts of the land, just so that it fits better with the composition here. So yeah, just continuing with the painting. And then just go on back to the lighting here now, I'm a lot happier with the colors now that I've rested my eyes a little bit. I just wanna opt for a more brighter and spring-time feeling to the painting, rather than the autumn type colors that we used before. The oranges and the yellows. Just using the bright blues and greens as they reflect a little bit better with the rest of the painting, especially with the elements that we've got, that we're using here with all these grasses and trees. So yeah that's it for this video. In the next video we're gonna continue on from the adjustments made to the composition here. Just adding in some final details and going into adding some final textures in as well. See you there.


