
 Lessons: 16Length: 2.3 hours
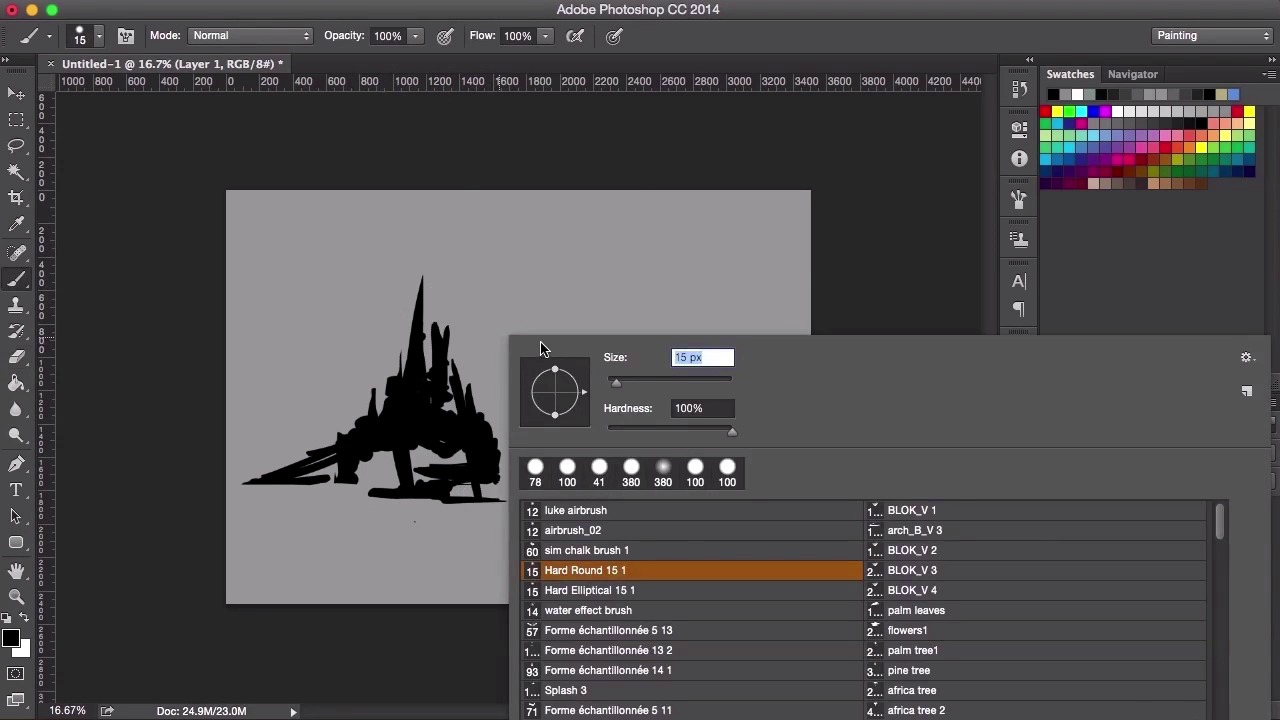
- Overview
- Transcript
2.1 Experiment With Shapes
In this lesson I will share with you some ways to generate different ideas when beginning your environment concept painting. You will start by learning how to create different shapes in Adobe Photoshop, as well as general line work and mark making.
1.Introduction
1.1Introduction01:31
1.2Adobe Photoshop Setup05:28
2.Shapes and Thumbnail Design
2.1Experiment With Shapes08:20
2.2Designing Shapes10:20
2.3Thumbnail Setup05:46
2.4Value Studies12:39
3.Painting
3.1Translating the Thumbnail08:19
3.2Initial Painting09:22
3.3Adding Texture08:31
3.4Design Development10:28
3.5Lighting and Colour10:19
3.6Clouds10:18
3.7Composition Adjustment10:56
3.8Adding Detail11:14
3.9Final Touches11:52
4.Conclusion
4.1Conclusion01:44
2.1 Experiment With Shapes
Hey guys, and welcome back to the tutorial for environment concept art for games. In this lesson, we're going to go through a few quick exercises to get you warmed up and in the correct mindset for creating ideas for your thumbnails. Now to set up this lesson, let's just go to File, select New, and then select International A4 for now. Now I personally like to work on a landscape canvas, so I'm going to flip the canvas by going to Image and then select Image Rotation, and then one of the 90 degrees options. Then I'm going to go to my color picker, select a light gray color and then fill the canvas by pressing G, clicking on the canvas. I'll select the new layer button, select a brush. I'm going to go to my hard round brush. And then selecting the size I want to use. Go back to my color picker, pure black, and then we're ready to start painting. So I'm just going to use the hard round brush here and start clicking on the canvas to see what sort of marks I can make, what sort of shapes I can start plucking out. So whilst we're at this stage, let's take another look at the brushes in Photoshop, clicking on Shape Dynamics. And now I want to make use of the pen pressure on my tablet. So, pen pressure and size jitter, pen pressure on the angle jitter, and you'll see straight away the marks that I'm making with my brush tool has changed. You can see it tapering off at the end there when I use the brush, when the pressure has been released. You can just sort of play about with these settings further. See what sorts of settings you like best. But I'm just going to keep these settings and continue on with the exercise from here. So just another little mention about the color of the gray background and why I chose to fill it instead of working on a completely white background. It's a personal preference but it also gives us the opportunity to work in lighter shades of color as well, as it allows a better contrast than it would when we work on a pure white background. I also find that a pure white background can sometimes be a little harsh on the eye, but because we're only working with silhouettes for now, any color background will do. So creating shapes in this way is a really powerful technique for creating quick designs and quick shapes and just sort of working out the direction that you want to move into when creating your concept painting. You'll see this sort of technique used quite often for creature and character designs as well. And these principles can translate right back at designing silhouettes for environments too. So with this silhouette I'm not really thinking too hard about exactly what I want to create. I'm more interested in creating interesting shapes and just sort of seeing what it develops into. So, just starting off with thick, kind of bold, shapes. Just started to block out something using a general idea of what you want to create, whether it's a tree or a mountain or some sort of focal point for the painting. So, just playing about and using the eraser every now and again. The eraser I've set to the exact same setting as my hard round brush. So, just using that to find the shapes, and now I'm just using a smaller brush. You'll see that I'm starting to add smaller details and smaller lines here and there. What this does is, it adds a sense of scale to this silhouette. So the form it's taking on now, I'm thinking, is some form of ruined castle look. So with this vaguely in mind, I start to create more shapes and marks using the brush tool. So, yeah, I'm just, the way I think when I'm creating these silhouettes is, I sort of see the marks as as a sort of 2D clay. Using both the brush tool, the hard round brush tool and the eraser tool you see me using here, to mold it and shape it until I find something which is quite interesting. So, once I'm happy with that, I'm using the marquee tool here, selecting the silhouette, clicking Ctrl+C to copy it, and then Ctrl+V to paste it, and then using Ctrl+T to transform it and to move it about. Flipping it around and then just sort of seeing if I can make this shape any more interesting than what I had before. So, click Apply here. And then, again, just going back into the same process of erasing and mark making. I'm gonna select both layers and merge the layers there, by selecting both layers and right-clicking, you'll see the Merge Layer selection there. And then, yeah, just going back into the same process as before, thinking of the, using the mark, making the same wave bold strokes first and then leading more onto a smaller lighter brush mark, marks to make a sense of scale. And then once you're kind of happy with that, you can move onto the next thumbnail. It's important not to be too precious with these shapes. It's mainly just an experiment, you want to create as many shapes as you can, and what you'll find is, you'll have more shapes which are better and some shapes which are not so good. So, a large amount of shapes is the key. So I'm going to move on to my next shape now. I've just enlarged the canvas by using the crop tool on the left side of the screen. And then once the canvas is enlarged, we are all set for the next video. So in the next video, we're going to continue making shapes. And I'll just take you through a few more techniques and let's see what we come up with. See you there.


