
 Lessons: 15Length: 1.5 hours
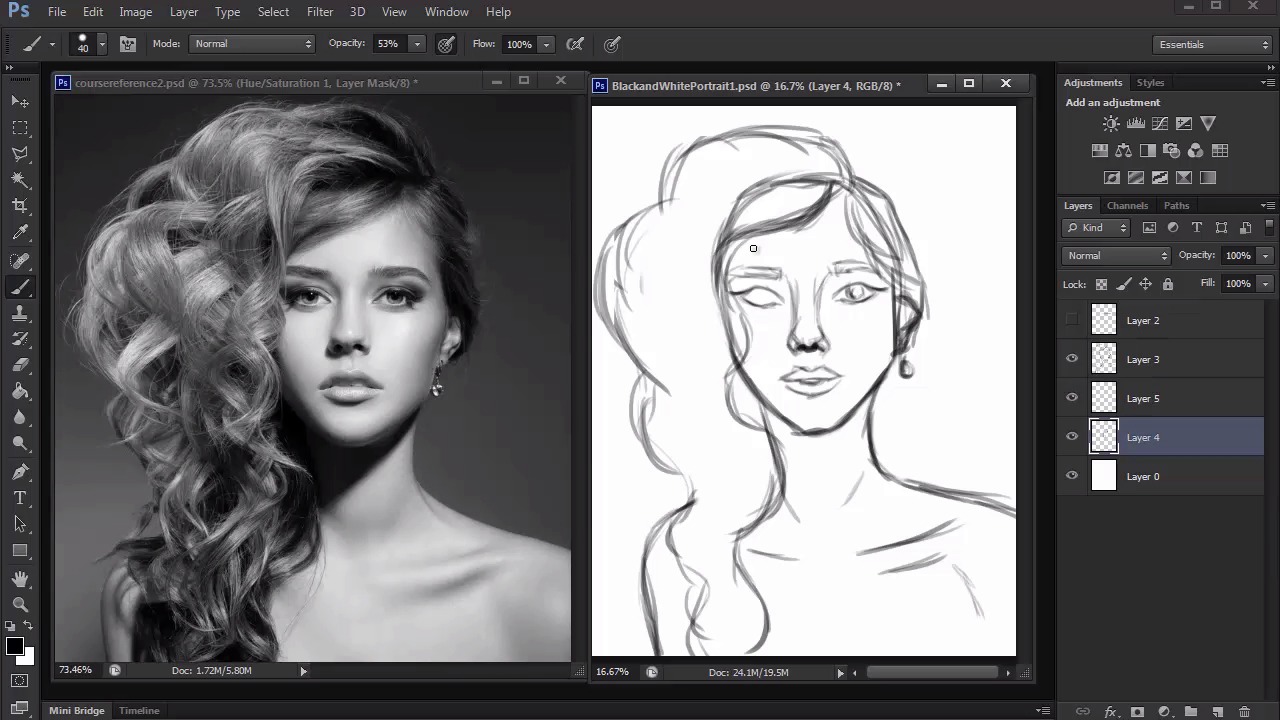
- Overview
- Transcript
4.1 Rough Sketch
Here we'll create a rough sketch of our reference to understand the placement of her features.
1.Introduction
1.1Introduction01:27
2.Setup
2.1Your Workspace02:36
2.2Creating Custom Brushes07:13
2.3Understanding Your References07:52
3.Paint a Simple, Colorful Portrait
3.1Sketch10:21
3.2Exaggerating the Features04:57
3.3Prep and Create Your Base Colors05:42
3.4Shading06:09
3.5Final Touches, Color Portrait09:27
4.Paint a Textured, Grayscale Portrait
4.1Rough Sketch06:14
4.2Creating a Textured Base05:44
4.3Shading With Textured Brushes06:21
4.4Polishing Your Portrait With Soft Brushes06:06
4.5Final Touches, Grayscale Portrait07:25
5.Conclusion
5.1Conclusion02:31
4.1 Rough Sketch
Hello. And welcome back to Digital Portrait Painting in Adobe Photoshop. My name is Melody Nieves. And for the first part of Chapter 4, we'll create the basic sketch for our second painting, a textured gray-scale portrait. Set up your workspace again similar to the way we had it for the previous portrait, with your reference right next to your document. Since I don't quite need it yet, I'll hide the navigator so I can fully concentrate on my sketch. Use the tapered brush we created earlier that we had designated for sketching. Set the color to black, the hardness to 100%, and make sure the option for pressure sensitivity is selected. Now begin sketching your reference. First I'll start off with a standard oval shape and use guidelines to indicate the position of her nose, eyes, and mouth. I like to take this initial process very slow. I'll use new layers to try out different details, because just in case I make a mistake, I'll still always have the basic shapes there. As you steadily move on to the face, adjust the opacity for the guidelines to around 30% so that they don't obstruct your view. Now you can really concentrate on her features. Once you get to the eyes, sketch one eye first. Then use the polygonal lasso tool to select the eye. Quickly copy and paste a duplicate of the eye onto a new layer. And flip the copy by going to edit, transform, flip horizontal. I really love this option for creating two perfect eye shapes. You can also use it for any other detail that requires a flipped duplicate, although I could easily finish one eye completely before flipping it. Sometimes I like to practice sketching in the rest of the details separately. With the eyes positioned into place, I move on to the rest of her face. Even with all the cheats and little tricks we have at our disposal in Photoshop, you should always take each step as a new learning opportunity for your art. Unlike the first sketch, I'm taking more of a looser approach with this one. Gray-scale portraits are much more flexible, so I know that I need just a good outline of each feature before it needs to be filled in with tone. Moving on to her brows, nose, and lips, you'll probably notice that I draw the mouth a little different from the picture. I really hate drawing teeth, so whenever there's a model with her lips parted, I typically redraw her mouth so that it's closed or with a slight part. This is one of those things that you just have to build your confidence with. But it also goes to show that you don't have to draw your sketch exactly like the model. Now let's move on to hair. When drawing full, curly hair, study each curl. Because I'm going for a loose and textured style, I block the hair into different sections according to the movement and fullness of that section. I start at the crown of the head, because that's where a lot of the hair movement is determined, and slowly work down. Curls are difficult sometimes because it's hard to tell where one curl ends and the other begins. Even if you don't replicate each curl perfectly, you can still create the general shapes that will make it similar in likeness. Try your best to avoid the temptation of drawing crazy and wild lines to represent the curls. Although they seem wild in nature, curls actually create a unique pattern and texture to the hair. Sure, it will take more time and patience, but as long as you know which curl shapes are in the forefront, you can focus on those first and leave the others for the actual painting. As I continue to work on the hair, I add a couple of wispy strokes to illustrate the strands. Because I know these sections will be painted over anyway, I try not to get too carried away with this step. I also began drawing lines to indicate areas where there is moderate to heavy shadow. In art, this technique is known as hatching. By sketching these lines in, not only does it give me a guideline of what to expect, but I'm also more prepared to take on potential problem areas around the neck and nose. Last but not least, I organize all the layers into a new group specifically for the sketch. Sometimes I do this to keep an extra copy of the sketch to refer to when I'm painting. I also notice that the sketch could use a little more tweaking. So I selected the group and control-T to free-transform it, making it slightly bigger, and rotating it to reflect the angle in the original picture. Finally, I merge all the layers together once I'm happy with the changes. Painting is a process, so don't worry if your sketch doesn't look like a spitting image of your reference just yet. If you'd like, you can always create a cleaner version of the sketch like we did with our initial color portrait. But since we still have plenty of room for alteration, during the actual painting I'll keep the sketch, because it will provide a great base to apply more texture. Stay tuned for more in our next lesson as we unfold the process of this painting and apply a textured base using our own custom brushes.


