- Overview
- Transcript
4.5 Final Touches, Grayscale Portrait
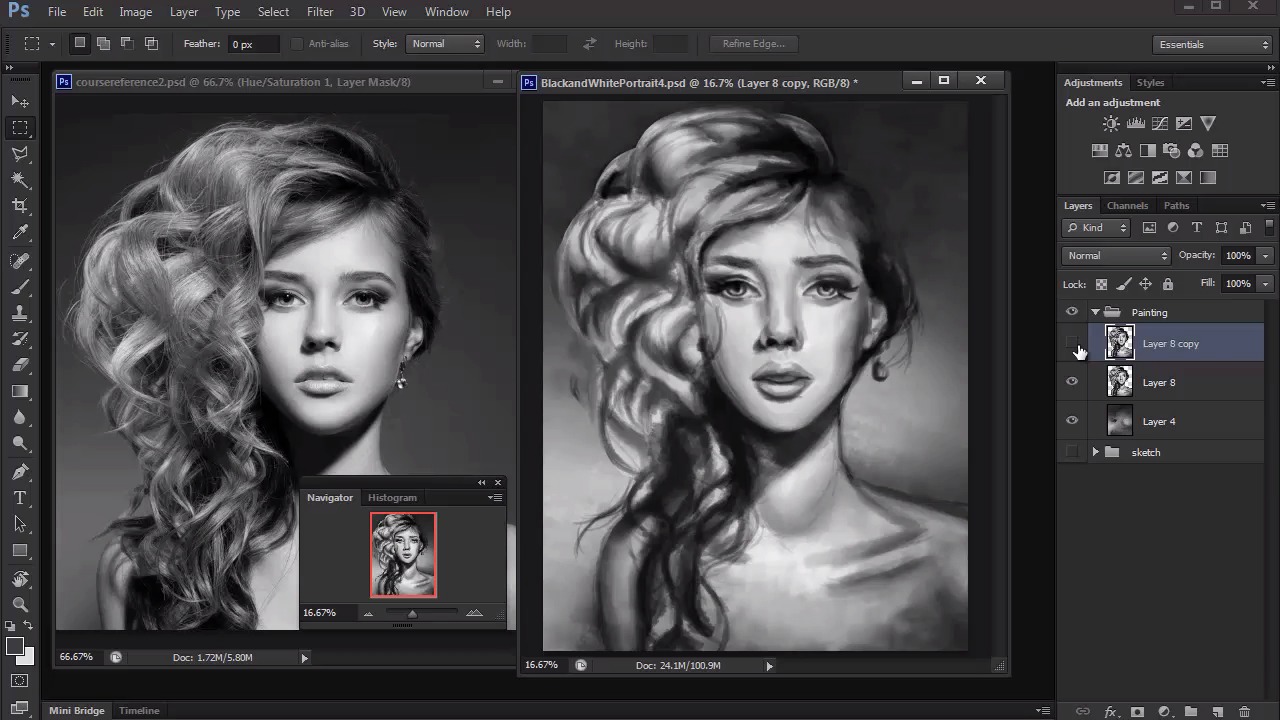
Let's finish this painting with a few final touches. We'll check and modify the symmetry in Liquify, and add an adjustment layer for added intensity and impact.
1.Introduction1 lesson, 01:27
1.1Introduction01:27
2.Setup3 lessons, 17:41
2.1Your Workspace02:36
2.2Creating Custom Brushes07:13
2.3Understanding Your References07:52
3.Paint a Simple, Colorful Portrait5 lessons, 36:36
3.1Sketch10:21
3.2Exaggerating the Features04:57
3.3Prep and Create Your Base Colors05:42
3.4Shading06:09
3.5Final Touches, Color Portrait09:27
4.Paint a Textured, Grayscale Portrait5 lessons, 31:50
4.1Rough Sketch06:14
4.2Creating a Textured Base05:44
4.3Shading With Textured Brushes06:21
4.4Polishing Your Portrait With Soft Brushes06:06
4.5Final Touches, Grayscale Portrait07:25
5.Conclusion1 lesson, 02:31
5.1Conclusion02:31
4.5 Final Touches, Grayscale Portrait
Hello, and welcome back to digital portrait painting in Adobe Photoshop. My name is Melody Nieves, and this is the final lesson for chapter four where we'll fix some symmetrical errors and apply the final touches to our black and white portrait. When we're painting, it's almost like we experience tunnel vision for artists. This tunnel vision causes us to see our painting without any errors until we’ve had enough time away from it. After long periods of working on one painting, it's important to step away from the computer every now and then in order to come back to your work with fresh eyes. When you finally do, you'll start to notice all the areas that you've neglected and any trouble that you've had in achieving likeness to your model. Realizing that your painting doesn't look like your model can be very disheartening for some artists, especially if the painting was specifically commissioned to look exactly like your subject. And some may even take this as a sign that they aren't good enough to create digital art. Just that easily, all the work we've done becomes a waste if you give up on your painting, but I'm here to tell you that every single painting you work on is fixable in Photoshop. The way that we'll be able to do this is by using the liquefy filter. That's right, liquefy is most commonly known to be the tool that helps photographers nip and tuck beautiful celebrities, while pushing the bounds of what's acceptable for retouching in the photography world. But here, we're going to use liquefy to push the structure of our model's face back into a position that better emulates her actual face. Take a good look at your reference first before doing this step, and memorize the areas you'll need to focus on because we won't have it with us when we go to liquefy. You'll also need to make sure that all of the layers dedicated to the model are merged together because we won't be able to make changes if there's more than one layer. Lastly, right click the model layer to create a duplicate. By working on a duplicate we can make sure that we always have a copy of the original layer to fall back on just in case. Once you're ready, select the layer with the problem areas and go to filter, liquefy. In order to make our painting look more like the reference, we'll be using the forward warp tool to push both sides of her face to create more balance. The main problem area is the eyes because they are currently too far apart. The key to working well in liquefy is to use a large brush to make big structural changes while using a smaller brush to tweak specific details up close. With a large brush, you can use the forward warp tool to straighten the nose and make it more centered on the face. You can also use the same tool to adjust the hair and make some sections more voluminous. After briefly looking at my reference again, I go back in to liquefy two more times to make more adjustments before I'm happy with the changes. Sometimes in your hesitation you might not push details enough out of fear that you'll mess up your painting, but eventually you'll see that you have to take this leap in order to achieve better likeness. And if you really need to concentrate on some features like I did with the eyes and nose, simply use the marquee tool to select that area so that it's the only part you work on in liquefy. You can keep going back into liquefy until you feel you've made significant improvements on the symmetry and facial construction of our model. The only downside is that the more you warp the painting, the more the painting starts to blur. So you'll definitely have to go back and repaint certain areas over again to sharpen them. Let's see the different between our initial painting and the changes we've made by turning off the visibility of the liquified layer. It's a pretty intense difference, right? And even though we've essentially warped her face, it looks so much better on the liquified layer. If you want, you can just hide the original face layer or delete it to save file space. Now, let's focus on cleaning up this painting. In order to do this, we'll need a round brush with a high opacity and a crisp edge. Since I'll be working on the hair first, I'll make sure the shape dynamics are set to pen pressure so that the brush will have a beautiful, tapered end. Create wispy strands that'll give the hair a more life-like appeal and will show that it isn't all just one block of hair on her head. To keep in line with the textural effect we've already set in place, allow yourself to be a little messy with the hair, and don't be too overly critical about making sure that everything looks perfect. By being a little more free with this step, we can really add great character to the portrait by allowing some room for imperfection. Continue to paint the hair, and focus on bringing out the highlights by only painting the highlighted strands of hair. Again, you don't need to make a million hair strands to show that there is great sheen and volume. So it's okay to be a little more thoughtful with this step. And because we've spent so much time in liquefy, it's important to go back over the face and re-sharpen her facial features while adding more details to complete your painting. This is where adding final details like shine and even more highlights come into play because they really make the painting come alive. One of the things I personally like to do is to paint random dots to add texture to the paintings. This step is super easy because first you paint them solid, and then you use the eraser tool to lift up some of that intensity and make blend better into the background. I also use a soft run brush to add more spots of light behind the model to create even more dynamic lighting. With the finish line already here, let's add the final adjustments. First, merge all the layers together, then create a duplicate for us to alter. Go to filter, blur, tilt shift, and add an angled blur of 17 pixels for a more dynamic shot. This step will slightly blur the edges of our painting and will create an interesting illusion that plays on depth of field. Use the eraser tool to reveal any areas underneath that you don't want effected by the blur. Last, but not least, add a new adjustment layer for color balance. We still want to keep this a black and white portrait, but a little color balance will help to punch out these tones. Select color balance from the adjustments panel to create a new adjustment layer for nondestructive editing. Adjust the shadows to favor cooler undertones and the midtones and highlights to favor warmer ones. With this last step, we have officially completed our second digital portrait for this course. I hope you've enjoyed creating this dynamic, digital painting with very few brushes and limited adjustments. I also hope it gave you a little more confidence to keep working on your painting, even when you run into troubled areas. And to truly trust that Photoshop has all the features available to make your painting better. This concludes chapter four. But stay with me for our final lesson to quickly recap everything we've learned.


