
 Lessons: 15Length: 1.5 hours
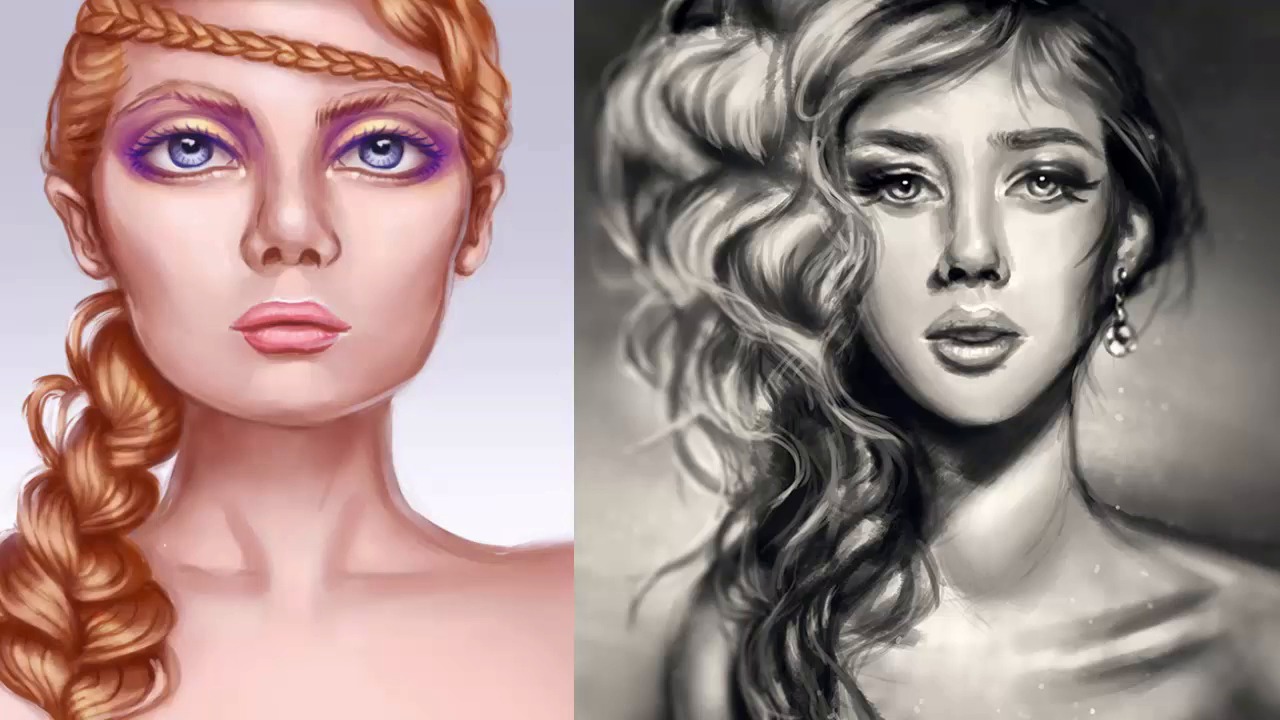
- Overview
- Transcript
5.1 Conclusion
I hope you've enjoyed learning about digital portrait painting in Adobe Photoshop. Let's take a look at everything we've learned along the journey of this course. Memorize these techniques and you’ll be on your way to creating beautiful digital portraits in no time! My name is Melody Nieves and from all of us here at Tuts+, thanks for watching!
1.Introduction
1.1Introduction01:27
2.Setup
2.1Your Workspace02:36
2.2Creating Custom Brushes07:13
2.3Understanding Your References07:52
3.Paint a Simple, Colorful Portrait
3.1Sketch10:21
3.2Exaggerating the Features04:57
3.3Prep and Create Your Base Colors05:42
3.4Shading06:09
3.5Final Touches, Color Portrait09:27
4.Paint a Textured, Grayscale Portrait
4.1Rough Sketch06:14
4.2Creating a Textured Base05:44
4.3Shading With Textured Brushes06:21
4.4Polishing Your Portrait With Soft Brushes06:06
4.5Final Touches, Grayscale Portrait07:25
5.Conclusion
5.1Conclusion02:31
5.1 Conclusion
Hello everyone, and welcome back to digital portrait painting and Adobe Photo Shop. My name is Melody Nieves, and it's been my absolute pleasure taking you along this journey to achieving better digital portraits. For the final chapter of this course, let's take a quick recap of everything we've learned thus far. Creating digital portraits is an incredible process that pushes you to strengthen your foundation. In this course, we learned the importance of starting with a solid base while allowing Photoshop's tools to assist you in creating two spectacular portraits. In chapter two, you learned how to create your own custom brushes, and the simple ways you can set up your reference photos to help you achieve better likeness. Make sure to keep these brushes in your painting arsenal, so you'll always have great brushes to turn to. Our first portrait in chapter three took us on a colorful journey, while our second portrait in chapter four, explored the drama created by intense lighting and texture. Whether you prefer to paint in grayscale or color, it was important for me to show you that you can achieve both paintings using very similar techniques. In fact, from the very beginning, we were able to use either the same concepts or tools to create our portrait basis, refine both their details, and even correct simple mistakes. And speaking of mistakes, never be afraid to make one. We often hold out on creating new art because of the fear that our art will somehow come out bad, but I hope with this course that you're now able to see that painting is an incredibly thoughtful process. You can make plenty of mistakes while allowing the tools and resources available to you in Photoshop to swiftly correct any blunder. After all, the mark of an improved artist is not in achieving perfection every time, but recognizing your mistakes while knowing the simple steps it takes to fix them. I certainly hope you've enjoyed trekking through this course with me. Remember to always take your time. And stop often to review your work, and truly internalize your progress. If you're looking for more information or inspiration on digital painting, feel free to visit my instructor profile here on tuts+. I often cover topics related to digital painting where you can see most of these tips in action. And with all that said, good luck on your creative journey! I'll see you next time, here on tuts+.


