
 Lessons: 16Length: 1.3 hours
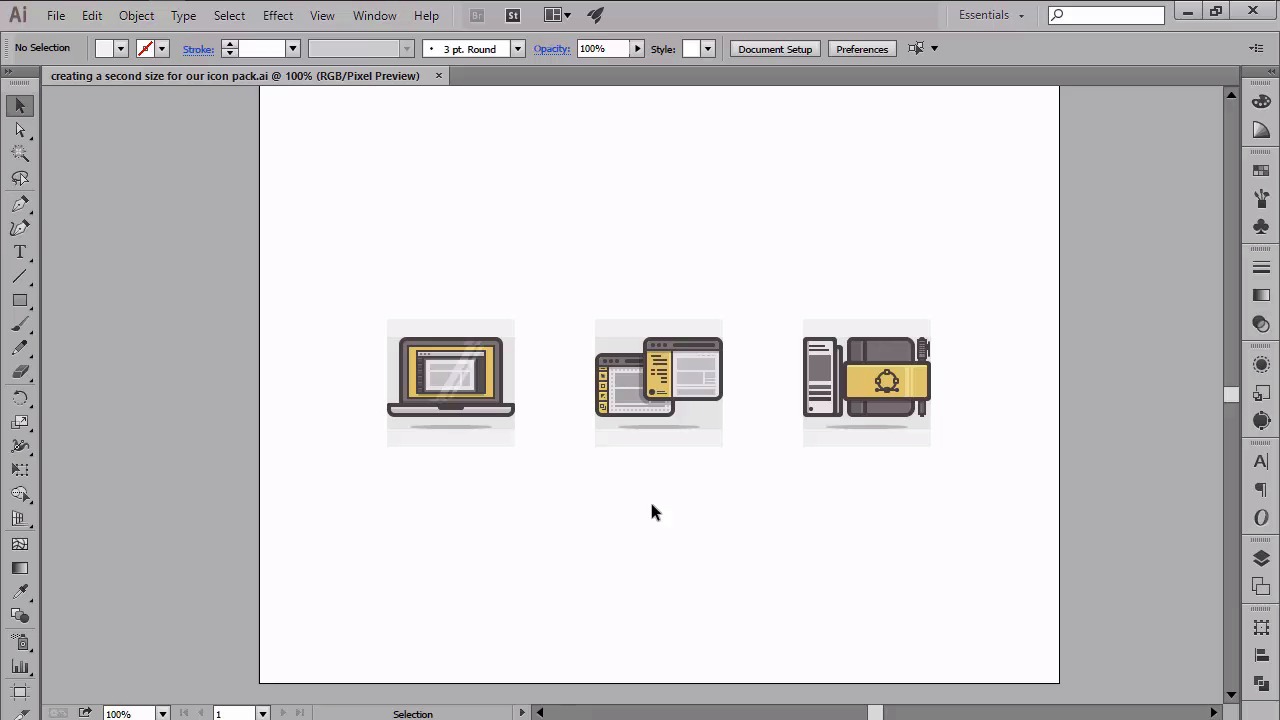
- Overview
- Transcript
4.7 Creating Size Variations
In this lesson we will talk about icon sizes, and see how we can create variations of the ones we've created using the powerful Scale Tool.
1.Introduction
1.1Introduction01:37
2.Understanding the "Pixel-Perfect" Concept
2.1Understanding How Illustrator Works02:26
2.2Defining the Concept04:09
2.3Advantages of Using a Pixel-Perfect Workflow03:01
2.4Introducing the Grid06:29
2.5Correct Use of Measurement Units06:09
3.Pixel-Perfect Workflow
3.1Adjusting Illustrator for a Pixel-Perfect Workflow04:49
4.Creating the Icons
4.1Size and Consistency05:54
4.2Creating the MacBook Icon06:30
4.3Creating the Window Workflow Icon06:03
4.4Creating the Designer Resources Icon06:11
4.5Adding Colors06:56
4.6Adding Finishing Touches: Highlights and Shadows08:23
4.7Creating Size Variations05:16
5.Saving for the Web
5.1Exporting the Icons03:16
6.Conclusion
6.1Conclusion01:32
4.7 Creating Size Variations
Hi. And welcome back to Creating pixel perfect icons in Adobe Illustrator. My name's Andre Stephan. And we are going to lesson 4.7, creating size variations which is the last one from the chapter. So, in the previous video, we learned how to create a color scheme using the blend tool and saw how we can easily apply icons using the eye dropper tool. In today's lesson, we will see how we can create a second size variation of our finished icons using the powerful scale tool. So, at this point, we are done working on our little icon set, which if you remember, was designed with the intent of being used for website. Now, since in the real world, you will almost always have to create at least two size variations for your icon pack, I wanted to show you a nice and simple way of achieving just that. Before we start, I wanted to remind you that no matter the case scenario, when you start working on an I compact, you should always establish the sizes that you'll be using for the final product. This is really important, since you will always want to start from the smallest size and build up from there. Why, you might ask? Well, if you remember what we discussed in lesson 2.5, correct use of measurements, you should now know the key role the numbers play when creating a piece of perfection in mind. So for example, if you were to create a 64 by 64 pixels icon, that has elements without value numbers, and you then decided that you also want to add a 42 by 42 one to that pack, Well, let's just say that things won't go as smooth as you would like them to. That's because, as you know, cutting our numbers in half will result in common delimited values, which in the end will break your design, since the shapes won't be able to snap back to the pixel grid. In our case, we actually have odd numbered values from the shapes of our icons, but that's only because I decided to go with 128 by 128 as the base size, which we'll really use to create a larger size variation. So, yeah. If for some reason we were to put the smaller size variation of 64 by 64 pixels, our icons wouldn't break, since their shapes would snap off the pixels res. But since we won't, our icons will be just fine, since when doubled, odd values always become even ones. They are being set. Let's get back to our project, and take a look at the proper way of treating a larger size variation using the scale tool. For those that usually tend to select and then enlarge their shapes by dragging, well, just don't. As I've already demonstrated, this will always break a pixel perfect design, since the snapping won't be able to keep up. The best way to create size variations is using the scale tool. If you never used the tool before, well, don't worry, since things are pretty straightforward. Using a percentage value, you have the power of easily shrinking or enlarging your designs. Well, while the process might seem simple, there's a small catch. You have to use a specific value increments, and some percentages will break your designs in a similar manner to the dragging method. First, let's try the copy after the icons in grids, which we'll then position at the safe distance towards the bottom of the originals. Now, with all the copies selected, right click, and then go to transform skill. As you can see, a small pop up window immediately appears, giving you a couple of options. The first one is uniform, which as you might have guessed, scales the selected shape both horizontally and vertically. Then, you have non-uniform, which allows you to individually secure the axis of the shape. Now, you might be wondering when to use one option over the other. Well, the answer is pretty simple. If you have a larger number of shapes that need to be scaled, always go with uniform. If you have just one shape or a couple of identical copies that you need to scale either horizontally or vertically, then you might need to use the non-uniform option. No matter the option you chose to work with, you should always make sure that the scale rectangle corners and stroke and effect options are checked, so that your shapes will scale correctly. That being said, let's see which percentages work best when dealing with up-scaling. So for example, let's say that we want to put a second size of 256 by 256 pixels, so double the size of our base icon. Using the transform scale uniform option, simply enter 200% into the value field, and then click OK. As soon as you click the OK button, the icons will have doubled in size. But are they still pixel perfect? Let's switch over to the pixel preview mode, and see if things scaled correctly. As you can see, things actually went really well. All our shapes being perfectly snapped to the pixel grid. The explanation is quite simple. Since 200% is 200 divided by 100, so 2, you've actually told Illustrator to double the number count of our pixels, which resulted in all around even values. That doesn't mean you can't use odd values. So for example, 300%. You can use any percentage value as long as it's in the round hundred range, so values such as 200, 300, 400, 500, et cetera. This is because no matter the nature of the number, Illustrator will always multiple the pixel common value that you assign inside the scale tool, which can result in either even or odd numbers. But since you're up-scaling, it doesn't matter, since your design will remain pixel crisp. Now, if you work these auto percentage values, so for example, 160% things will get broken. This is because 160 divided by 100 is 1.6, which reverses the pixel count somewhere in the double range, which in the end gives us comma delimited values. So always use round hundred values when up-scaling, and you should be fine. With that being said, we have now concluded the final lesson from this chapter. Stay tuned for the next one, when we'll talk about the process of exporting our icons.


