
 Lessons: 16Length: 1.3 hours
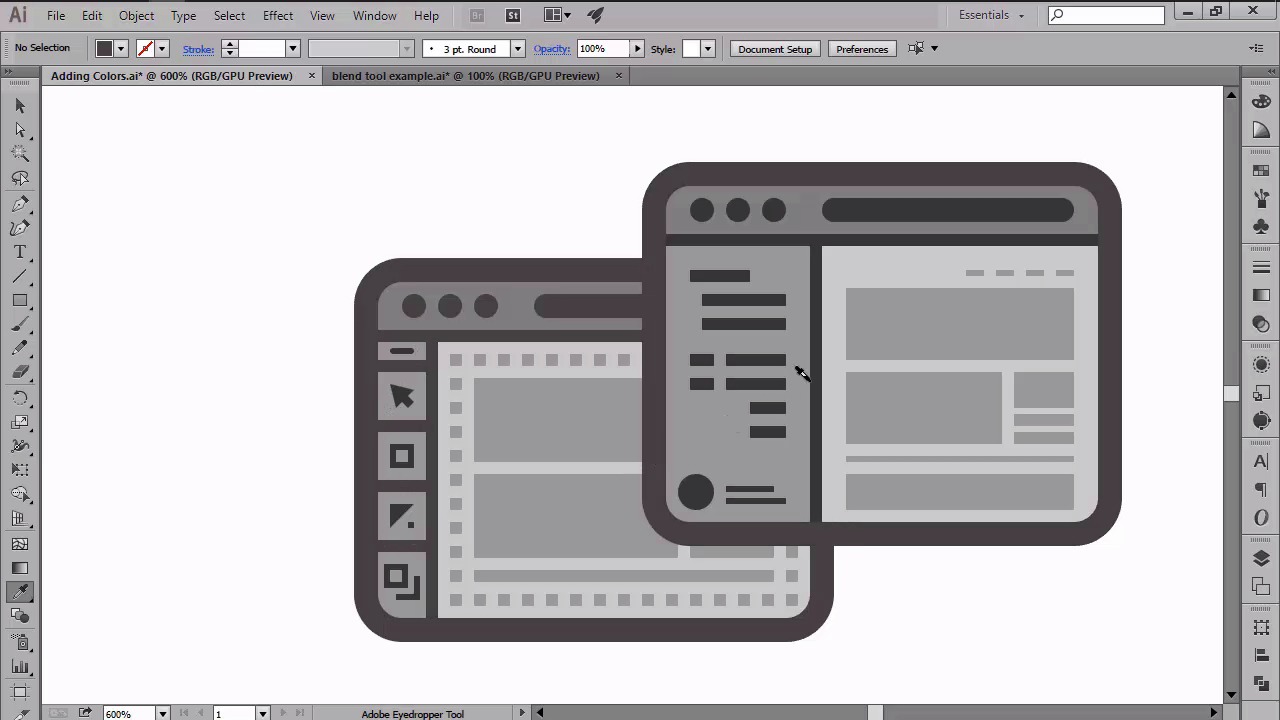
- Overview
- Transcript
4.5 Adding Colors
In this lesson we will learn how to create a custom color palette using the Blend Tool, and see how we can use the Eye Dropper Tool to quickly color our icon set.
1.Introduction
1.1Introduction01:37
2.Understanding the "Pixel-Perfect" Concept
2.1Understanding How Illustrator Works02:26
2.2Defining the Concept04:09
2.3Advantages of Using a Pixel-Perfect Workflow03:01
2.4Introducing the Grid06:29
2.5Correct Use of Measurement Units06:09
3.Pixel-Perfect Workflow
3.1Adjusting Illustrator for a Pixel-Perfect Workflow04:49
4.Creating the Icons
4.1Size and Consistency05:54
4.2Creating the MacBook Icon06:30
4.3Creating the Window Workflow Icon06:03
4.4Creating the Designer Resources Icon06:11
4.5Adding Colors06:56
4.6Adding Finishing Touches: Highlights and Shadows08:23
4.7Creating Size Variations05:16
5.Saving for the Web
5.1Exporting the Icons03:16
6.Conclusion
6.1Conclusion01:32
4.5 Adding Colors
Hi and welcome back to creating pixel perfect icons in Adobe Illustrator. My name is Andres Stefan and we are currently in lesson 4.5, adding colors. So, in the previous lessons, we learned how we can use illustrators basic shapes to create our little icon set. During the building process, we saw the three pillars of a pixel-perfect workflow in action so that we got to understand how precise positioning carefulness of measurement, and sharp details affect the final outcome of our designs. Now, since at this point our icons are basically done, in this lesson we will start focusing on colors by first creating a color palette which we'll then apply using the powerful eyedropper tool. Before I go on and reveal the colors that we're gonna be using for our icons, I first want to show a nice way for using color schemes of your own, using the Blend tool. If you've ever used the Blend tool before, you probably know that as the name implies, the tool is normally used to blend different colored objects so that in the end you have a smooth color transition between them. The way it works is quite simple. You create two or maybe multiple shapes, depending on your needs, and color them using different colors or shades. Then using the blend tool, Illustrator magically fills in the missing colors, stretching from the first to the last shape. Well, that might have been its initial purpose, but as with most of Illustrator's tools, you have the power of doing so much more with it. One option being that of creating color palettes. So, let's take a couple of seconds and see that tool in action by creating a quick color palette. First, we have to create two objects and establish a starting and ending color which we'll then apply to them. I usually tend to use squares since they are easier to create and align to one another. Once I have my shapes and colors, I make sure that I have a fair distance between them. And then I go over to Object, Blend, Blend Options, and then I set a distance option to Specified Steps. And this will allow me to enter the number of steps or exactly colors that I want Illustrator to create in between my two shapes. Once I entered the values, so for example. Simply go to the object blend menu again and click on Make. As you can see, the software automatically raised my blend giving me a nice smooth transition which I can then expand in order to properly align the squares next to one another. It's as simple as that. Using just a couple of steps I've managed to easily create a nice looking color palette that I can then apply to any project. That being said, let's pick up from where we last left out. And using the rectangle tool, let's create nine larger squares, which will then vertically align next to one another, and then position somewhere above our board. As you can see, I already have mine positioned and set up so I can easily guide you through the process of assigning the colors to your own shapes. I've also added the short description containing the hack values that we'll be using in order to create the color palette. Now, select the first square and then using the color tool found on the right tool bar, assign the custom color by entering the hacked value found on my square. Once you are done, move on to the other squares and do the same. Okay. So at this point, you should have the exact same color scheme that I have, which means that we can now move on to apply them onto our icons. Since our risen guides would distract us, I recommend we hide the layer that they're on so that we can easily apply the colors. We will be using the eyedropper tool to pick and then apply one color at a time onto the composing shapes while holding down the Alt key. So, let's start with our first color, the darker gray and apply it over the outlines. The MacBook stop our buttons The workflow button pictograms. The code lines. And some part of the Pantone book and pen. Once you're done, move on to the second color and apply to the MacBook's window buttons Then its right side section. And one of the vertical lines of the Pantone book. Use the third square to color the notebook's hat band and circle pattern. And the pen's body. Then, move onto the fourth color and apply to the Macbook's lid. The window top bars. The main color from the Pantone book. The pen's cap. And the notebook's cover. Use the fifth square to color the new elements of the first workflow window. Select the color from square number six and use it for the MacBook start bar. View our elements and bottom. The first window grid. And the second window's UR elements. And finally, the second page of the Pantone book. Use square number seven for the MacBook's interface background, For the workflow backgrounds, And main section of the Pantone book. Finally, use the eighth color to add accents to some of the composing elements of our icons. You might have noticed that we have one last color that we haven't used. Well, that's because I thought it would be nice to give you a second option for the accents. At this point, we should be done with the coloring process. Stay tuned for the next lesson when we'll start adding some finishing touches to the icons by adding the highlights and shadows.


