
 Lessons: 15Length: 1.6 hours
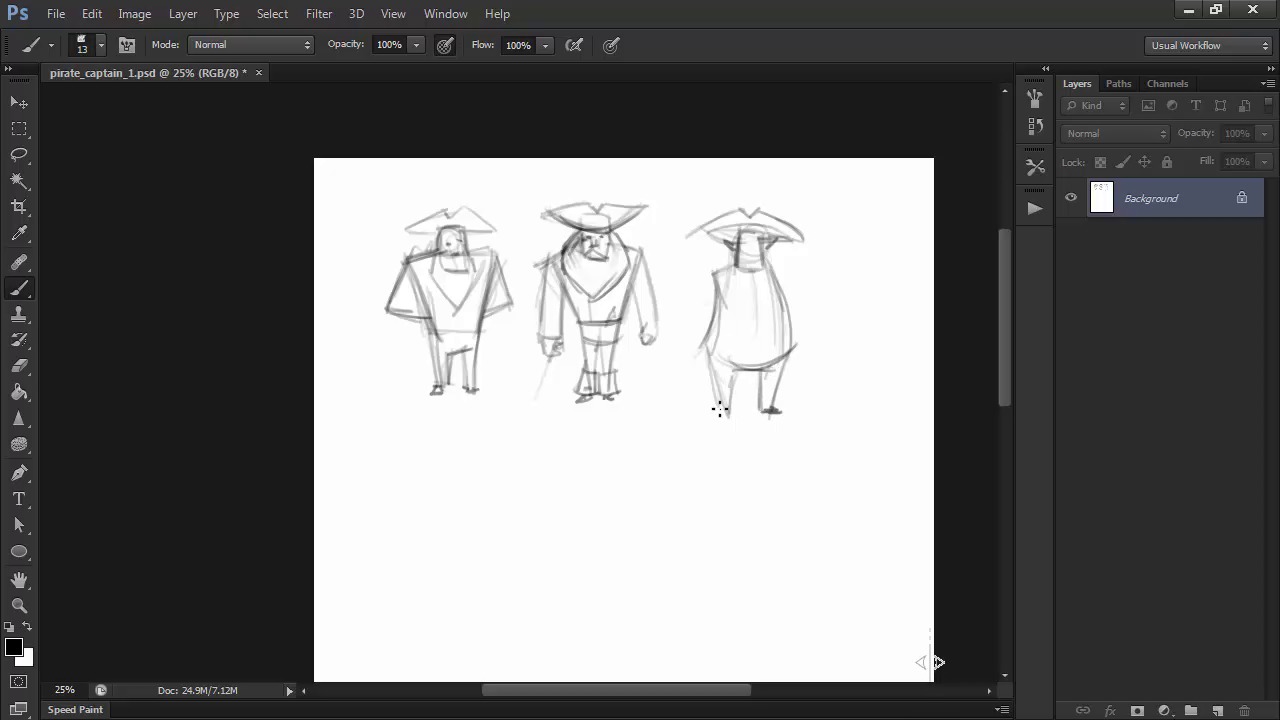
- Overview
- Transcript
3.1 General Figure and Pose
In this lesson we'll come up with a few different thumbnails for our character, so that we can figure out what we want him to look like without going into too much detail.
1.Introduction
1.1Introduction01:51
1.2Tools and Resources01:34
2.Creating a Cute Pirate Character
2.1General Form and Sketching06:07
2.2Detailing06:32
2.3Line Art07:10
2.4Base Colors04:55
2.5Light, Shadow, and Texture09:01
3.Creating a Tough Pirate Captain
3.1General Figure and Pose05:37
3.2Detailing the Figure08:05
3.3Expression09:00
3.4Detailing the Head04:55
3.5Detailing the Body08:15
3.6Line Art and Base Colors11:09
3.7Shading and Texture09:05
4.Conclusion
4.1Conclusion01:31
3.1 General Figure and Pose
Hi, welcome back to Illustrating Personality In Character Design. My name is Ioana Sopov and this is Chapter Three, Lesson 3.1, General Figure and Pose. In this lesson, we'll go through one of the most important yet often overlooked or underestimated stages in the process of designing the character. It's a stage that I like to refer to as thumbnailing, where we'll try to come up with different rough versions of our character's figure and pose without worrying about any sort of detail or anatomy. So let's jump right in, shall we? We know that this character is going to be a pirate captain. What do we want our character to be like? This is the first and most important question. Well, I was thinking about an opposite nature from our previous little pirate. This captain is a rough and almost intimidating figure, who lays down the law on his ship. He's tall, broad shouldered, a little stark. This means sharper angles, straighter lines, and a sort of trapeze body shape. This body type is most often associated with masculinity since it roughly encompasses what a muscular, male body looks like. Like I said in previous lessons, contrast is the best tool to find pleasing shape combinations. So let's give him broad shoulders and tiny feet. So taking into account these traits, we'll want to use a basic frame to figure out what we want our character to roughly look like. Notice that I'm really not concerned about details or anatomy. I just freely sketch out some proportions and poses with just hints of features that I think this character would have in the future. The key to successful thumbnailing is to let your lines be loose and relaxed. Don't think about the details, and just try to think of your character as a basic shape that you only vaguely define at this point. Thinking about details will always complicate the initial decision making process. Reducing your character at first to just a few basic shapes or contours will not only help you explore different options for your character but will also make your design look well rounded in the end. As all the other parts and details will be subordinate to this primary shape. This is often times the first piece of information that the viewer will process subconsciously about your character. Is he tall or short, muscular or soft, thin or thick? All of these visual queues translates into the character's personality before his expression, voice, or actions will come into play. The idea here is to explore the possibilities of this character's design. The more options you create for yourself, the better your decision making process will be in the end. And thus, your resulting character as well. Even though I want to go for a broad and sharp figure, I let myself experiment with smoother, curved lines just to see if that is not an option that I maybe want to take. I try a few different angles and shapes, but each step is helping me figure out how I want the final character to look like. You can see slight progress in the detailing of the figures even between thumbnails. This is because with each step that I take, I am closer to finding the shapes that I'm looking for. This basic silhouette, or shape of the character should stand out among multiple characters and will make it easily recognizable if you're designing a character for a comic book or a graphic novel. Where you will most likely have different compositions, different angles and distances, Notice how I'm also using the help of action lines, like for our first pirate character, in order to better establish the pose of the body. Even though my character is composed of more rigid shapes because of his stark personality, his body will have a curved action line. This adds dynamism to the pose. Even if the pose might seem static, your action lines will never be straight. In order to capture the natural positions of the human body, the curvature of the lines will be exaggerated into the drawings, so don't be afraid to do so. We are, after all, talking about a wacky character. From thumbnail to thumbnail, don't just vary the general proportions and the angle at which you're drawing your character. Try to also play around with the proportions of the elements like the size of the head or beard, the length of the leg, and so on. There isn't a maximum limit to how many thumbnails you should do before settling on one, but after taking the first one and refining it a bit, I settle for the sixth one as my preferred choice. I recommend trying to come up with at least three for each character though, just so that you can have some options to choose from. Now, that we found our character's general look and pose, it's time to move on to detailing his figure even further. Join me in the next lesson for this next important step in defining our hardy pirate captains anatomy.


