
 Lessons: 16Length: 1.4 hours
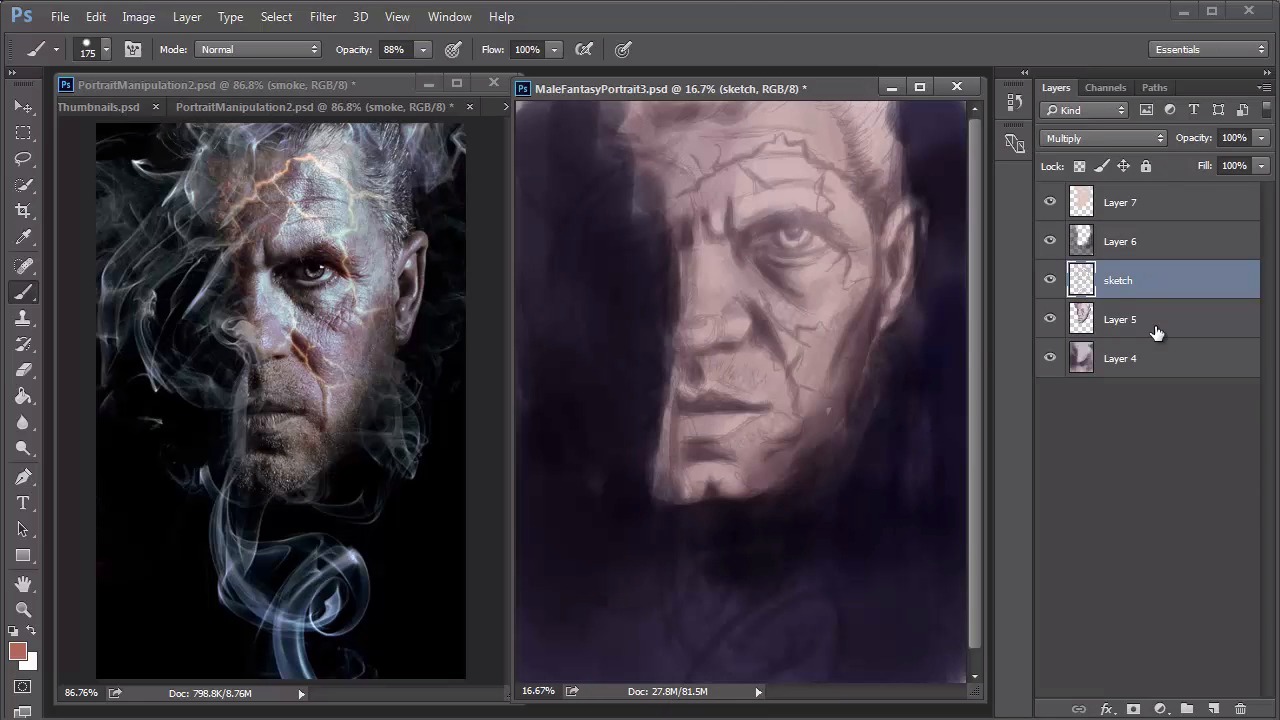
- Overview
- Transcript
3.4 Male Portrait: Shading
Time to add more colors! Transition out of your monochromatic palette and continue developing the shading and overall lighting of your portrait by incorporating layer blend modes into your work. Watch your painting transform to a color scheme similar to the original photo manipulation.
1.Introduction
1.1Introduction01:37
2.Set Up
2.1What You'll Need06:25
2.2Developing Strong Concepts06:29
2.3Manipulating Your References: Male Portrait06:30
2.4Manipulating Your References: Female Portrait05:59
3.Paint a Male Fantasy Portrait
3.1Male Portrait: Sketch05:49
3.2Male Portrait: Thumbnails for Light and Shadow05:56
3.3Male Portrait: Create a Base Painting05:11
3.4Male Portrait: Shading05:40
3.5Male Portrait: Final Touches05:13
4.Paint a Female Fantasy Portrait
4.1Female Portrait: Sketch05:15
4.2Female Portrait: Thumbnails for Light and Shadow05:01
4.3Female Portrait: Create a Base Painting04:12
4.4Female Portrait: Experiment With Shading05:49
4.5Female Portrait: Final Touches05:33
5.Conclusion
5.1Conclusion02:14
3.4 Male Portrait: Shading
Hello, and welcome back to Fantasy Digital Portraits. My name is Melody Nieves, and it's time to add more colors to our male fantasy painting. In this lesson, we'll take the monochromatic palette painted in lesson 3.3 and apply new colors using different blend modes. We'll continue the shading and push it as far as it can go before we need to paint the final details. If you remember, I painted different values of purple for this portrait because I wanted to establish the correct lighting scheme for this composition. Similarly, you can do the same by painting in grayscale, but sometimes I feel like the grays wash the colors out. However, using values of another color instead, like this tinted purple, for instance, will add more to the overall painting. To change this painting from a monochromatic palette to a colorful one filled with realistic colors, I'll have to add color onto new layers set to different blend modes. First, I use a dark blue color to fill the background completely on a new layer. Initially, I had it set to linear burn, but after cycling through the different blend modes I decided to set it to multiply, instead. This time I manually adjusted the color to be darker by going to hue and saturation, and decreasing the lightness. Then I added another new layer set to multiply, and chose a yellowy tan color to paint the skin. By using hue and saturation to adjust the colors, you can find the exact color you need faster than ever before. With the final adjustments all set, here we have the perfect base for the male fantasy portrait. These colors are a great start, and since the lighting scheme is all figured out, the rest of the shading process should go much faster. This was actually the first time that I ever tried this technique of using a monochromatic palette for light and shadow that incorporated colors other than gray values. Who knew that this method provides the prefect setup for your paintings? I think I actually like it much better than painting in grayscale because you can transition easily to any color scheme you want, and I like how the purple tones underneath add even more to the overall palette. For now, the only thing left for us to do is to continue tweaking the colors. It's important to keep trying to get the colors as close as possible to the photo manipulation, or at least a realistic color scheme, before moving on to details. Looking at the current base, I can already tell that I'll need warmer colors for the skin tone and the fiery cracks along his face. To save on file space, I merge some layers together and separate the color effects into a new group dedicated to color. On a new layer set to multiply, I pick a bright orange color and begin painting it softly around the face. And just with this one change, the colors already start looking more like skin. But you should try not to overdo this step. Allow some of the base to peek underneath for a dynamic result. I also start painting the fiery cracks into his skin using a bright reddish color. It's always a good idea to have a game plan as you paint. In this instance, you may notice that most of my layers are set to multiply because this means I'll be able to merge them easily together. Not only will it help me save file size, but I also get to experiment on new layers without losing anything I already like. To tweak the colors even further, I added a new adjustment layer for color balance, making sure to focus on bringing out warmer tones in the highlights. After a bit of painting, I added a new layer and set it to overlay. Using a light tan color, this layer helps me add more light to the eye and forehead area. Usually, I like to add highlights towards the end of a painting, but sometimes it's good to start early. Even though we started off with a textured brush, make sure that you are now using a solid one to attain smoother strokes. Using adjustment layers is a surefire way to getting closer to the colors you desire, so I added a new adjustment layer for curves. If you experiment with the different color channels, you can get an interesting color effect, like the one seen here after adjusting the green and blue channels. For more realism, let's paint even more texture. Selecting the dry brush from the preset panel, I use it to add bright highlights to the forehead and jaw line. Because he has a light beard, or five o'clock shadow, this texture will help to mimic that effect in those areas. If you're anything like me, you probably have a hard time keeping yourself from experimenting with color. Naturally, I continued to do so, setting a new layer to soft light so that I could make the skin tone as realistic as possible. Following up with some light painting, I added soft shadows for more dimension to his face. This last step concludes this lesson. Looking at the result, would you ever believe that this was once a monochromatic palette? The only thing we have left to do is add the final details and highlights. So join me in the final lesson for chapter three, where I'll show you how to finish this fantasy digital portrait.


