
 Lessons: 16Length: 1.4 hours
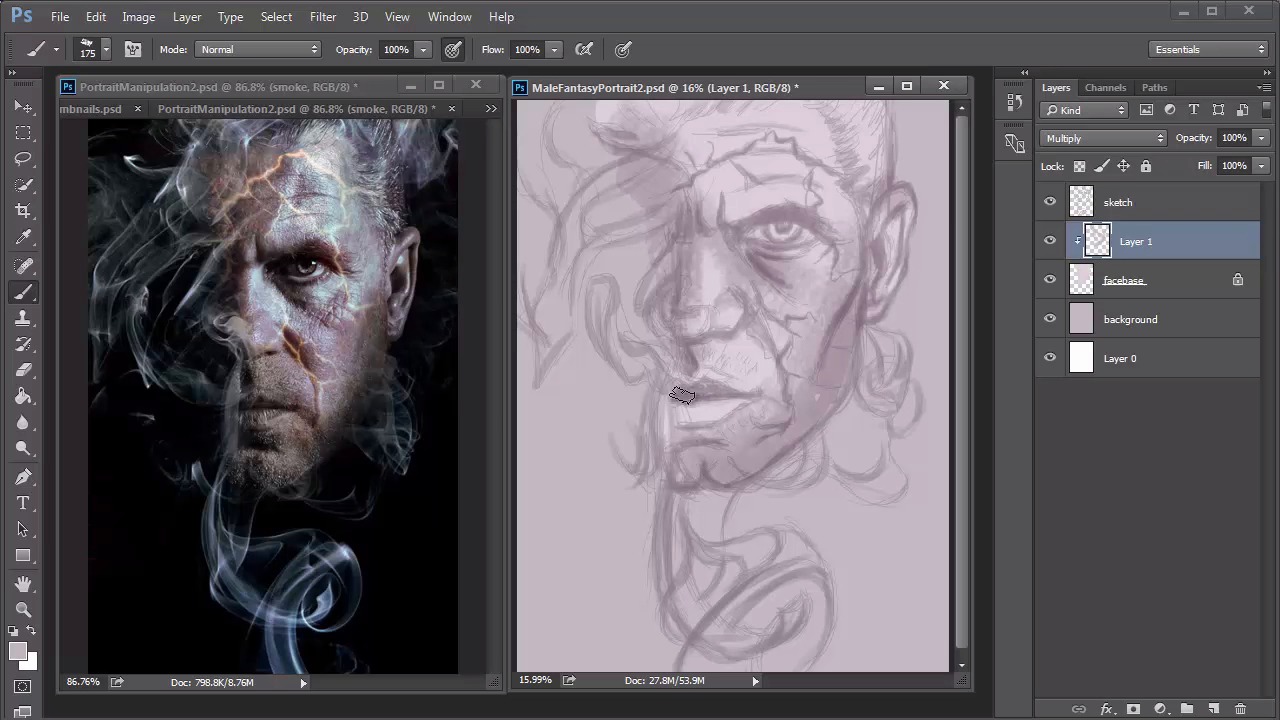

- Overview
- Transcript
3.3 Male Portrait: Create a Base Painting
After you've finished experimenting with thumbnails, learn how to set up the base colors for your painting. Once your base layers are in order, you can move on to developing the light and shadow using a purple monochromatic palette.
1.Introduction
1.1Introduction01:37
2.Set Up
2.1What You'll Need06:25
2.2Developing Strong Concepts06:29
2.3Manipulating Your References: Male Portrait06:30
2.4Manipulating Your References: Female Portrait05:59
3.Paint a Male Fantasy Portrait
3.1Male Portrait: Sketch05:49
3.2Male Portrait: Thumbnails for Light and Shadow05:56
3.3Male Portrait: Create a Base Painting05:11
3.4Male Portrait: Shading05:40
3.5Male Portrait: Final Touches05:13
4.Paint a Female Fantasy Portrait
4.1Female Portrait: Sketch05:15
4.2Female Portrait: Thumbnails for Light and Shadow05:01
4.3Female Portrait: Create a Base Painting04:12
4.4Female Portrait: Experiment With Shading05:49
4.5Female Portrait: Final Touches05:33
5.Conclusion
5.1Conclusion02:14
3.3 Male Portrait: Create a Base Painting
Hello and welcome back to Fantasy Digital Portraits. My name as Melody Nieves, and in this lesson, we'll begin our first fantasy portrait by creating the base players and establishing the preliminary light and shadow. So far we've gathered tons of valuable information that will help us during this painting process. We have the complete sketch, which was based on the initial photomanipulation of our references. We also have three thumbnails that can be used as reference examples for light and shadow. To avoid overcrowding my workspace, I have attached a thumbnail file to the same window where the photo manipulation is. So with all of this helpful information, let's begin by creating and organizing the base layers. Add a new layer and fill it with the same purple we used to create the sketch. Feel free to add names to the layers for better organization as you go. To fill in the base for the face, we'll need a brush with 100% hardness so that it's a completely solid fill. Choose a lighter color from the color picker by selecting the brightness option and moving the value upward. When you've got a nice bright color ready, use it to fill the entire face With this layer selected, lock the transparent pixels. By doing this, we'll be able to clip new layers above it and paint all of the facial details without going outside of the border of the initial base. To see this in action, I'll create a new layer and set it as a clipping mask. Next, I'll choose a bright red color to paint over the base, and notice how when I go to the edges, the color stays completely within the border of the base. Now that the base layers are set, I'll begin some preliminary shading to establish light and shadow in a purple, monochromatic color scheme. Changing the blend mode of the sketch to multiply, the sketch appears darker and easier for me to see. From the brush presets, I selected the oil pastel large brush, and use it to begin shading on a clipped layer set to multiply. Since the layer is set to multiply, I don't have to change the color because it'll automatically appear darker on the canvas with this particular blend mode. Starting off with a pastel brush gives the painting a nice sense of texture that will work well as its foundation. Texture is essential to creating any digital painting where you want to push the realism. And, if you feel you need darker shades of purple to create deeper shadows, just hold the Alt key to switch the brush tool to the eye dropper tool, so you can pick up the shade of purple that's already there for shadow. Since it's one step darker than the base color, it'll apply even darker because of the multiplied layer blend mode. Continue adding more texture and shadow, paying special attention to the photo manipulation for clues on how light works for this portrait. Create another new clip layer set to multiply, but this time, clip it to the background so that you contain the background shadows and textures for a more cohesive look. As I deepen the shadows for the background, I remember that I definitely wanted to stray away from a solid background. This is the moment you start to realize how beneficial those earlier thumbnails were. It's important to continue establishing the shadow first before moving on to lighter values for highlights. Since the layers are separated, you'll probably have to bounce around a bit, so you just wanna make sure that you're doing your best to make this a cohesive look. If you're wondering why I decided to start with a monochromatic color palette, it's because I wanted to establish the light and shadow before moving on to detail. This is the exact same concept as painting in grayscale first before adding color. The only difference is that because I'm painting with values of purple instead of gray, you'll be able to see those purple colors come through in the final painting. Now that the shadows are all set, I can establish the lighting for this portrait. Selecting a lighter value of purple from the color picker, I clip a new layer to the locked base and start painting areas where the light is hitting the man's face so that they can pop out from the shadow. What we're doing is similar to creating an underpainting in traditional art. Try not to get stuck in one place, because we will be adding much more color and detail on top of these layers. I didn't want to get too carried away with this step, because I still need to transition the palette from a monochromatic one to one that is similar to the colors in the original photo manipulation. So we'll stop here for now, but stay tuned to see how I transition this and add the correct colors for the color scheme I desire. Join me in the next lesson where I'll show you exactly how it's done.


