
 Lessons: 16Length: 2.5 hours
- Overview
- Transcript
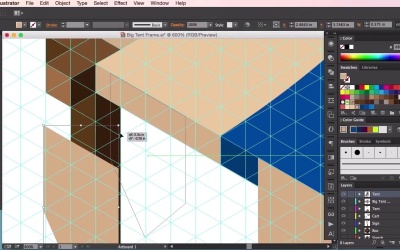
3.8 Tent Roof Colour
In this lesson you will learn how to include colour on the roof of your market tent.
1.Introduction
1.1Introduction01:08
2.Planning
2.1Creating an Isometric Grid07:17
2.2Sketching the Design09:19
3.Props
3.1Isometric Box15:18
3.2Signpost05:50
3.3Cart Top Frame10:56
3.4Cart Bottom Frame10:18
3.5Cart Roof12:44
3.6Outer Tent Frame15:41
3.7Tent Roof14:44
3.8Tent Roof Colour14:30
3.9Isometric Anvil10:04
3.10Flag and Fruit05:22
4.Final Environment
4.1Setting Up and Arranging the Props06:34
4.2Adding Final Touches06:40
5.Conclusion
5.1Conclusion01:14
3.8 Tent Roof Colour
Hey, guys and welcome back to the Isometric Environment for Games course. In this video, we'll be looking at adding some color to the roofs of our market tents. So just grabbing the pen tool as we did before, we're going to select a color. In this case, we blue and make sure that it's three segments long, which is exactly the same as as what we did for our market cart. So just ensuring that it's three segments long and three segments long in between each rectangle and just making sure zooming in here to make sure it matches the corners of our construction beam and our guidelines and zooming out again and making sure that everything matches up correctly And now we're just going to choose a darker blue color. Now I'm going to count the segments here and see how as the tent gets wider as it reaches the bottom unlike our market cart, we can't have the shape of our color exactly three segments long again. So with this one, I've chosen it's to be slightly wider to represents the sort of our tent just widening as it as a guest was to see the base of the roof. So I can just zooming in here, making sure that the rectangles match up with the structure below. So you'll see that I've made the mistake here. I've separated the bottom structure into thirds when I should have separated the bottom structure into fifths. So let's get rid of that by clicking Delete and I'm just going to try again. So again, counting the segments here. One, two, three, four, five, six. And I'm going to make this segment five sections long and I've made it, so that the segments on either side of the bottom part of this tent is six segments long, but that should be okay and we should still receive the same effect. So copy, count out one, two, three, four, five segments between each one. Now that looks about right. So I'm going to select another blue color here, a midterm blue color. Using the pencil, I'm just going to join the corners up and just create a nice curve here to give a sense of curvature for our market tent. And the same thing for for this one here, which is sort of curving the sense of color here and here. And then just going back in and using the handles to adjust the curves, so that you get the right curvature that you want for for your market roof. So, it's just a matter of using these handles. If you can grab on to them, that is. I'm just curving them around, so they look correct. Is there a little bit more curve? Maybe. Just zooming out there to see if it looks correct. So I'm gonna do is I'm going to zoom in, I'm going to lengthen this particular color here. Just so that it looks in the center the the color sort of the that wider. That looks a bit better. Oops, just using the handles again to adjust the curves of the colored shapes. That looks a little bit better. So just zooming in there, checking these segments. Now, I'm just going to add these sort of triangular shapes here. The sort of thing that you see quite often in markets. I'll just leave one segment in between on each side. It's a bit too long, so I'm just gonna move it up a little bit. Using the guide that again, as a tool to help us measure the size of of our shape. I'm gonna copy and I'm just gonna paste it into the middle of each of these drapes down here, just estimating where it should go. Paste another one here, it's right in the middle. So, it's one and a half segments on either side. Same thing with this one, pasting in the middle and the same thing with this one. So you'll notice that the the two drapes need to be blue. So lets just use the eye dropper tool and that's one side done. So using the black selection tool, I'm going to try and select all of the shapes that we've done and paste them, reflect and put them in the exact same place using our guides to help us for the other side. So I forgot to add some shapes there. So let's do that again. Reflect and using our guides to help us. Cool. So now we've got a nice tent roof on either side, I'm going to use this shape here. Copy > Paste on top and then copy and paste in this shape again. Paste it on top and then using the Pathfinder tool. Just so we can create some shadowing, just so that it follows the same lighting structure as before. So now that we've created the front part of our tent with color, we're going to do the same thing for the back. So duplicating these these balloon rectangles, I'm going to send them to the right place here. So three segments in between, doing the same thing here. Copying and pasting to the right place using our guidelines. Those are three segments from the end, using the guides to place it. And now, I'm just going to create the color. Now because we're creating shapes behind the tent, these colors are going to be dark. So using the pen tool, just creating the the blue color behind the tent. Just making sure that it's a nice dark blue to represent the inside to color inside the tent, we'll do the same thing again on the other side. Just filling in this shape here, so that it represents the blue color behind the tent. Now we do the same thing for the color on the sort of roof draping over behind this well. So let's go ahead and choose an even darker color and just continues the curvature of the color here using the Pen tool, selecting and then sort of imaging how the color would be represented and just send it to the correct plane. Well, what I'm doing here is I'm just using the pathfinder to cut it, which may be easier. And just Copy > Paste > Transform > Flip and send it to the other side, like so. Seaming in and making sure it's in the right place. So there we have it, our bottom roof. So now let's do the the same thing for our top roof. So let's bring out the guides again. Now just counting the segments here and choosing the right color. Going to make this one three sections wide, exactly the same as our market cart. Copy > Paste > Flip. Bring out our guides again and bring it to the other side. Selecting the right color and I'm just going to the Pen tool again to create the right curve from the top of the tent here, like so. And just using the White Selection tool to make sure everything lines up correctly. And now, we're going to do the same thing on the other side. So Copy > Paste > Flip and make sure everything lines up again. Now we're going to do the same thing. So we're going to use the White Selection tool to copy and paste that shadow, copy and paste the color. Make sure both the selective use of path by the tool. Now we've got an isolated shadow shape, which we can then use to darken. I'm just going to get these triangle shapes again. Shorten them down, resize them so that they're smaller And just do exactly the same thing as we did for the bottom, the bottom tent roof. So just Copy > Paste > Send to the middle. Use the eyedropper tool to make sure it's the right color. I select all three. Group, Ctrl+G. Copy > Paste > Flip and put it in the same place on the other side. So there we have it. We now have roofs for our central structure or our central market tent. So that's it for this video. In the next video, we'll be looking at how we can create an isometric anvil prop for our environment. See you guys there.


