
 Lessons: 16Length: 2.5 hours
- Overview
- Transcript
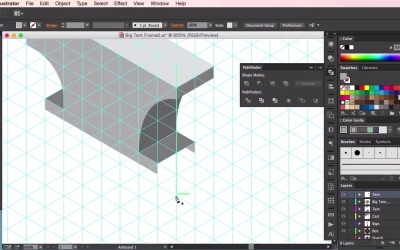
3.9 Isometric Anvil
In this lesson you will learn how to create an isometric anvil prop to include in your market level.
1.Introduction
1.1Introduction01:08
2.Planning
2.1Creating an Isometric Grid07:17
2.2Sketching the Design09:19
3.Props
3.1Isometric Box15:18
3.2Signpost05:50
3.3Cart Top Frame10:56
3.4Cart Bottom Frame10:18
3.5Cart Roof12:44
3.6Outer Tent Frame15:41
3.7Tent Roof14:44
3.8Tent Roof Colour14:30
3.9Isometric Anvil10:04
3.10Flag and Fruit05:22
4.Final Environment
4.1Setting Up and Arranging the Props06:34
4.2Adding Final Touches06:40
5.Conclusion
5.1Conclusion01:14
3.9 Isometric Anvil
Hey guys and welcome back to the isometric environment for games course. In this video we will be looking at creating an anvil prop to go with our blacksmith's tents. So to start things off, we'll use our pen tool again. And just create a rectangle, which is sort of two segments wide and seven segments long. I'm just going to create another shape here. Just to represent the side of our anvil. Okay, so this to the that one. That one [INAUDIBLE]. So I've created the shape, which isn't in lines with the guidelines. So what we'll do here. Right. So I'll create that. So now I've got two segments, sort of wide here. I want to shorten this, so I'll just use the pathfinder there to shorten this one. And just send that to the back. So I've removed those artifacts using the white selection tool. Okay, so now I've created the top of our anvil, going to go back to the pen tool again. And create the side segment here, send it to the back. And just make it a slightly darker color to help represent some depth. Okay. So we're just constantly changing color. Going to create the side of our anvil. So again using the pen tool, just creating that curve there and then just carrying on with the typical sort of anvil shape. Just going to create a curve here. Just trying to make sure that it goes in line with with our guideline, our isometric guidelines. And using the handle there to try and adjust the curve. I'm not quite happy with that, so what you can do is you can sometimes use the, if you're using the latest version of Adobe Photoshop, if you have a corner, you can grab that corner and just create a curve from that. So, I'll do the same thing here. So I'm just going to create a corner, okay. Straight down and just grab that node there to create a curve. But, that curve doesn't quite suit the anvil shape so I'm just going to Ctrl+z all the way back until it's back to the original curve. And now I'm just going to add the inside of our anvil there. Copy paste. And then send this side of our anvil to the back, and align it to our top. And then just have a side there. Right now it's starting to look a little bit more like an anvil, we can begin to create the bottom structure. So grabbing this side there. Let's see if we can reuse some bits. I'm just going to create the bottom base of the anvil. Cutting it as we did before. Sending this structure back. And now it's just a matter of filling the shapes in Like so. Okay, and now just grabbing the pencil again. Just want to create our own wide base here. And just copy paste, select both, cut. And now, just going to bring that foot slightly down, and grab the pen tool again, fill in the shapes. And make sure that the colors are coordinated. And see if I can just move it to a plane which looks correct. And the same with the other foot. Align it to the bottom. Just going to make it a little bit taller there. And make sure that everything just looks correct. I'm going to use the guidelines again. Just setting it to the correct place. And then copy and pasting that particular foot. Make sure that it's in line with the guidelines. Okay. So grabbing everything, grouping it. Just going to extend the shape here. [SOUND] So I'm going to keep that there because I deleted it before. And now, just rearranging the foot again as we did before, moving it along with the guidelines so I can use it. And now I can copy and paste that foot, use the guides and make sure it's in the same plane, the bottom here. Okay, so what we're going to do now is I'm just going to extend the top here slightly. So moving that piece there and then just moving using the white selection tool those pieces there. Okay, from there I'm going to use the guidelines here to create a square hole for the anvil. So, using the Pathfinder tool to create two new segments there. I'm just going to move it to the anvil and just resize it, and move it to the correct place. And what anvil isn't complete without the typical anvil curve bit at the front there? So I'm just going to use the pencil to create the curves there. And just another one here to give it a sense of depth. Slightly different color. Send both to back. And there we go. Our anvil. Isometric anvil prop. Now just add some finishing touches to our anvil, I'm just going to create some rectangles here. And just turned them white, fit them around, turn the transparency to 44%, and just lay them on top of the anvil here like so. I"m just going to grab the front of the anvil, paste it on top and using the pathfinder tool to cut these rectangles and turn the opacity down again. Just to create a little bit of reflection or sense of shininess to our anvil. Okay. So that's it for this video. In the next video, we'll be looking at creating some final touches to our props before we import them into our isometric environment. See you guys there.


