
 Lessons: 16Length: 2.5 hours
- Overview
- Transcript
3.4 Cart Bottom Frame
In this lesson you will learn how to create an isometric wooden frame which will make up the bottom section of your market cart.
1.Introduction
1.1Introduction01:08
2.Planning
2.1Creating an Isometric Grid07:17
2.2Sketching the Design09:19
3.Props
3.1Isometric Box15:18
3.2Signpost05:50
3.3Cart Top Frame10:56
3.4Cart Bottom Frame10:18
3.5Cart Roof12:44
3.6Outer Tent Frame15:41
3.7Tent Roof14:44
3.8Tent Roof Colour14:30
3.9Isometric Anvil10:04
3.10Flag and Fruit05:22
4.Final Environment
4.1Setting Up and Arranging the Props06:34
4.2Adding Final Touches06:40
5.Conclusion
5.1Conclusion01:14
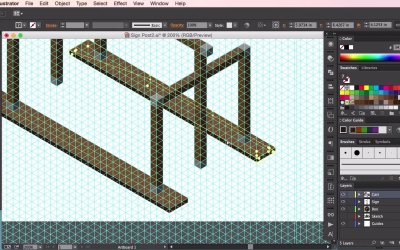
3.4 Cart Bottom Frame
Hey guys, and welcome back to the Isometric Environment for Games Course. In this video, we will be continuing our market cut design from where we left off in the previous video. So now that we've completed our top structure of the market cart, it's time to build the bottom structure. We'll be doing this by creating a new element in Illustrator, which will be a flat wooden planks. These will act as our general source of flooring for all our structures going forward. So once again, we'll be using the Pen tool to create our element. So this one's going to be three segments going along. One, two, three, four, five, six, seven, eight, nine, ten and then counting again as we go along. One, two, three, four, five, six, seven, eight, nine, ten. So 20 and then 1, 2, 3, 4, 5, 6, 7, 8, 9, 10. So 30 segments long, three segments across. Now, you'll notice that this hand icon keeps popping up as I drag along the screen. Now to do this, all you have to do is hold the Spacebar button on your keyboard and then click and drag to move along your screen. Now, I'm just copying and pasting this shape here, just moving it down using the Shift key to create the bottom part of our wooden plank. Changing its color and then what I'm going to do is I'm going to send to back Arrange > Send to Back. And now, I'm going to create the sides of our wooden plank again, by using the pencil. Just clicking and joining the dots. So we've got a wooden side here. And if we look up, our plank. So just zooming out. Now, you can either draw another side here or by using the white selection tool, just move the northern cross to create a joint there. So there we have our wooden plank. So I'm just going to highlight everything using the black selection tool. I'm going to group it all together by clicking Cmd+G or Ctrl+G on our keyboard. And then I'm going to copy and paste it all in. So just moving it across here. Just lining up to where I want it to be in regards to our previous wooden shape. So for this particular example, I'm going to make it so that it's three segments. Three segments away from our previous structure. So you can see here you count three segments from the grey cube at the bottom. So one, two, three. So now, I'm just going to copy and paste the plank in again. And just doing it on the other side now, making sure that it's measured to exactly the same measurements as the previous plank making sure that there's three segments away from the edge. Using our guides to help us along and you'll notice that there's one segment on either side of the original wooden construction poles. So, this is where you'll find that the guidelines make things very, very easy to follow. So I'm just going to create another wooden plank and doing exactly the same for the middle construction pole. And then doing the same thing again, copying and pasting the planks in to fill in the remaining gaps between the other two or the other three wooden planks. Using the arrange of options to make sure that the planks are in the right order and also using the guidelines to help us along. And to make sure that our planks are in the right size. Copying and pasting again, transform or arrange center back. Then using the guidelines again. To put them in the right where it should be. Now you can also use the Align tools. So selecting all of the planks together with the black Selection tool. We can use the Align tool to ensure that all the planks are the right spacing exactly apart from each other. So you can experiment with the line tools here. And now, we're just going to use these once to make sure that the spacing between each plank is exactly the same. So there you have it. All of the planks aligned exactly where they should be. Now from here what I'm going to do is I'm going to copy and paste in the top structure here. Gonna Ungroup everything. I'm just gonna steal this top construction beam. I'm going to use it to complete our market cart. So just getting the guidelines in again. Pasting it in, sending it to the back. I'm just going to move it forwards. Now these will act as the two sort of beams at the front of the cart, where the horse usually uses it to drive a cart for it, so it's just gonna have two of these beams here. So counting in how many segments are protruding out from the cart. Zooming in to make sure that aligns exactly with our guide lines. Like so. And now pasting in the other beam here. Making sure to count the segments, so that the segments are exactly the same or using the guideline here to make sure that it's exactly aligned to the other beam. Like so. And now we're going to copy and paste a third beam. Now this will act as the sort of underside for our a base of our cart sort of to give it a sense of construction underneath the planks. So just lining it up here. Giving it a strong base. And there you have it. The completed framing structure for our market cart. In the next video, we'll continue to build our cart prop by adding a roof and possible some other color elements as well. See you guys there.


