
 Lessons: 14Length: 1.5 hours
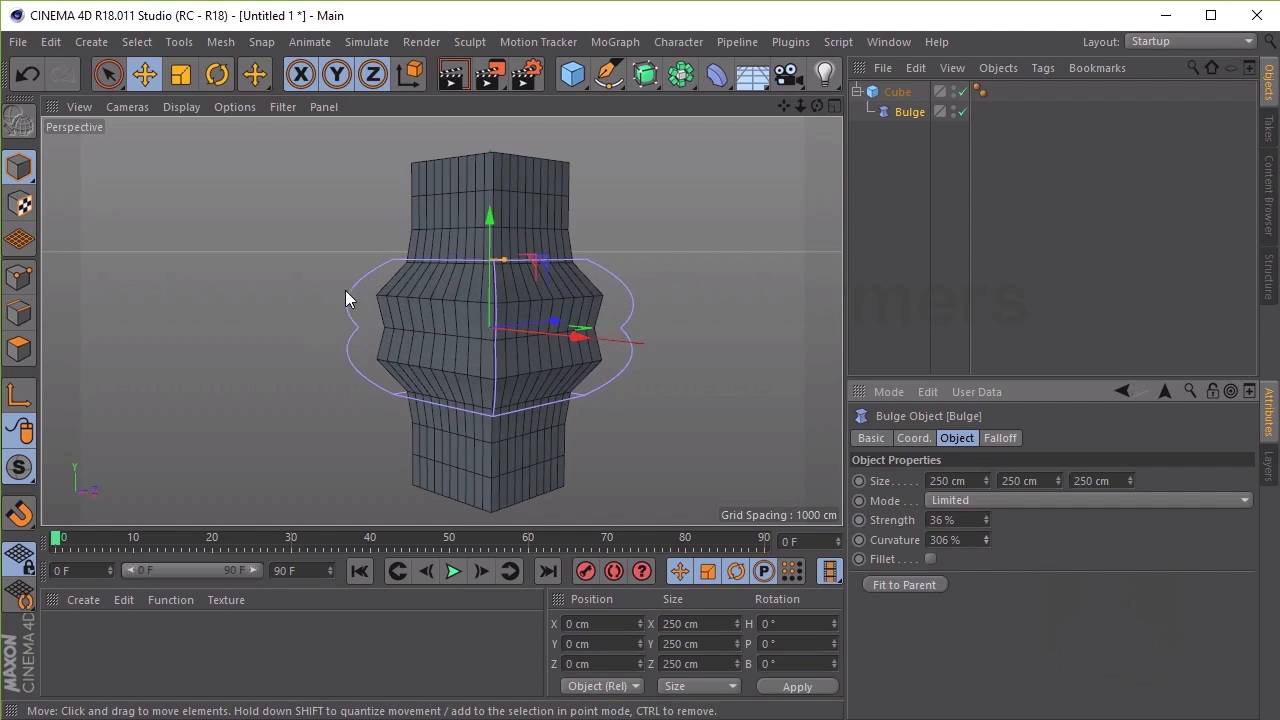
- Overview
- Transcript
2.3 Introduction to Deformers
In this lesson we will go into detail on how to use the “deformers”, which will give us further options for manipulating shapes into what we want for modelling.
1.Introduction
1.1Welcome to the Course00:41
2.Cinema 4D Overview
2.1Cinema 4D Setup04:30
2.2Introduction to Basic Shapes10:05
2.3Introduction to Deformers11:08
3.Modelling Fundamentals
3.1How to Edit Basic Shapes11:03
3.2How to Use the Extrude Tool07:53
3.3How to Use the Bevel Tool04:59
3.4How to Use the Boolean Tool06:04
3.5How to Duplicate Objects03:51
3.6How to Use the Bend Deformer05:53
3.7How to Use the Spline Tool07:39
4.Lighting and Rendering
4.1How to Create Materials13:26
4.2How to Render Your Final Model03:45
5.Conclusion
5.1Thanks for Watching!00:52
2.3 Introduction to Deformers
Hi everyone, and welcome back to up and running with Cinema 4D. In this lesson, we'll go into the basic on how to use deformers, which will give us further options on how we can manipulate shapes into what we want for modeling. Now, Cinema 4D has a big list of deformers. However, most of them are pretty self explanatory once you've taken the time to experiment with them. So let's take a quick look at how many deformers the program offers by clicking and holding on the, add bend object here. So this menu works exactly the same as the creating an object button, just sort of going through the menu here, you can see we have all these deformers. So for this course, we'll be looking at the basic ones such as bend, bulge, shear, and taper. And this will give us a good foundation to work on, and then we can experiment with the other ones later down the line. So first we need an object which our deformers can work on. So we can create a cube by clicking on the cube button here. And we can apply a deformer directly onto the object. So let's go ahead and click on the bend, we'll start with the bend deformer. And we can apply it by clicking on it and then dragging it into the cube here. Excellent. So to use deformer, we'll want to make sure that the bend deformer has been selected using mouse. So you can see when we select an item in our list view, the item highlighted in brigh yellow is the one that's been selected. And then just over it in our adjustments window, we can see that we've been given some adjustments, some options that we can use to bend the object, our cube. So let's go ahead and adjust the strength and see what happens. So you can see straight away that it's bending the cube, its trying to bend the cube. Now you'll notice that the edges here are still straight, and that's because our cube object doesn't actually have any topology, it doesn't have any polygons to work with. So to change that, let's go ahead and bring this back to 0. And we'll go over to our cube to add some segments. So let's go ahead and change display to shading lines so we can see how many lines or polygons we've been adding. So let's go with 20 by 20 by 20. Let's go a little bit less, let's go with 10. You can see here that we've added some polygons to our cube. So now once we've done that, let's select the deformer again, the bend deformer, and let's see what happens now. So you can see now that by adding some strength to the bend, our cube is actually curving, and we can make this a little bit more obvious by making the cube a little bit taller. So let's go ahead and make our cube taller by making the size. And you can see now that it's sort of going out of this purple cage here. Now this purple cage, what this indicates is the affected area which our bend is or our deformer is going to effect on our cube. So if we start using the strength here, you can see it only effects the area which is covered using the purple cage. However, we can adjust the cage by using the size properties here. So let's go ahead and make the cage bigger. And you can see now that it's affecting more of our object. So we can have less of our object, so we can have like a tights curve, or we can have a bigger curve by making effect more of the object here. Excellent. So next stop, we'll have a look at the bulge deformer. So let's remove the bend deformer by clicking on it and then hitting the delete button here. And select the bulge deformer by clicking and holding on the bend button here and then selecting bulge. Or we can apply it in exact the same way as we did before, just clicking and dragging it into the cube. Cool. Now once you've done that, we can start adjusting the strength value, which is over here, exactly the same as what we did with the bend deformer. So you can see if we make it bigger, we can make the strength percentage bigger. You can see that it bulges more or less, you can take it to a negative value here and sort of make it tight like that. We can also play about with the curvature too, so we can make it less curvy. So sort of like a sharp edge there or more curvy here. So it starts off at 100%, and the more curve that we have, you can see the cage sort of bends inwards like that. So that's something that you might want to play about with as well. But we'll keep it at 100 for now. Again, if we wanted to apply this section to all of our objects here, all we have to do is make the cage larger so that it fills up all of our objects. So now, when we increase the strength of our bulge, it increases the whole object as opposed to the small section that we had before. So that's something that you want to keep in mind when using the deformers. Excellent. Now remember this works best on an object with more polygons, so let's go ahead and increase the polygons here. Now if we look at the curve here, it's still kind of jugged, but if we increased the polygon counts, effectively giving it more to work with, you can see the curve becomes a lot smoother than it did before. So if we make the polygon count less, let's say five, you can see it becomes a little bit more jagged. And if we increase it even less, it becomes very obvious. Cool. So the next deformer that we'll be experimenting with is shear. So again, let's remove the bulge deformer by selecting it and then hitting delete on the keyboard. In fact, let's go ahead and add more segments to our shape again. And select the shear deformer from the menu and then apply it to our object. Cool. So works in a similar way as the previous deformers. Just adjust the strength here and you can see that it sort of bends the object, like so. And we're given some more options here. So we've also got an angle here, so we can angle it in a certain direction if we wanted to. So if we go look around here, you can sort of see that we can angle the shear and we can also change the curvature. So automatically it's at 100%, and if we make it 0% we can sort of have this sort of sharp sort of curve here instead of the curvy one that we had before. So let's bring it back to 100. Cool. And again, we can increase the size of our deformer. So the size of the cage here, the effective area. And bring it all the way up so that it affects the whole object, excellent. Now another thing we've got here is fillet. So with this checked, it basically eases the bulge near the top and the bottom. So you can see here, it's got this sort of curve effect here. Cool. So the last deformer that we'll have a look at in this video is taper. So let's remove the bend deformer the same way that we did before, just selecting it and pressing Delete on the keyboard. And then let's select taper. And then add it into our object. Cool, now, again, we have similar options. So we've got strength, which we can use to increase or decrease. And you can see how that changes the shape, so we can make it big like that, or bring it into itself like so. And we also have the curvature options, here again, so we can make it curvy or we can make it straight. And we also have the fillet option right here, which works exactly the same as how the previous one did. Again, we can make it affect the whole object, or we can select an area that we want for it to effect. We sort of used the move tool as well to bring it up or down. So there we have it, a quick overview of basic deformers in Cinema 4D. So now that we're familiar with the deformers, you can experiment with other deformers, and we can also combine them together. So for example, we can add the bend deformer into our cube as well as the taper. So selecting the bend deformer here. We can also increase the strength. So these can all work together as well. So that you can see that we have both deformers inside the object grouped in the list here, and we can use both of them to adjust the object together. Excellent. So that's it for this lesson. In the next lesson, we'll be going through some modeling fundamentals. See you all there.


