
 Lessons: 14Length: 1.5 hours
- Overview
- Transcript
3.5 How to Duplicate Objects
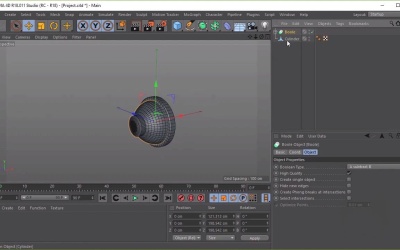
In this lesson you will learn how to duplicate objects. We will then use these skills to duplicate the ear pads and combine them with the rest of the headphones.
1.Introduction
1.1Welcome to the Course00:41
2.Cinema 4D Overview
2.1Cinema 4D Setup04:30
2.2Introduction to Basic Shapes10:05
2.3Introduction to Deformers11:08
3.Modelling Fundamentals
3.1How to Edit Basic Shapes11:03
3.2How to Use the Extrude Tool07:53
3.3How to Use the Bevel Tool04:59
3.4How to Use the Boolean Tool06:04
3.5How to Duplicate Objects03:51
3.6How to Use the Bend Deformer05:53
3.7How to Use the Spline Tool07:39
4.Lighting and Rendering
4.1How to Create Materials13:26
4.2How to Render Your Final Model03:45
5.Conclusion
5.1Thanks for Watching!00:52
3.5 How to Duplicate Objects
Hi everyone, and welcome back to up and running with Cinema 4D. In this lesson, you'll learn how to duplicate objects. So, to start with, let's go ahead and hide our headphones model. So, let's click the circle until it turns red. And we'll spawn a cube into our view pool. Now to duplicate this cube is quite simple. All we need to do is making sure that our move tool is selected, we're going to hold the control key on our keyboard. Now you can see once I've held the Ctrl key, you can see that the cursor on the mouse changes. And then once that happens we can go ahead and drag the cube using the arrows. And you can see we've duplicated it. So we can do this on any of the axes, so any of the arrows, we can do that. And another way that we can duplicate the cube, if we don't want to drag it out, we can do the same on our list view here. So if we hold the Ctrl key on the keyboard, click and drag, you'll see we've duplicated the cube on our list view. And the good thing about doing it this way is that it's in the exact same position as our previous cube. So they're both in the same position if you wanted them to be in the exact same position. Great, so now that we know how to duplicate objects, let's go ahead and delete the cube here, and let's bring back our headphones. So now let's practice duplicating these parts of our headphones here. Now to make things easier, instead of having to duplicate two separate objects and then having to bring them back together again, let's go ahead and group these shapes together. Now in order to group these shapes together, we'll need to select both of these objects. Now we can click and drag to select both of these objects like so. And you can see they're both highlighted in yellow. Or you can click and hold the shift key on your keyboard to select and that way as well. Great, now that we've got them both selected, the way that we can group objects is by pressing on Alt and G key on the keyboard. And you can see straight away they have been grouped into this no object here which we can then rename. So let's go ahead and rename this, Ear Piece. Great, and now in order to duplicate this whole object, all we need to do is press and hold the Ctrl key on the keyboard, and then drag it out. Excellent, and now what we'll need to do from here is, we just need to rotate this by 90 degrees or by 180 degrees. Something like that. Or again, if you're struggling with making it 100% correct, just press the value here, 180, and then click Apply. And then it should be 180 degrees like so. And then we can go ahead and rename these. So this will be the Left Ear Piece, so L Ear Piece and this can be the Right Ear Piece. Excellent, so that's it for this lesson. In the next lesson we'll learn how to use the bend deformer. See you all there.


