- Overview
- Transcript
3.2 How to Use the Extrude Tool
In this lesson you will learn how to use the extrude tool on a simple cylinder object. We will then combine this object with the previous shape to create part of the headphones model.
1.Introduction1 lesson, 00:41
1.1Welcome to the Course00:41
2.Cinema 4D Overview3 lessons, 25:43
2.1Cinema 4D Setup04:30
2.2Introduction to Basic Shapes10:05
2.3Introduction to Deformers11:08
3.Modelling Fundamentals7 lessons, 47:22
3.1How to Edit Basic Shapes11:03
3.2How to Use the Extrude Tool07:53
3.3How to Use the Bevel Tool04:59
3.4How to Use the Boolean Tool06:04
3.5How to Duplicate Objects03:51
3.6How to Use the Bend Deformer05:53
3.7How to Use the Spline Tool07:39
4.Lighting and Rendering2 lessons, 17:11
4.1How to Create Materials13:26
4.2How to Render Your Final Model03:45
5.Conclusion1 lesson, 00:52
5.1Thanks for Watching!00:52
3.2 How to Use the Extrude Tool
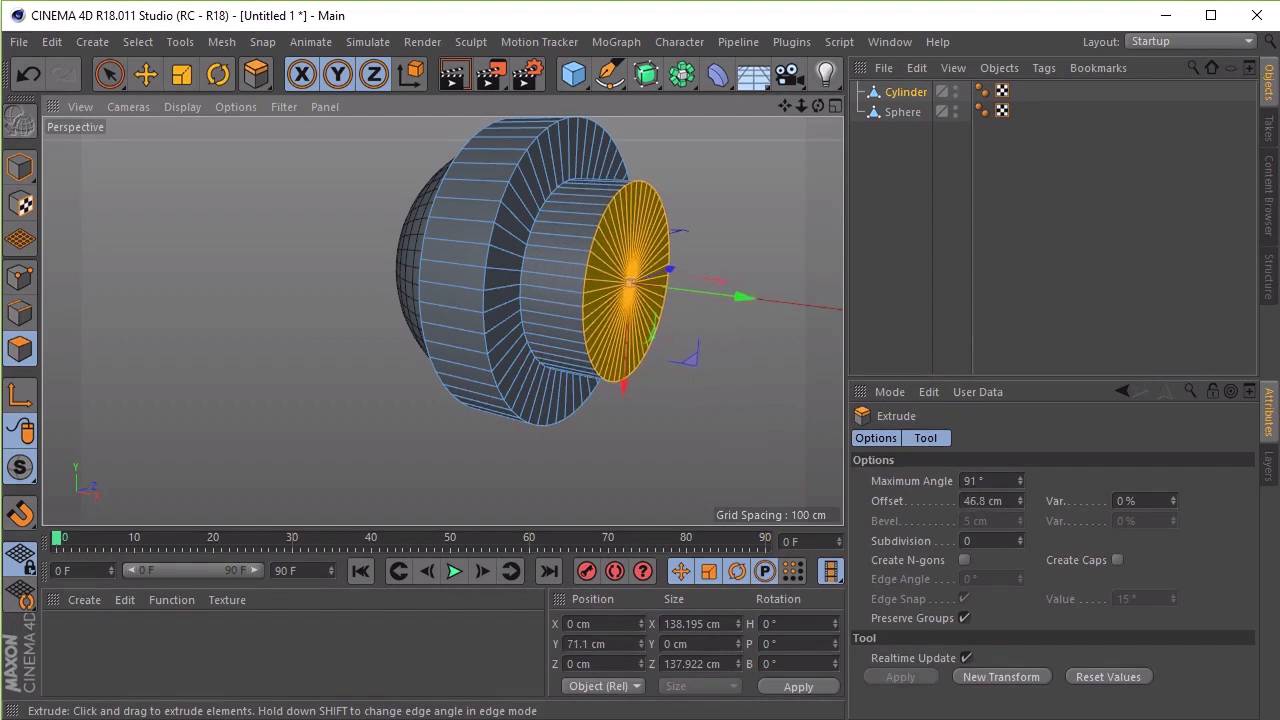
Hi everyone, and welcome back to up and running with Cinema 4D. In this lesson, you'll learn how to use the extrude tool on a simple cylinder object. And will then combine this object with the previous shape here to create part of the headphones model. So let's begin by creating a cylinder object, by clicking and holding on the cube button here, selecting cylinder. And we'll want to rotate this by 90 degrees, so let's go ahead and select the rotator tool, and by going to our front view here we can rotate it by 90 degrees or we can enter the value here. In fact lets go ahead and select the model. And if we entered the value 90 degrees here and click on apply you'll see that it's been rotated 90 degrees. Excellent, so the next thing we want to do, is we want to go ahead and start changing some of the object values here. So I just want to increase the radius and then decrease the height here. I'm just going to bring this out a little bit and see how it penetrates, how it connects to our sphere here. All right and I'm just going to increase, make it a little bit bigger. And basically, this cylinder will act as the ear pads for our headphones. So I want to make the rotation segments a little bit more just to make it a little bit smooth. So let's give it 50 segments. You can see that makes it smoother. And next we'll want to add a cap. Now this will add some more polygons to the face of our cylinder here. So if we go to the Caps tab here and add a few segments you'll see that it now has a few circles on the face. Now we'll just want to add one, so let's go ahead to add two segments and you'll see that it adds a circle in the face here. And then once you're happy with the way that it looks we'll want you to hit the make editable button. But before we do that we want to make sure that we're happy with the way that it looks. Because we won't be able to add anymore segments here or here. So I'm happy with the way that it looks. So let's go ahead and click on this button here. And now, what we'll want to do is we'll want to click on the live selection tool which is this button here. And we want to select Polygons. So let's go ahead and click on the Polygons tool. And I want to select all the polygons in the middle here. And now I want to make them a little bit bigger so let's go ahead and select the scale tool and scale the polygons up a bit. And now, the next thing I want to do is I want to start using the extrude tool. Now we can also use the move tool to push and pull these polygons here as well. But the main thing that I want to do here is actually extrude these polygons out. So the way that we do this is we go ahead and right click on our mouse button and select Extrude. Cool, now in order to use the Extrude Tool, you'll see that the cursor has changed into this sort of extrude icon which indicates that we can actually now use the Extrude Tool. So just click and drag anywhere on the viewport to extrude these polygons out or in. So I just want to extrude these polygons in like so. Just moving round this model here, to see if we are happy with that. Just want to actually move this out a little bit more. Cool, now let's try the same thing on our hemisphere. So we want to select live selection tool again. Let's go ahead and click back on object and let's select our sphere. So our aim here is to select a circle from my hemisphere exactly the same way that we did on my cylinder, so that we can extrude it. Now if we click on the Polygons tool here and click on our live selections tool, and then try and select these polygons, you'll see that it's a little bit trickier than what we did previously, just simply because there's more polygons here. Now I can go ahead and do this. But there is an easier way to do this, and another solution is if I just de-select all of that, is to go ahead to our front-view. And let's go ahead and use the rectangular selection here. So we just click and hold on the live selection tool, select Rectangular Selection, and from the site select some polygons here, and you'll see now that we've got a circle selected. Now in order for this to work, we'll need to make sure that if we go back to our selection, we have to make sure that only select visible elements is ticked off. Now if this is ticked on, if I deselect the selection here. If that's ticked on, you'll see that it's selected the polygons on the side, but once you go back to our perspective view, it's only selected the visible polygons. So we want to make sure that this is ticked off. Now, sometimes that's ticked on by default. So we want to just double check that. So select those polygons, and you'll see that you've selected the circle. Cool, another way that we can do this is by using the loop selection tool, so I'm just going to deselect those polygons. Now, the way that we can select the loop selection tool is by clicking on the right mask button. Just finding the loop selection tool here or in fact it's not there. Let's go to the select menu and you'll see that it's loop selection here. So if we select that tool and wrote scrolling over our hemisphere you can see that it highlights the loops. So we wanted to select this loop. So if we zoom in using the mouse wheel, you can do this by pressing and holding on the Shift key on the keyboard, and sort of selecting the loops like so. Cool, now that all we need to do from here is right-click, select Extrude, and then extrude these polygons as we did before. And I just want to scale the shape down like so. And let's go ahead and move this a little bit like so. Excellent. So that's it for this lesson. Now we know how to use the extrude tool. In the next lesson, we'll learn how to use the bevel tool. See you all there.


