
 Lessons: 14Length: 1.5 hours
- Overview
- Transcript
3.4 How to Use the Boolean Tool
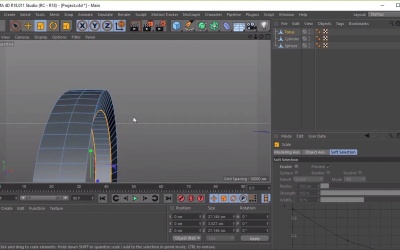
In this lesson you will learn how to use the boolean tool to create cutouts. We’ll demonstrate this on our headphones model.
1.Introduction
1.1Welcome to the Course00:41
2.Cinema 4D Overview
2.1Cinema 4D Setup04:30
2.2Introduction to Basic Shapes10:05
2.3Introduction to Deformers11:08
3.Modelling Fundamentals
3.1How to Edit Basic Shapes11:03
3.2How to Use the Extrude Tool07:53
3.3How to Use the Bevel Tool04:59
3.4How to Use the Boolean Tool06:04
3.5How to Duplicate Objects03:51
3.6How to Use the Bend Deformer05:53
3.7How to Use the Spline Tool07:39
4.Lighting and Rendering
4.1How to Create Materials13:26
4.2How to Render Your Final Model03:45
5.Conclusion
5.1Thanks for Watching!00:52
3.4 How to Use the Boolean Tool
Hi everyone, and welcome back to Up and Running With Cinema 4D. In this lesson, you'll learn how to use the boolean tool to create some cutouts on our headphones model. So let's begin by looking at where we're going to make the cutout on our model. And I'm thinking we're going to create some sort of cutout here on the headphones, to represent some sort of shape or logo. So in order to do this, I'm just going to create a donut shape, just to represent the logo here. And I'm going to rotate this by 90 degrees. And you can make an even more complicated shape then this, using splines or something like that. But for now we're just going to use the donut as an example. So for this one, I want it to be quite simple, so we're going to bring the segments quite far down, so about five segments. And we'll still want it to be quite smooth, so I want the ring segments to be a high number, so maybe about 50 or 60, let's go with 60 for now. And now let's scale this down so that it fits the sort of area that we want the logo to be in. So just making it thinner. And bring the radius back down, and then, not the segments, I'm gonna keep the segments there. I just wanna bring the radius down here, like that. And let's go ahead and test it, to see if it fits in the space here, cool. So in fact, let's make this a little bit smaller, so I'm going to make the radius a little bit smaller. And that should do it, excellent. So now, once you're happy with the size of your shape, let's go ahead and make it editable by clicking on this button here. I'm just going to make some quick adjustments by using the Edge tool here, and I want to make these edges a lot flatter. So in order to do this, I'm just going to go to one of the side views here, I'm going to select the Scale tool, I'm just going to bring this in, just so that becomes flat. And then I'm going to do the same with the, in fact that should be it, Cool, in fact, let's bring these edges out a bit. So let's go ahead and select these edges here, so that one, And let's select, holding Shift on the keyboard and double-click on the mouse button to select the other ring. And I'm just going to bring these edges out a little bit, like so, just so it becomes flat, excellent. Cool, now once we're happy with that, all we need to do is select the model again, so that we can move this back into position, using the Move tool. And now, once we're happy with the placement, we'll want to go to the Array button here, click and hold, and select Boole. And then once this appears in the list here, you'll want to add the shapes that are involved in the cutout. So these shapes would be the Torus, which is the shape that we were manipulating here, that one. And also the Sphere, so this will be the shape that we'll be cutting into. So let's go ahead and move both of these into the Boole. So the shape first, and then the Sphere. And you'll see straight away that the donut shape has been cut out from the sphere, Excellent, now, just a quick note, it's important which order these two shapes come in. So you can see that the Sphere is on top of the Torus, but if we were to flip these around, if we were to put the Torus on top, then it won't be the desired result that we want. It will reverse everything, and we'll only see the Torus, the donut shape instead. So let's go ahead and flip these back, and now we'll have the logo or the donut shape cut into here. Now, the great thing about using a boolean is that we can actually continue to adjust the cutouts from here. So if we were to select the Torus again, if we wanted to make the cutout deeper, all we have to do is either move it further in, or use the Scale tool and make it taller, like so. Or we wanted to make the circle bigger, we can use the Scale tool, and any sort of adjustment that we make to our Torus will reflect on our cutout, so it's quite easy to adjust this shape here. It's a good way to create a cutout without actually going into the Sphere and adjusting it using these tools here. Cool, so that's it for this lesson. In the next lesson we'll learn how to duplicate objects. See you all there.


