- Overview
- Transcript
2.1 Cinema 4D Setup
In this lesson you will learn how to move around the 3D workspace and get familiar with the interface. You will also learn the program setup and get a brief explanation of the tools you will need to complete the course.
1.Introduction1 lesson, 00:41
1.1Welcome to the Course00:41
2.Cinema 4D Overview3 lessons, 25:43
2.1Cinema 4D Setup04:30
2.2Introduction to Basic Shapes10:05
2.3Introduction to Deformers11:08
3.Modelling Fundamentals7 lessons, 47:22
3.1How to Edit Basic Shapes11:03
3.2How to Use the Extrude Tool07:53
3.3How to Use the Bevel Tool04:59
3.4How to Use the Boolean Tool06:04
3.5How to Duplicate Objects03:51
3.6How to Use the Bend Deformer05:53
3.7How to Use the Spline Tool07:39
4.Lighting and Rendering2 lessons, 17:11
4.1How to Create Materials13:26
4.2How to Render Your Final Model03:45
5.Conclusion1 lesson, 00:52
5.1Thanks for Watching!00:52
2.1 Cinema 4D Setup
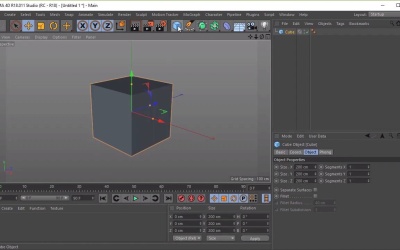
Hi everyone, and welcome back to Up and Running With Cinema 4D. In this lesson we'll be going through our initial setup, just to familiarize ourselves with the tools we'll be using throughout the course. So we'll get started by loading up Cinema 4D's default layout. And to return to this default layout simply go to Window Customization and layouts. You'll be able to find the startup option from the menu there. The [INAUDIBLE] screen space will be taken up by the viewport which is what we'll be spending most of our time looking. And at the top we have our menu bar. This is where we'll select our main menu button, such as the selection tool The move tool, the scale tool, and the rotator tool. And you can see as I scroll over these buttons you can see the shortcuts so we've got 9, E, T and R. In the middle here we have our rendering options. Over to the right here, we have our creation and modify tools. I'll be showing you how to use these later on through the course. On the right side of the screen is where our objects will be listed. This includes all the 3D shapes we'll be creating for our scene. Below this, is where we can edit our objects which is what I'll show you throughout the course as well. And then to the left of this screen we have modelling options. So things like points, edges and polograms is what we will be concentrating on in this course At the bottom here, we have our position, and size, and rotation options. And over to the right here, we've got our material options. So this is how we'll color our model, and create materials for it. So, let's create a cube by clicking on the cube button here, and by clicking this you can see straight away. It appears in our view port, also in our list of objects here. And now we can adjust the cube in this section as well. So let's start by navigating the view port by holding the Alt key on your keyboard, and pressing the left mouse button to move around the object. And you can also pan across the object by, again, holding the Alt key and pressing the middle mouse button, or the mouse wheel. Excellent. Click the middle mouse button to bring up the different views like so. So if I, sort of, hide the cube object here, by pressing this button until it's red. I can bring up the figure object, and you can see now we've got a better way of looking at our different views. So we've got the top view. We've got the right view here, which is a side view. And we've got the front view, as well as the perspective view here. So to select the different viewing options, simply scroll, well, roll your mouse over the screen. And then click the middle mouse button to select it and then click the middle mouse button again to go out of it. Cool. You can also simply select the view that you want from the camera drop down menu here. So you can see you can select the perspective view, the left or the right view, front or the back view, and top or the bottom view. Feel free to practice using Cinema 4D and get used to moving around the objects. And then once you're familiar with the basics of Cinema 4D and moving around the view port, we can move on to the next lesson where we'll introduce basic shapes. See you all there.


