
 Lessons: 13Length: 1.9 hours
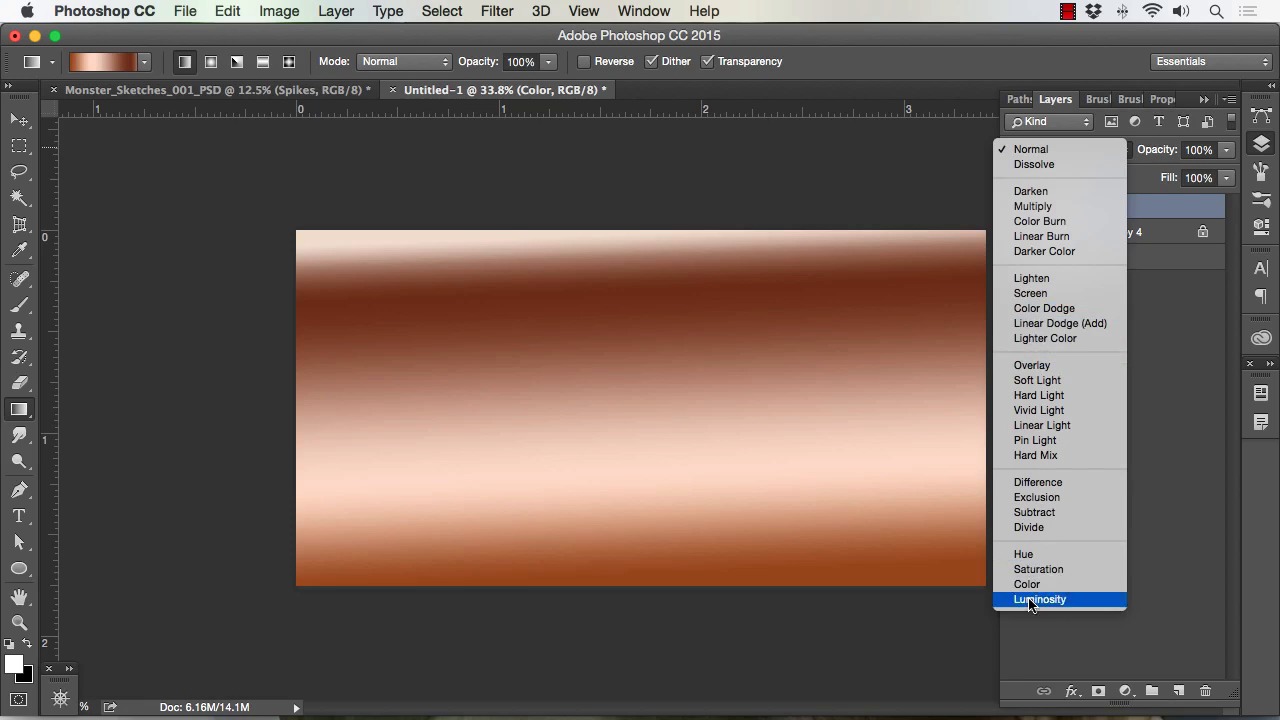
- Overview
- Transcript
2.1 Understanding Layers and Brushes
In this lesson we will cover the layers and brushes within Photoshop. These tools are extremely powerful and vast, so I will show you the primary way in which we'll be using them in this course.
1.Introduction
1.1Introduction01:15
1.2Tools and Resources01:20
2.Understanding the Tools We Will Use to Create Our Monster
2.1Understanding Layers and Brushes18:14
2.2Working With Selections to Control Our Effects11:21
3.Designing Our Monster
3.1Studying and Sketching From Reference to Create Our Creature Design11:32
3.2Blocking in the Overall Shapes of Our Painting15:35
3.3Painting in Light and Shadow to Give Our Monster Depth and Form15:39
3.4Using Liquify to Quickly Modify Parts of Your Illustration14:45
4.Refining the Artwork
4.1Adding in Detail and Textures12:59
4.2Creating Effects With Blending Modes04:19
4.3Adding Finishing Touches With Levels and Color Balance03:20
4.4Saving Elements of Your Painting to Enhance Productivity02:08
5.Conclusion
5.1Conclusion01:12
2.1 Understanding Layers and Brushes
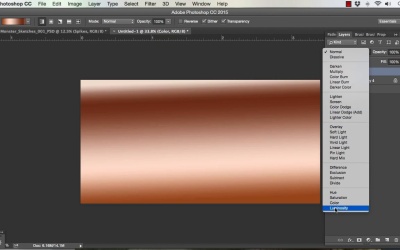
Welcome back to how to create monster in Adobe Photoshop brought to you by Tuts+. I'm your instructor today, Robert Morvillo. Will now be covering less than 2.1, Understanding Layers and Brushes. Okay, so now I want to talk to you about layers. Layers within Photoshop are very important for creating any type of artwork, but especially for the artwork we're going to create here. So, if you see, I've got these three monster sketches on a separate layer from the background, that's the way that I like to work. You can get to your layers right here and you can also go to Window > Layers here or F7. There's usually a couple ways to get to everything you need inside of Photoshop. All right so I'm gonna add a new layer by simply clicking here And you can name that layer by double-clicking here and I'll just call this Effect1 for lack of a better term. Okay, and I can hide that if I want more real estate on my screen here. Now the first thing that I wanna cover about layers, because layers have a lot of importance to what you can do in this. But the first thing I wanna cover is how to apply and manipulate effects, so we'll say, for instance, on this monster in the middle here. And you could see, if I zoom up, he's just really blocked in, that's a method that I use to start creating the art. So, I'll say that I wanna add some spikes on the top of his head. Now to do that I'll simply use my layer effect. I'll create some sort of spike, I'll do that by drawing a selection. Something like that. Keep in mind I can add to the selection by selecting this key right here or holding shift. If I hold shift, it'll put a plus sign next to the selection and I can keep adding to it. Alt will subtract like that, so those are basic selection of our spike. I'll just go ahead and fill this with a color. Start off with a dark black. I'll Cmd+D to deselect. I'll use the layer, I'll lock transparency right there. See it puts a lock right to the end of the layer there. Click off of that and now, I can paint freely inside this quick little design I made. So I'll just start off with a soft brush and just paint in some light and dark there and I'll grab a chalk brush here. Just painted some texture. Something like that, just to give us something to work with to add to our character. So what's nice about layers is I can do all of that really quickly and I'm on a separate layer. I can hit Cmd + T or Edit > Transform, hold Shift. I can scale that down. If you don't hold shift it'll just distort it which is fine too you can just distort in the place and then, now I could add that spike. Let me zoom in here a little bit, I can add that spike to our character here. And another kind of neat and quick thing that you can do as you can hold Alt, as long as you are selected on your move tool here. You can hold Alt and copy here, if you want your layers, you'll see that i interactive did another copy there, when I moved it over. So that's really, really a neat feature and it's something that allows you to move really quickly. You don't have to go in here and keep opening up your layers. A lot of times I'll leave this closed and I'll move this around into place I'll know that I hit. If I hit Cmd+E, it just merge those two together. Cmd+T to move them again, kinda resize them, re-distort them, whatever. And say I want to another spike right back here, but a little bit smaller. I could take the Selection tool, select around it, Cmd+C, Cmd+V, hit V for move. So it brought me back to my move tool. Cmd+T and resize down, so all that I was able to do, hit Enter to lock in the transformation. I was well able to do that really quickly and not jump in and out of the layers tool section here. Now once I get it into place I hit Cmd+E, I could double click here and just call these spikes now to make a little bit easier to discern from one from another. And now, I've got spikes that I can set in and around this character's head, I can hold Alt again, drag them all over, hit Edit > Transform> Flip Horizontal. And I've got spikes on the other side and I just go spike crazy and start putting him everywhere if I want to. But also the more important thing to keep in mind is when you do things like that ,I can play some of the each character. So if I get something I like, then I would save out that layer and be able to utilize it all throughout my work. Now let me go ahead and show you what I mean about saving that out. So say, get the spikes the way that I want, I put a good amount of time into making them look right. These are obviously very basic and they need a lot more work to be ready to incorporate into a painting or whatever. But say this is what I wanted and I can simply go here right click go duplicate layer. I can click new right here under document I could name it. I'll just go ahead and hit OK for now. Now what it's done is it's recreated the document at full scale so it's entire window With the same resolution, same size spikes. So I've got a couple options here. One of the things I like to do is take the spikes themselves, or whatever element I'm trying to save. Scale it to a decent size. I always like to be a little bit on the larger end of the resolution and scale so that I can downsize it but if I need to use it for a larger file, I've got plenty of resolution to work with. But you also don't wanna get in the habit of storing really large files all over your hard drive if they're not necessary. So, we'll zoom into this spike artwork, and you notice if you get really close it's still really clean, and that's subjective to what using it for but I think this will be fine. So say I needed to save these I can now select around them, go Image > Crop. A lot of times I'll set up a background layer as a separate layer, just so I can see the design a little bit better, so maybe something like that. But I do keep the layers separated, so I I have more ability to edit and then I'll save that. The one last thing to keep in mind, it's really basic and I'm sure most digital artists already understand this, is that if you do happen to manipulate and move things around. Again, I'm holding Alt and just kind of pulling side to side, the top most layer is going to be in front, the bottom most layer will be on the back. So I just wanna make sure I mention that. So we'll delete those and the other thing to keep in mind with players as well is that if you have the layer selected and you hit delete it'll simply delete the artwork. If you don't have any selection like this and you hit delete It will delete the entire layer. So that is a good thing to keep in mind. So now I can File >Save, save this somewhere on my hard drive and I've got my spikes for the duration. All right, now the next thing I want to tell you about layers, and we'll get more into this as we create the artwork for our monster creations later in the course, but blending modes are highly important. So well say for instance that we wanted to add some tone to these spikes or some color. We've got all these blending mode options, so the way these work is each new layer that just call this color will affect the each layer beneath it. So for instance, if I add a color will just do a gradient over these spikes. So, I'll click here go to my gradient tool, I'll click here, and let's see if Something like that. Let's go ahead and put a gradient over top of this. Now, as a solid, under normal mode, that's what we get. So, we can't see our spikes at all, but if we start to go down the list and I recommend that you just play with these because there's so many variables in what they can create hard to really remember them all. I can definitely tell you that the main ones that I use are color, as you see there it just simply added that fact to my existing artwork. And you could see it only applied the color to the areas that already had value, so it's a neat way to work. Now if you go from Color, another one I use a lot is Overlay, it provides a different effect. I actually use these in conjunction with one another quite a bit. So I use Color and then I'll apply another layer over top and set to Overlay. I might get in here and add, let's see, let's say a reddish Orange. I use a soft brush And I might just wanna punch up the highlights and show another light source, so I'll use overlay with that quite a bit. Color Dodge is also another neat one because you can do a lot of neat glow effects. And again, like I said we'll get more into that as we produce the artwork. But I just wanted to you to be aware that these blending modes can be a very helpful feature for creating your artwork. Okay, so now I wanna go ahead and show you a little bit more about the brushes, and some of the neat features that they have. Now, I use a pretty basic brush set up. I try to avoid having too many, just because it takes longer to sort through them and find what you need. Some of my favorite brushes are the chalk brush that comes with Photoshop, and I've just adjusted the settings. If you go to Transfer > Pen Pressure > Pen Pressure with no shape dynamics. Now without the shape dynamics on, I'll show you the effect that I get. We create a new layer for that. Double-click here we call this Brush Effect. Turn the layer palette off. Okay, so if I size the brush up, no keep in mind I'm using the bracket keys to size my brush up and down. I do that quite a bit as I paint. Now, if I put light pressure and I slowly bear down all the way and then lighten back up, that's what I get. Now it's hard for me to discern what you might get. Mainly because the settings on your tablet are a huge factor with what you've just seen there. So, you might barely push down on your screen and get something like this. So you've got to learn to tweak the settings in your tablet and get them just right. But primarily, what you want for painting is the ability to get something light, press down, get something more opaque. Just like that and that will allow for a lot of different effects right there. Now for a brush like this click here another give me black and white for a brush like this. The thing that I like most about it is the rigid edges that I get the very end of the stroke and the nice overlay method I can get by brushing over top with light pressure. So I can get this nice texturing effect with it. You can also put this all the way up to 100% opacity and you can select but lightly press, and you can actually blend. And you don't have to have it at 100% opacity, it's just the way that I like to work, and sometimes I'll adjust it if I'm feeling that I need a little bit more control. Then I can turn the opacity down, but you can see just by doing this I can blend that back and forth. I'm holding alt, selecting the new tone and then just softly pressing. I can grab the white here, softly press and then I can blend out this way. So it takes a little practice to get used to, but you start combining that with resizing the brush and you can quickly blend effects just like that. And another way to do that is to simply grab a soft brush. Let me go back to my brushes here. Make sure I'm on the brush and let's grab a soft brush like this one here. Again, I'll show you the settings. Simply pen pressure, and pen pressure under opacity jitter, flow jitter under transfer and that's it. Now this is just what I like for painting, so now, this brush will give me. A soft edge. And put it back on black and white. And I can blend with it, almost just with the brush itself. I start holding all and I can blend back and forth. Get a number of facts with that. I can also come over to a pattern like this and say that texture is just a little bit too much for me, then I can use a soft brush over here. And I can blend some of this even further. And that's really all it boils down to. Now, the other thing that brushes are great for, is saving time on certain effects. So let's take this layer off, let's add a new layer, call it brush effect 2. And we'll say that I want something like a grass or hair like pattern. A good brush for that is, hit B for brush, is something like this, just a series of dots. Now, that's one I created, but it's real simple to make. But we'll take the spatter brush which comes with Photoshop and I'll show you with that. It yields an equally nice result. So, again, the settings for that are just pen pressure, pen pressure, no shape dynamics, at least not in the start. Wanna use something like this? And I can simply get this nice kind of grassy like effect and I think this effect really takes shape when I keep overlapping the strokes. Now this is one where I will play with the opacity a little bit and I will paint back and forth to get the effect that I like. I'll also even use a Smudge Brush with the same type of brush to enhance the effect sometimes. So I'll show you what I mean there. Let me hit X to go back to light, pressing even softer I always notice that I have to press even lighter with the white then and I do with the dark to get the effect that I'm after. And all I'm basically doing is trying to build up a bit of texture, and see into the shape a little bit more. So I go back and forth, I'll size the brush up and down. If I don't want something that's too repetitive, I might throw random shapes in there. If I don't want this shapes to come off too much at a blunt end, I can simply hit here, and what that did is it applied shape dynamics to the same brush. I generally don't paint that much with that effect on, but I draw with that effect on. So if you notice the same brush tip, without design. You get this, with it on, you get this. It's a lot more of a drawing type look, which can be useful in certain effects, like drawing. Okay, so there's a little bit of a grass effect. I would just keep painting it in and back and forth I got it right. Now as far as what I said about the smudge, the Smudge tool or the Eraser tool can use any of the same brushes. So we'll take the Smudge tool, we'll grab the same spatter brush right here and I'll actually Smudge some of these edges back and forth, To get more of a hair type look at the very end. You see I'm just basically, I'm pulling, I'm clicking, pulling, and holding in one direction as I pull, playing it back. So if I pull the other way, you'll see I get some of that tone sprouting off in the other direction. And that's really it. So that particular brush, once you get the hang of it can make grass hair a lot easier to accomplish. Okay, so that should give you a basic understanding of how layers and brushes work. And we'll be using those a lot more throughout the course and I'll show you a lot more facts as we go. And that'll complete this lesson. Next we'll head over to Lesson 2.2, Working with Selections to Control our Effects.


