
 Lessons: 13Length: 1.9 hours
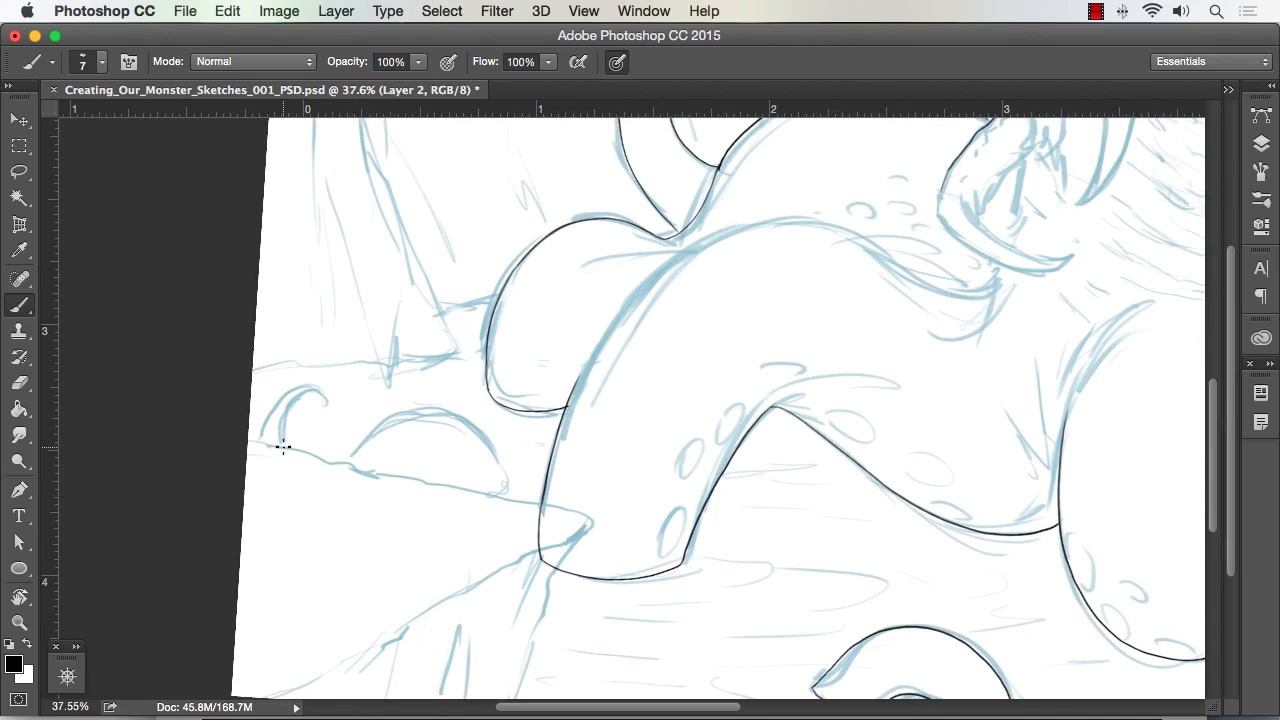
- Overview
- Transcript
3.2 Blocking in the Overall Shapes of Our Painting
In this lesson we will separate areas of our painting and block in some basic tone. This will allow for an easier workflow and editing as we progress through this course. This also allows us to create quick selections later while painting our monster.
1.Introduction
1.1Introduction01:15
1.2Tools and Resources01:20
2.Understanding the Tools We Will Use to Create Our Monster
2.1Understanding Layers and Brushes18:14
2.2Working With Selections to Control Our Effects11:21
3.Designing Our Monster
3.1Studying and Sketching From Reference to Create Our Creature Design11:32
3.2Blocking in the Overall Shapes of Our Painting15:35
3.3Painting in Light and Shadow to Give Our Monster Depth and Form15:39
3.4Using Liquify to Quickly Modify Parts of Your Illustration14:45
4.Refining the Artwork
4.1Adding in Detail and Textures12:59
4.2Creating Effects With Blending Modes04:19
4.3Adding Finishing Touches With Levels and Color Balance03:20
4.4Saving Elements of Your Painting to Enhance Productivity02:08
5.Conclusion
5.1Conclusion01:12
3.2 Blocking in the Overall Shapes of Our Painting
Welcome back to how to create monster art and Adobe Photoshop brought to you by Tuts plus. I'm you instructor for today, Robert Marzullo. I will now be covering lesson three point two blacking in the overall shapes of our painting alright now one of the things I want to show you is in Photoshop the best way to paint I think is to separate components. Of your painting, so we're gonna separate the monster, and what a gonna do is add a layer style to go to layer, layer style, color over layers is set to a blue, you pick whatever color is good for you, we just basically wanna to turn down the opacity, but still be able to see our line work, i create a new layer over tab. And I'm going to draw over the monster and create a selection. So I've got the brush with the shape dynamic set and I'm just gonna draw around the Character and this serves kind of two purposes. It allows me to define the artwork a little bit more, give it a bit of a quick clean up to the edge, even though I'm not trying to be very much of a perfectionist at this stage, I'm just trying to get an outline. But the thing is that by doing it this way, you're able to quickly separate the artwork. Like the the monster from the background. You could separate legs or arms. Like I could take the arm right here and place that in front of the monster. If I needed to to give myself another degree or level of seclusion to be able to paint a little bit easier. And it's great to think of it that way because it allows you a lot of opportunities to make things in your painting go a lot smoother. So for this particular one I'm just gonna go around the entire shape of the creature and notice to I hit R for rotate and rotate the screen to where it's more comfortable for me to pull my line. I often times get a lot of people ask me, "How do I get nice line work", and although the main answer to that is just practice the other is knowing what can exceed your own way of drawing or painting which sounds so simple but I think a lot of people miss that. Where you basically have to know what your strong suits are. If your strong suit is ability to pull down and inward toward yourself which mine is that's the way that I draw, then you want to make the software or your canvas or whatever help you do that as to where I can't pull a line very well side by side. So there's no point me sitting there struggling with it now I do practice it. But it's definitely something I don't do as well so I utilize the program to make it easier on me, and keep in mind that those are what I call snap keys or they have a snap to function. So if you're on your brush icon and you hold space bar, you'll get the hand which will move the canvas around but then it'll snap right back to the brush and then if you hold r it'll rotate the screen. As you pull the screen with the mouse or your other hand and then I'll snap back to the brush so any key that you hold to get to without releasing, you hold do the function then release it'll actually snap back to your brush so it leaves you without having to go aver rotate the screen hit beef or brush it saves a step so lots, of cool features inside Photoshop that allow you to do that and it's just good time savers So and Z for zoom I think I go back and forth to the actual button but you can hit a Z on your keyboard for a short cut for a zoom. And just real carefully going around now. Keep in mind too I really don't need to go as carefully around the artwork as I'm sometimes I just tend to do that because I'm trying to still see into the artwork a little bit more and see how I want the shapes to work and I'm also thinking about how I'm gonna paint them at this stage. So, the line work doesn't have to be perfect, because you're still going to paint a lot of this and you're still going to manipulate a lot of this. So these are just general guidelines to make the selection but, again, I do get in the habit of refining it because I'm still trying to figure out what I want to see in the artwork. But you see, I just sometimes do a section of a line, rotate to another section. Sometimes I sketch the line. Sometimes I do a nice long pull. Now if you get better with those long sweeping pulls, they do come in handy. Because there's certain things like cars, organic shapes like you see here. Just a variety of things where, if you get better at those longer sweeping poles, you'll actually speed up, you could sit there and sketch the line like I'm doing right there, all over the place but it does get a little more time consuming But there's times where the sketch line, to me, reacts little bit better and that's why I do it. So I've got I think a little bit more consistency in control with the sketch line, maybe because that's how I've drawn longer, but the long sweeping poles are important to master as well. And you can see right there as I'm adding in the selection, you can also do it that way. You could draw in your entire selection, and hold Shift to add to the selection, Alt to subtract from it. And you could create the entire selection around your character that way as well. So this is just another way of doing that. Like I said, it kind of serves two purposes because it gives you a refinement of your artwork another look into your design [INAUDIBLE] excuse me, as well as creating your selection. So once we've got the the full outline or perimeter of the monster drawn out, we'll then use the magic wand to select around it and then create our selection. I'll show you how to do that. And that that's essentially what you do the entire painting and then you block in a solid layer of a tonal value or even just white but you know it doesn't matter because it allows you to block transparency of that layer and begin to paint. So I wanna get a few of these little tentacle pieces in there as well. So I basically want everything that consists of the monster on one separate layer. And that's why layers can be so impactful and important to use because if you separate everything like this, it just cleans up your work almost since you know immediately there's just so much more you can do and you're not affecting other areas you're painting. Which you can paint the other way but it's just a lot more time consuming or a lot more prone to not being as clean of a painting you're just gonna tend to paint over certain areas and work to other areas that you don't want to. This way is like basically overlaying frisket over the entire painting and just cutting out the monster is what we're going after. And if you notice there, I'm just going up to the edge of the rock formation. Because that will be a separate layer. So I could really just either draw behind that rock formation or go up to the edge. It doesn't matter because we'll use that as a foreground element that will block it. So grab the magic wand tool, tolerance set to zero. I see my settings right there. I select the outer perimeter of our line work now, and I hold Shift, and I grab the little inside elements. You can hit Cmd+Shift+I to invert that selection. Or go to Select > Inverse, right there. And we'll zoom in so we could see a little bit better. So basically now if I hit Quick Mask, Q for Quick Mask, and show you that the selection is now selected the monster itself. Cuz notice I can only paint within that area now, but I wanna do another thing. I wanna contract the selection by two pixels. So select Modify>Contract and now I've brought that selection behind my line work just a little bit. So I'll take my color overlay off so we can see what the original sketch looks like. I'll add a layer and I'll just paint in white for now and I'll drop that behind the line work. I've also copied at the same time I copied the initial line work. I want to separate that from the background as well. So what that allows me to do is have my line work on one layer, of flood fill a way behind that line layer. So I can paint on the flood fill for a while, using the line work above it as a reference point, and I'll name these layers so I can separate them or see them separated. And then once I'm comfortable with the amount of paint work I put down, I can merge down my line work. Now you can merge down your line work from the start if you're a more confident painter and you wanna do that. I just think it allows me another level of control. And so now with transparency locked on that white flood layer, I can easily get in there with my chalk brush here and just paint in. First I paint in a starting value and that will give me just a way to separate and see my elements of the painting. I'll do like the monster, the rocks, the water. I'll separate all those in the same fashion. And again it'll allow me to just paint on each one of those separately and not worry so much about bleeding over into the other elements. And here I'm gonna show you how I can just use the Lasso tool for basic shapes so if it's quicker to just draw that shape in with the Lasso Saves the time from redrawing. And I know that with this rock formation, I'll be painting it over entirely anyways. So there's really no need to keep much of the line work. And then for something that's more difficult like this little branch. Even though I'll probably just draw that back. I just want to show you how you can also use Quick Mask to make things like this easier. So I hit Q for Quick Mask. And now with black and white, I can paint or take away any elements of the Quick Mask by painting it in with black and white. So I believe white separate or releases the Quick Mask and black paints it in. Or vice versa. But it's real simple, and you can use any brush, any opacity, soft brush effects, whatever you want. Here I'm just using a solid brush because I just want the shape of that branch. But it's a really neat way to just think of it like you're painting in for a skit, essentially, and you hit Q to release it and you've just got your selections there. So yeah that's another neat effect to create your selections and sometimes it's quicker to draw men. Other times, you think it'll be quicker, but it really isn't and it's better, it's quicker to do the perimeter. And the only way you will know that based on your own art style, is to time yourself with different elements so I recommend trying all these different selection methods. I'm doing the same thing here where I create a flood layer. I paint it solid and then I copy the linework. And then I just merge them together. Again, out of a more simple area of the painting. I'm just going to paint entirely over it anyways and probably refill in my darks. But if you notice even at this stage I made the foreground elements of those rocks a little bit darker. So generally in your paintings the foremost object closest object to the viewer is going to be a little bit darker in value. So even at this basic stage of separation, I start to implement that into my painting. So I'll just, separating these, trying to make a good organization of my layers and see exactly where I'm at. Obviously I could take the eye tool icon off and see what's what And generally I cut from the sketch layer that's kind of what I'm fixing here I generally cut components from the sketch players so I can make sure that's another way I could check my work and see that I've separated everything. And if the background elements are simple I could have just got away with just filling in the entire background here with one layer of tone but again, I just wanna to do a little bit more separation. So here I'm using just the Lasso tool. And keep in mind the short cut for that is L for lasso. And I'm just drawing it in because it's a basic shape and it's gonna get covered by the other elements of the painting anyways. So I just grab that really quick, I grab a little bit darker value, water tends to be a little bit darker and I'll just drop that in and move on and now the rock formations again. All just using the lasso tool. It's really quick. Here I'm sorry I'm actually doing the sky right there. But it will also give me the selection for the rocks because the separation from there will allow me to just paint on the background layer and do the rock formations. So actually generally don't have to do the very last selection. So just using a quick gradient, gradient are nice you can just click that gradient bar to top left, click the bottom icons where the color is and drop whatever color and then practice pulling your color fades out. You can actually do some pretty neat beginning stage you're painting just with gradients. I recommend doing that because it gives you a nice starting point. To see how I'm selecting half of that rock formation, and just throwing in a quick gradient. And again it's not spilling over to the other elements, because it's behind everything else, which in turn created a nice separation for my effects. So with that being done and having everything selected like that, it becomes very easy to get some initial paint work going in. And give myself a nice starting point to go to the next stage where we'll begin to start blocking in more detail, more value, a little bit of textures. But just mainly the larger shapes of shadows of light and dark in our paint work Hurts that'll complete this lesson, next will head over to Lesson 3.3 painting in light and shadow to give our monster depth and form


