
 Lessons: 13Length: 1.9 hours
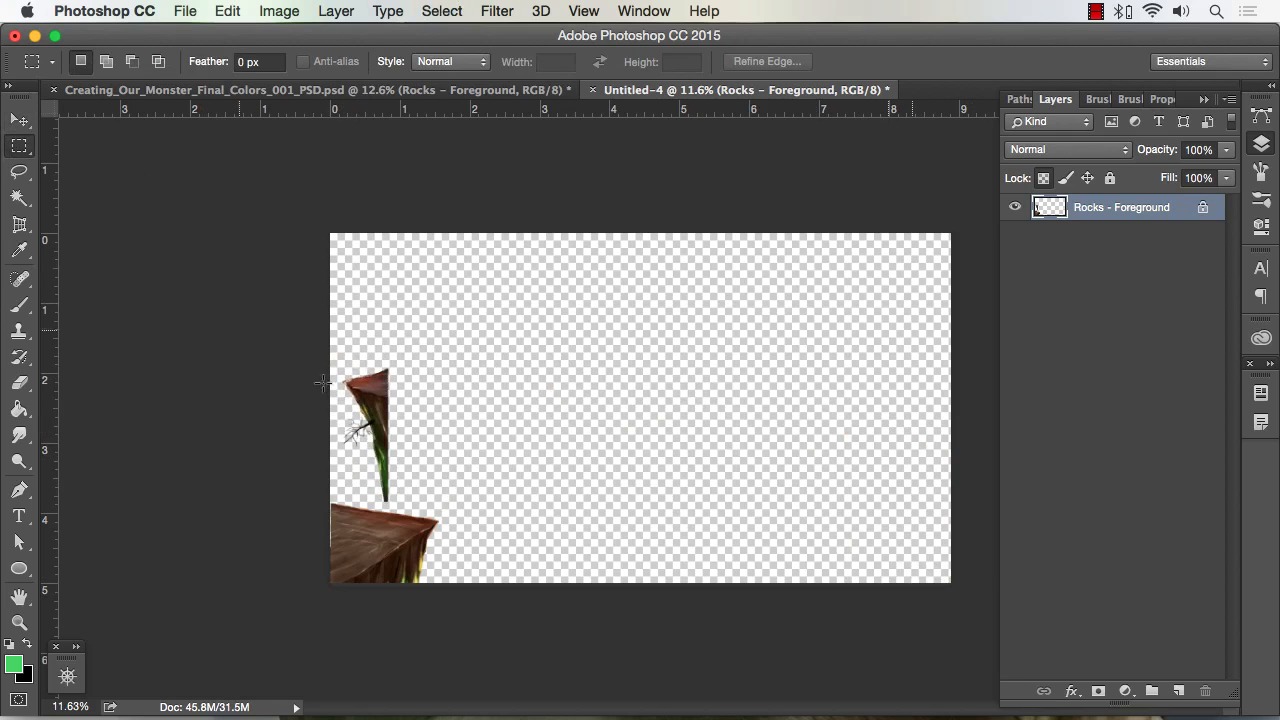

- Overview
- Transcript
4.4 Saving Elements of Your Painting to Enhance Productivity
In this lesson we will go over how to save various parts of your finished painting. You can create your very own clip art that will speed up future paintings. You can also composite some of these saved elements to create a variety of new effects.
1.Introduction
1.1Introduction01:15
1.2Tools and Resources01:20
2.Understanding the Tools We Will Use to Create Our Monster
2.1Understanding Layers and Brushes18:14
2.2Working With Selections to Control Our Effects11:21
3.Designing Our Monster
3.1Studying and Sketching From Reference to Create Our Creature Design11:32
3.2Blocking in the Overall Shapes of Our Painting15:35
3.3Painting in Light and Shadow to Give Our Monster Depth and Form15:39
3.4Using Liquify to Quickly Modify Parts of Your Illustration14:45
4.Refining the Artwork
4.1Adding in Detail and Textures12:59
4.2Creating Effects With Blending Modes04:19
4.3Adding Finishing Touches With Levels and Color Balance03:20
4.4Saving Elements of Your Painting to Enhance Productivity02:08
5.Conclusion
5.1Conclusion01:12
4.4 Saving Elements of Your Painting to Enhance Productivity
Welcome back to how to create Monstar and Adobe Photoshop, brought to you by tuts+. I'm your instructor today, Robert Marzullo. We'll now be covering Lesson 4.4, Saving Elements of your Painting to Enhance Productivity. So we've put all this time and effort into our painting. We've got it just the way we want, the colors, the effects, all our segmented layers. So we're ready to put this one to bed. But one of the things I like to do before totally retiring a painting is looking at elements that I can save and maybe speed up my workflow for the next time out. Something, for example, would be maybe these rock formations up front. So I can go to that layer here, right-click, go to Duplicate Layer. Under Document, click New, hit OK. And you can see it copied another canvas with the same resolution and size, which is nice because it doesn't downgrade the artwork. So I can select that, move it over. Hit Cmd+D to deselect, I'll draw a new selection right around here. I don't need to save this entire space, obviously, so I'll save some file size by doing this. And then I'll just save this somewhere on my hard drive where I can reference it later. So I really recommend doing that. I think it speeds up your workflow quite a bit. Now one of the neat things about saving out various elements of your painting like this, say for instance I want to just save out the creature itself, like this. What's really nice about doing this, is that later on, say I come up with another background, or series of backgrounds, or series of characters, if they're all separated it becomes very easy to combine them back together and make some new scenes. Some of the things that I really recommend saving are gonna be background elements like trees, shrubs, even just long-distance foliage shots, just a number of background things that you can combine and really speed up your paintings. So give this a try, and hopefully it helps your workflow like it has mine. So that'll complete this lesson. Next we'll head over to Chapter 5, the Conclusion.


