
 Lessons: 13Length: 1.9 hours
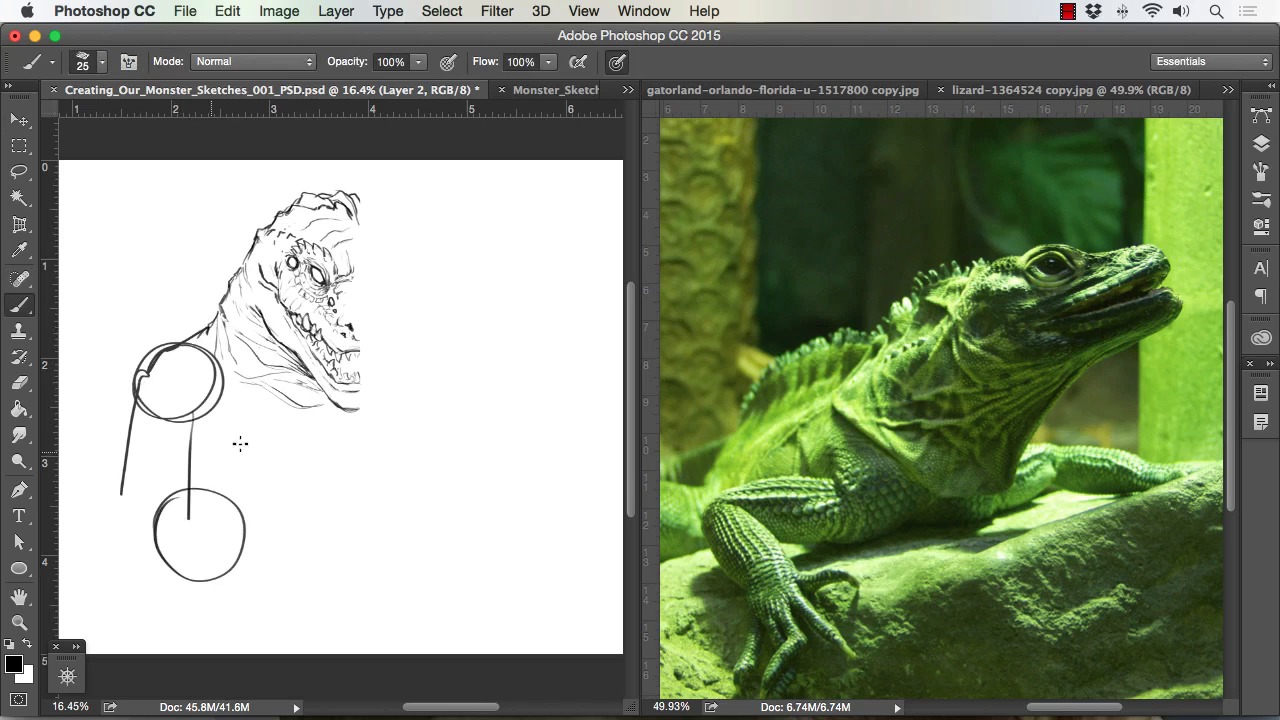

- Overview
- Transcript
3.1 Studying and Sketching From Reference to Create Our Creature Design
In this lesson we will go over how to properly use photo reference to spark creativity and give us good design elements for our monster. We will study various animal and insect photos to create the monster line work for our painting.
1.Introduction
1.1Introduction01:15
1.2Tools and Resources01:20
2.Understanding the Tools We Will Use to Create Our Monster
2.1Understanding Layers and Brushes18:14
2.2Working With Selections to Control Our Effects11:21
3.Designing Our Monster
3.1Studying and Sketching From Reference to Create Our Creature Design11:32
3.2Blocking in the Overall Shapes of Our Painting15:35
3.3Painting in Light and Shadow to Give Our Monster Depth and Form15:39
3.4Using Liquify to Quickly Modify Parts of Your Illustration14:45
4.Refining the Artwork
4.1Adding in Detail and Textures12:59
4.2Creating Effects With Blending Modes04:19
4.3Adding Finishing Touches With Levels and Color Balance03:20
4.4Saving Elements of Your Painting to Enhance Productivity02:08
5.Conclusion
5.1Conclusion01:12
3.1 Studying and Sketching From Reference to Create Our Creature Design
Welcome back to How to Create Monster in Adobe Photoshop brought to you by Tuts+. I'm your instructor today, Robert Marzullo. We'll now be covering lesson 3.1, Studying and Sketching From Reference to create our creature design. Okay so now we're going to go and work out our forms and our sketch lines to give us a reference point to start painting. So what I like to do, if you notice here I've got some ideas that have already worked out, added some effects to, and these all pretty much started the same way. A very loose sketch, or very blocked in shape or series of shapes that I would work up to these forms. But to do that I always start with some kind of reference. Just ideas really, just to look at stuff and gain perspective on a variety of animals and then distort those animals into some kind of monster design. So I really recommend doing that. I don't recommend tracing a whole lot, it's not a bad thing, you can trace elements if you need to, but if you practice enough you won't need to. So you can simply set up your screen like this where you have a divider window. I like to put my my work sheets over here, or my canvas. By the way, just so you know what I'm working at, you go to image size. First, make sure I'm on the canvas over here. Image size. This is a seven by 12 and a half, approximately, 300 dpi. I'm more into image size. I make sure that the image is big enough where I can get some good line clarity and paint clarity but then also that it's not such a large file that my system can't handle it. So that's where I'm at right there and as far as just looking at reference. I get a variety of things, I look at alligators. They've got some great forms and the reptilian features are awesome. Dinosaurs are great, obviously. Elephant skin, great for texturing. Rhinos and just a variety of lizards. Lizards have some of the neatest features and monster-like qualities already. So it's real easy. And I think the smaller ones, like insects, are great too because not everybody is so used to looking at them up close. So that in turn almost resembles a monster in itself. Because by the time you draw it, since people aren't so familiar with it, It becomes alien and monsteresque to them cuz they're not used to seeing it in such detail. So this arm off the praying mantis is just a really good example, I really like that look. So I'll work off these reference shots here and then I'll draw onto the screen over here. I'll the time lapse this next portion and narrate over top. So let's go ahead and get started. Okay, so now I'll just study from this reference and start to sketch out my line. And notice I also selected the shape dynamics on this brush to get more of a point in a pencil kind of look. So first in notice that like the eye from this reptile. So I obviously change the angle and start to draw that in. And then I also liked the ridges in the spikes from the T-Rex, so I'm doing a little bit of that as well. And now I'm studying the mouth from that one, but then I quickly want to go to the alligators because I really like, and I'm not sure if this an alligator or crocodile ,but I think it's alligator. But just the mouth shapes from these creatures are amazing. So I study that for not only the shape of the mouth, the opening, but also the teeth and I change the teeth a little bit. I put some on the inside and some on the outside Again, just another way to give it more of a monster-type quality. And just loosely sketching in some of the shape of the overall head, and I'm still figuring it out. Now, one of things I want to make sure I mention to you is, wWhen you're in a rough stage or rough sketch like this, be very open to change. If you keep it very loose, messy even. I would err more on the side of a messy, haphazard sketching than a clear and concise line work at this stage. The more I draw this stuff, the more realize that trying to be too concise in the beginning when you're designing a character like this will really stagnate your creative process. So just be nice and open to change and. When you see me flipping through these pictures of the various animals, that's what I'm doing. I'm just thinking about what area of that animal would look good into the sketch. And I'll just rough it in to see if it works. If it doesn't, no big deal. I didn't spend a lot of time, an absorbent amount in any one area. So I like more of those spikes in those cranial shapes in there. And here I'm cutting the image in half, or cutting part of it away, and I'm showing you the direction that I've been sketching in with that arrow that I just had there. But I'm also going to flip this and combine it to see if the these shapes are working. And here I actually like the neck from that reptile, so I want to incorporate a little bit of those folds in there. And then I start to try to work out the arms. Arms can be tricky. I'll try to work the neck down further and then work on the arms and there you see me flipping it and combining it, which can be a really neat effect to not only save time but see if your design's working out in a symmetrical fashion. But, yeah, again, back to the arms, they can be tricky, because we're so used to drawing arms on people, and you can see that the reptile arms work completely different. So, you want to make sure that you get that bit of monster quality into the the arms, because if they look just too traditional then it won't have the same effect. And you see I'm just flipping through the photos here. I'm basically trying to again, gain perspective. I'm looking at those photos and studying some of the arms and seeing which ones stand out. And obviously I end up gravitating towards the one I like the most and that's the arms of the praying mantis. Very unique and obviously recognizable, one of the more recognizable insect arms. So one of the things I do right there is I add a little pincer at the bottom. I try to play with the shape of the overall arms, I had a bit more of an elbow peak and just things so you don't look at and just go that's obviously just a praying mantis' arm. It's okay to have qualities from it for sure, but I definitely want to give it a little bit more of a different feel. I even try to flip the hand back and forth, it doesn't quite feel the way that I think it should so I end up flipping that back right there. But that's the whole process, is just playing around with things like that and seeing what works and what doesn't. And again, being very open to change at this stage. I'm definitely not committed to any one idea at this point. And then what I do is, as soon as I get something looks semi-decent, I flip it to the other side just to, again, save time. When I'm doing conceptual designs like this, I'm more worried about getting those ideas in there. Not so worried about the asymmetrical values. Now if I do another piece later of the same character then I'll change the proportions and angles and things like that, and try to get a more dynamic approach to that. Now for the bottom I just decide to go with some tentacles. Tentacles to me always look very monstrous and scary and all that. So I just think that It's a good fit to give this creature another dimension. They're fun to paint too, I'll end up doing the suction cup texturing effect to it or the components of it. And I just free flowingly paint those in there or, I'm sorry, draw at this stage. But draw those in there and just look for a little bit of the roundedness that it gives to the piece and add some overall size to our creature, which is nice. And then I can also include a water dynamic, with the creature going in and out of the water. And just some rock formations in the background to give the picture a little bit more depth and area of interest. And I always usually draw in a light source. Even if I don't have the light source, or the moon shape, sun shape, whatever it is stay in to the end result. At least tried to start envisioning, even at this stage, how my light source is gonna go. So the rough sketch is all preliminary work to that that next stage. And if you get used to thinking of a lot of your work like a relay race, that you're giving yourself the next stage to the next part of the race, or whatever. You're working up to each additional stage. You start to get more comfortable and overall, you'll start to skip steps and speed up and things like that. So it's very important to always be thinking ahead in your project and going okay, what's my next move gonna be as I'm creating this. And again, using some of the selection tools to grab areas and manipulate those you can even use the distort. And you see I'm just grabbing part of the line of work at a time. I recommend doing that because you'll get overall better distortions and get things into place a little bit more accurately. Later on in the course, I'll be showing you how to use liquefy to modify parts of your painting. It can be very helpful and a big time saver. And here just filling in some texturing. I like to give a little bit of my line of work, a little bit of the texture that I'll actually be painting in. But just to remind myself of what I was thinking when I was sketching it out. If I leave too much blank area then I might miss something. And still play with little tiny details and spikes. Another thing I'll add in to a lot of paintings like this is spikes. They always to me, always make something look a little bit more monstrous. And they're fun and easy to do, so why not. All right so that'll finish up this lesson. Next we'll head over to lesson 3.2, Blocking in the Overall Shapes of our Painting.


