
 Lessons: 15Length: 1.7 hours
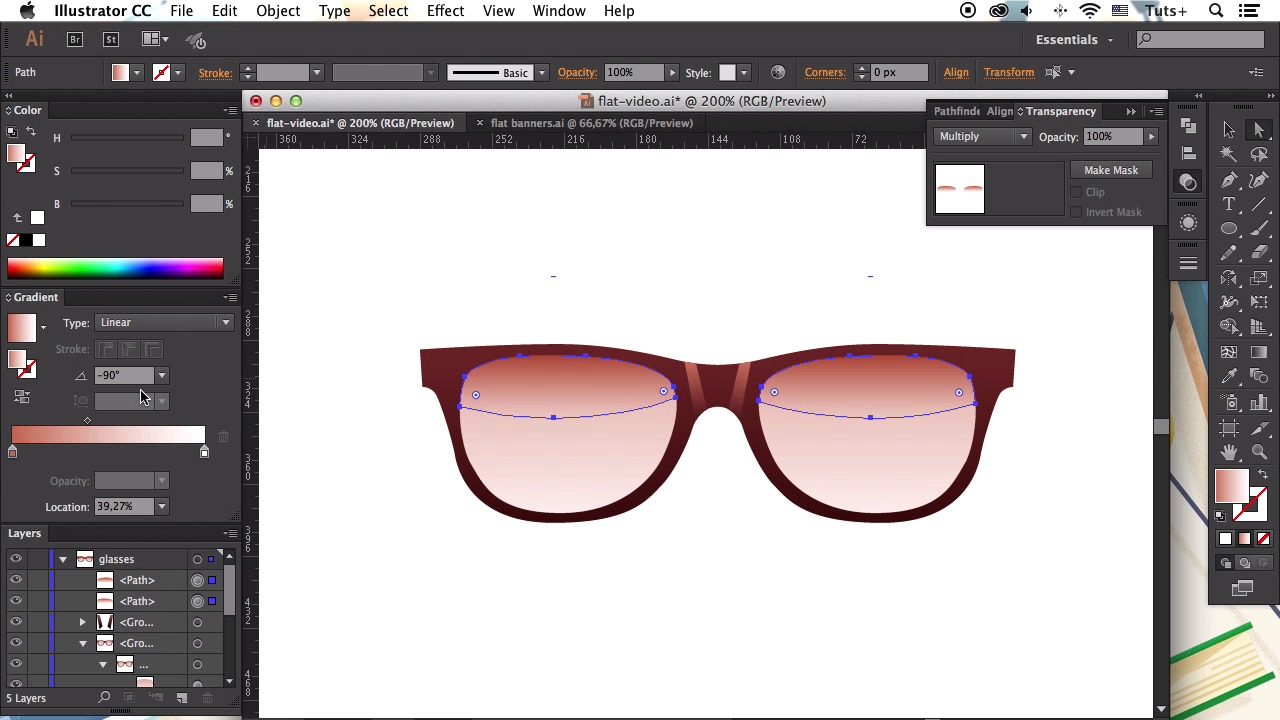
- Overview
- Transcript
3.4 Rendering Glasses
In this lesson we’ll be creating trendy hipster glasses with semi-transparent elements, reflections and glossy surfaces, making them look realistic, but at the same time preserving the overall flat style of our set of items.
1.Introduction
1.1Introduction01:40
2.Advertisement Concept Idea
2.1Making a List of Elements03:30
3.Creating a Set of Workspace Elements
3.1Making a Laptop13:40
3.2Drawing a Cup of Coffee06:58
3.3Creating a Sketchbook05:53
3.4Rendering Glasses07:55
3.5Making Headphones06:37
3.6Creating a Smartphone04:59
3.7Creating a Tablet04:10
3.8Drawing a Camera08:32
3.9Designing a Wallet and Credit Cards11:50
3.10Making Stationery08:15
4.Making an Advertisement Template
4.1Creating a Wooden Background06:15
4.2Building a Composition08:26
5.Conclusion
5.1Conclusion02:13
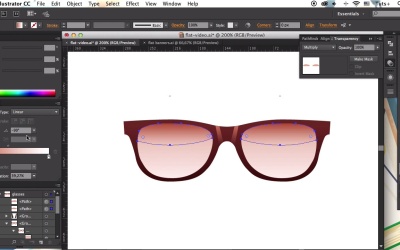
3.4 Rendering Glasses
Hello guys and welcome back to creating Flat Workspace Elements for Advertisements course with Yulia Sokolova at Tutsplus. In this lesson, we'll be creating trendy hipster glasses with semi-transparent transparent elements, reflections, and glossy surface. Making them look realistic, but at the same time preserving the overall flat style of our set of items. Let's start. This time we'll do some freehand drawing starting from a rough sketch. You can make it right in Adobe Illustrator using the pencil tool as I do or use any other medium to your liking whether it is Adobe Photoshop, or a pencil and sheet of paper. Or if you wish, you can use one of Illustrator basic shapes and just make your glasses square using the Rectangle tool to make a rim. Your item doesn't have to look exactly the same as in this tutorial. I draw only one half of the glasses and then just use the Reflect tool to flip it over the vertical axis, which is very convenient and time saving. So, when we're happy with our final sketch, let's take the pen tool and start outlining the left part of the glasses. The pen tool is very convenient for creating smooth lines when you can click and drag to create the anchor points with long anchor handles. Use the direct selection tool to adjust the position of the anchor points making the lines move. As previously, flip the left side of the glasses horizontally, making a copy. If you have some detached anchor points as I have here, select them, click right mouse button, and join them here. Go do the inner shapes and use the minus front function of buff finder panel to cut the holes in the rim of your glasses. Make a compound path of two shapes. And click Minus Front in the Pathfinder. Let's apply the colors to our glasses. We'll start from the rim applying a linear gradient of some dark color. Perhaps dark brown. Make the gradient vertical. Now move on to the glasses. Select the shapes and apply a vertical gradient. Make them seven transparent by lowering opacity in the transparency panel to say, 50%. Play with the colors making a very wide brown or light orange linear gradient. Now let's add the glossy highlight at the nose bridge part of the rim. Make a tiny narrow rectangle and switch to this green mount. Make one part of the gradient black to make it transparent. To form the top of the shape and rotate it, adjust the shape and use the Reflect tool to make a reflected copy. Grab the shapes with the Shape Builder tool. Adjust the position of the gradient on the highlights. And switch the stroke color of all the elements to none. And now let's add some overtones to the glasses. Make two ellipses and place them above the upper part of the glasses. Duplicate the shapes. Select both the glass and the ellipse on top of it. Use the intersect function of path finder or the shade builder two to cut all the shapes. And apply a nice brown gradient. Now we can add some reflections to the glasses as well. Make several stripes with the rectangle tool. Click right-mouse button, and turn them into the compound path. Place the stripes over the glasses. Delete then one of the parts. Set the blending mode to Screen, and lower the opacity to 20%. Pick the appearance from the first highlight using the eye dropper tool. Now we can add some decorative elements to the rim. Make a smaller shape with the ellipse tool. Apply a steel gray gradient giving it a metal look. And add a small highlight on top, and a gentle shadow in the bottom of the shape. Switch the highlights to Screen mode. Duplicate the basic part twice. Move the upper copy up a bit, and use the Minus Front functional Pathfinder to cut the shape. Switch the blending mode to multiply. Select all the elements and group them. Use the retain tool to retain the shape to minus 10 degrees. And use the reflect tool to make a copy and flip it horizontally for the opposite side of our glasses. Now let's form the arms or the headbands of our glasses, which will be folded behind the glasses. Use the pen tool and start from the left arm. Make a smooth curved shape. View the anchor point tool to make the anchor points smoother. Pick the color from the rim of the glasses. Go to the arm and paste it in front twice and move the shape up to make a shadow with the help of the path finder panel and multiply blending mode. Group the elements. Use the reflect tool to make a copy. Send the arms to back, placing them beneath the glasses. Now let's duplicate the base of the glasses twice. And add some shadows and highlights as well, to make it look more glossy, dimensional and realistic. Select the two shapes and use Minus Front function. Click right mouse button to isolate the graded pieces. Use the eye dropper tool to pick the colors for the rim and the shadow parts of the glasses. You can adjust some details of the glasses, if needed. For example here, I've decided to change the direction of the gradients above the glasses. And that's it, the glasses are finished. Great job, our stylish hipster glasses are ready and we can move on to our next workspace element. In our next lesson will be making colorful headphones using various tools and warp effects. See you next time.


