- Overview
- Transcript
3.5 Making Headphones
In this video we’ll be using various tools, shapes and warp effects to make a colorful headset.
1.Introduction1 lesson, 01:40
1.1Introduction01:40
2.Advertisement Concept Idea1 lesson, 03:30
2.1Making a List of Elements03:30
3.Creating a Set of Workspace Elements10 lessons, 1:18:49
3.1Making a Laptop13:40
3.2Drawing a Cup of Coffee06:58
3.3Creating a Sketchbook05:53
3.4Rendering Glasses07:55
3.5Making Headphones06:37
3.6Creating a Smartphone04:59
3.7Creating a Tablet04:10
3.8Drawing a Camera08:32
3.9Designing a Wallet and Credit Cards11:50
3.10Making Stationery08:15
4.Making an Advertisement Template2 lessons, 14:41
4.1Creating a Wooden Background06:15
4.2Building a Composition08:26
5.Conclusion1 lesson, 02:13
5.1Conclusion02:13
3.5 Making Headphones
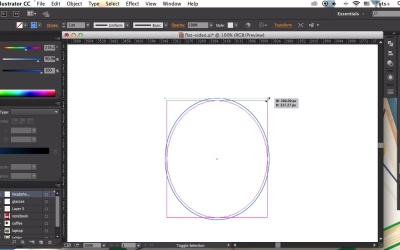
Hello, folks, and the welcome back to creating flat workspace elements for advertisements cars with YuLia Sokolova at tuts+. Today we'll be using various tools, shapes, and warp effects to make a colorful headset. Let's do it. We'll start from the headphone. First of all let's make a 30 by 135 pixels rectangle. And another one of 20 by 120 pixels size. Align the rectangles and place them next to each other. Create a third rectangle of 20 by 55 pixel size. Select the upper right anchor point of the middle rectangle, and use the Move Options panel to move it 30 pixels down. Do the same for the lower right anchor point, moving it 30 pixels up. Make the corners rounded with the help of the Live Corners function. Create a squashed ellipse, placing it at the left side of the headphone, so that its center crosses the edge. Let's apply the colors to the headphone. Start from the bigger rectangle, filling it with linear gradient of light gray shades. Make the gradient go vertical. Send the ellipse to back, and fill it with gray gradient as well. Now let's move to the plastic parts of the headphones, and fill them with bright magenta colors. Adjust the position of the gradients and use the eyedropper tool to pick the color from the other part. Send the smaller rectangle to back, and hide it behind the headphone. And now we can make a headband. Make a 300 by 350 pixels ellipse. Create a smaller copy inside, and use the Minus Front function of Pathfinder, to cut a hole in the big ellipse. Move the copy down a bit, Select both elements and click Minus Front. Take the eraser tool, hold down the Alt key and delete the lower part of the shape. Make the corners of the shape slightly rounded. Now make a small rectangle about 13 by 45 pixels size. Go to Effect > Warp > Arc. Here I set the horizontal band value to about 15%. Expand the appearance of the shape. Resize it, rotate, and place at the left part of the headband. Use the Reflect tool to flip the shape horizontally and place a copy on the opposite side. Use the Shape Builder tool and hold down Alt or Option key to get rid of the unneeded pieces. Go to the head band, place it in front twice and move the upper copy up a bit. Use Minus Front to cut off the unwanted pieces of the shape. Use the eyedropper tool to pick the colors from the headphone and apply them to the headband. Make the base of the headband bright magenta. Apply light gray and dark gray gradients to the minor parts. Attach the headphones, editing their size and position. Use the Reflect tool to make a mirrored copy of the headphone. Apply a nice lilac color to the small parts in the bottom part of the headphones, lowering down their opacity a bit. And here we have it. Our bright colorful headphones are ready. Great job. We've made another element from our list of workspace items and can move to the next one. In our next lesson we'll be making a front view of a smartphone and use its screen as a mock up. Meet you in the next lesson.


