
 Lessons: 15Length: 1.7 hours
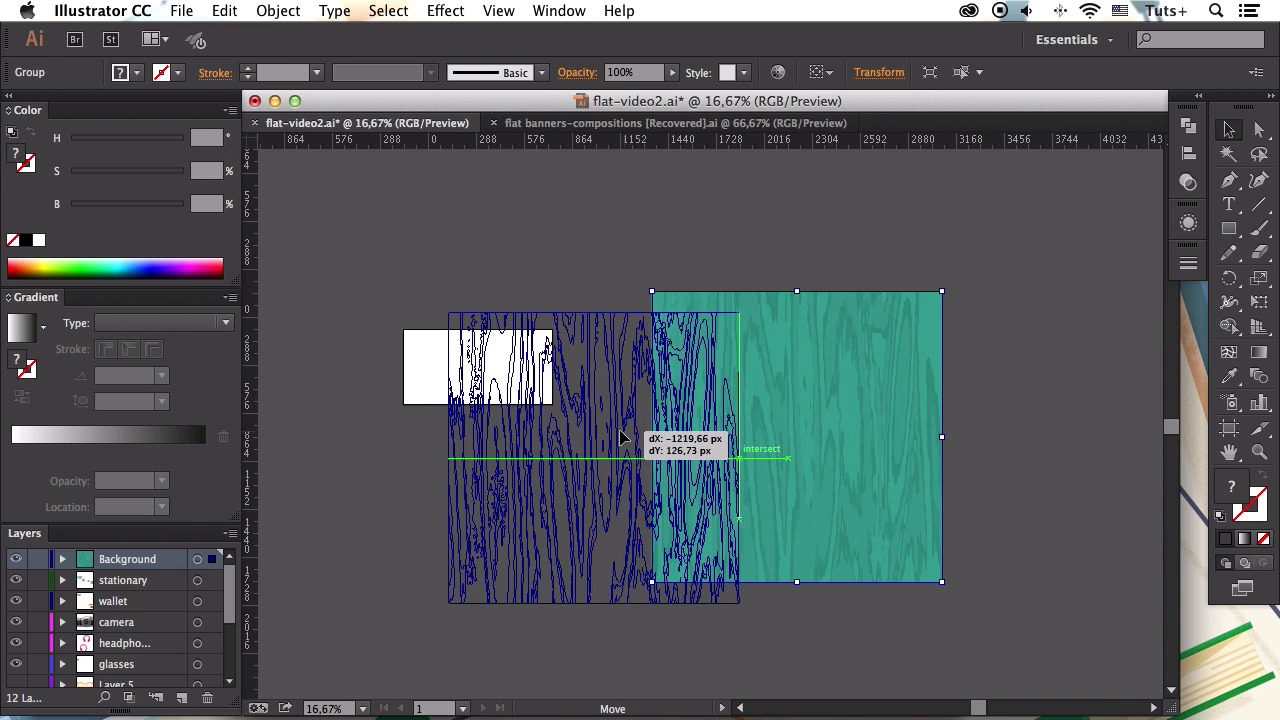
- Overview
- Transcript
4.1 Creating a Wooden Background
This time we’ll be using the Live Trace feature to make a realistic wooden texture. We’ll be forming wooden planks for the background of our workspace. You will need to use a reference image of a wooden surface from your own photo collection or download the following file:
Related Links
1.Introduction
1.1Introduction01:40
2.Advertisement Concept Idea
2.1Making a List of Elements03:30
3.Creating a Set of Workspace Elements
3.1Making a Laptop13:40
3.2Drawing a Cup of Coffee06:58
3.3Creating a Sketchbook05:53
3.4Rendering Glasses07:55
3.5Making Headphones06:37
3.6Creating a Smartphone04:59
3.7Creating a Tablet04:10
3.8Drawing a Camera08:32
3.9Designing a Wallet and Credit Cards11:50
3.10Making Stationery08:15
4.Making an Advertisement Template
4.1Creating a Wooden Background06:15
4.2Building a Composition08:26
5.Conclusion
5.1Conclusion02:13
4.1 Creating a Wooden Background
Hello folks, and welcome back to creating Photoworks-based elements for course with at tuts+. This time we'll be using life trace feature to make a realistic wooden texture. We'll be forming wooden planks for the background of our workspace. Let's start. First of all, we need a good reference image of a wooden texture that we can use in our work. You can use a photo of a wooden surface from your own collection or the one that we'll be using in this tutorial. You can find the link in the materials to this course. Let's go to File > Place, and select your image. Click and drag to place the image on the art board. And here in the top control panel, we have the image trace options. If you open the drop down menu, you'll found some presets for image tracing. All of them are perfect for the purposes they serve. In our case, we need to make a realistic wooden texture. We could choose a High Fidelity Photo preset, but at the same time, we need to have a small range of colors in our image. So that we could recolor it just in a few clicks. So let's select the 3 Colors preset. Now, as our image is traced, we can still adjust some tracing settings. Let's head to the image trace panel on top and open the Image Trace options window. Let's add one more color to our texture to make the wood more true to life. Here we also have a bunch of other options which make the image trace function very flexible. Let's leave the other options as default and move on. Now as we're satisfied with the tracing result, we're gonna expand the image, converting it into paths. And let's change the colors using the magic wand. Go to Window > Magic Wand. Here I set the fill color tolerance to 0, so that we select the objects only with the same colors without any varieties in tints and hues. Now, take the magic wand and click the darkest brown color on our image. And let's change it to dark blue or turquoise. Then select another group of brown shapes with the magic wand tool, use the eye dropper tool to pick a dark blue color. And make it a bit lighter. Fill other brown shapes with the lighter blue colors in the same way, using the magic wand and the eye dropper tool. Now let's make the artboard visible in View > Show Artboards. Click the artboard tool, and let's set the artboard size to 900 by 450 pixels for our banner. Rotate the created wooden texture and squash it. Make it smaller, making it covering the artboard. It doesn't have to fit the artboard entirely, as we'll hide unwanted pieces outside the edges later. Now let's make several horizontal planks. Take the rectangle tool, and create a narrow stripe fitting the width of the artboard. Align it to the artboard, if needed, and let's make some more planks. Select the shape, hold Alt+Shift, and drag it down, creating a copy. With a small gap between the planks, press Ctrl+D multiple times, creating about ten more copies. Select all the created planks and squash them, making them fill the artboard. Click right mouse button and create a compound path. Drag the texture under the planks. Select both subjects and make a clipping mask. Now our planks are wooden and textured. Let's fill those empty gaps between the planks. Make a rectangle of the size of our artboard. Align it to the artboard and send it to back. Fill it with darker turquoise color, adding contrast to our image. And finally, let's add some more dimension to the planks. Open the layers panel and find the compound shape of our planks. Copy them. And make another copy. Fill the copies with any contrast colors, just to make the shapes visible. Select the upper set of planks and move it up a bit. Select both copies and use the minus front function of Path Finder to cut the shapes, leaving only a group of narrow stripes. Fill the stripes with blue color inside the binding mold to screen, making the stripes turn transparent and turning them into subtle highlights. Let's also tweak the colors of the wooden surface a bit, making them not so contrast. Make the darkest colors of the wood a bit lighter. And here we have it, our textured wooden background is ready. Great, now we can move to our final lesson and create a nice composition containing all the created items on the background, making a trendy banner which can be used for advancements and promotion. Stay tuned.


