
 Lessons: 15Length: 1.7 hours
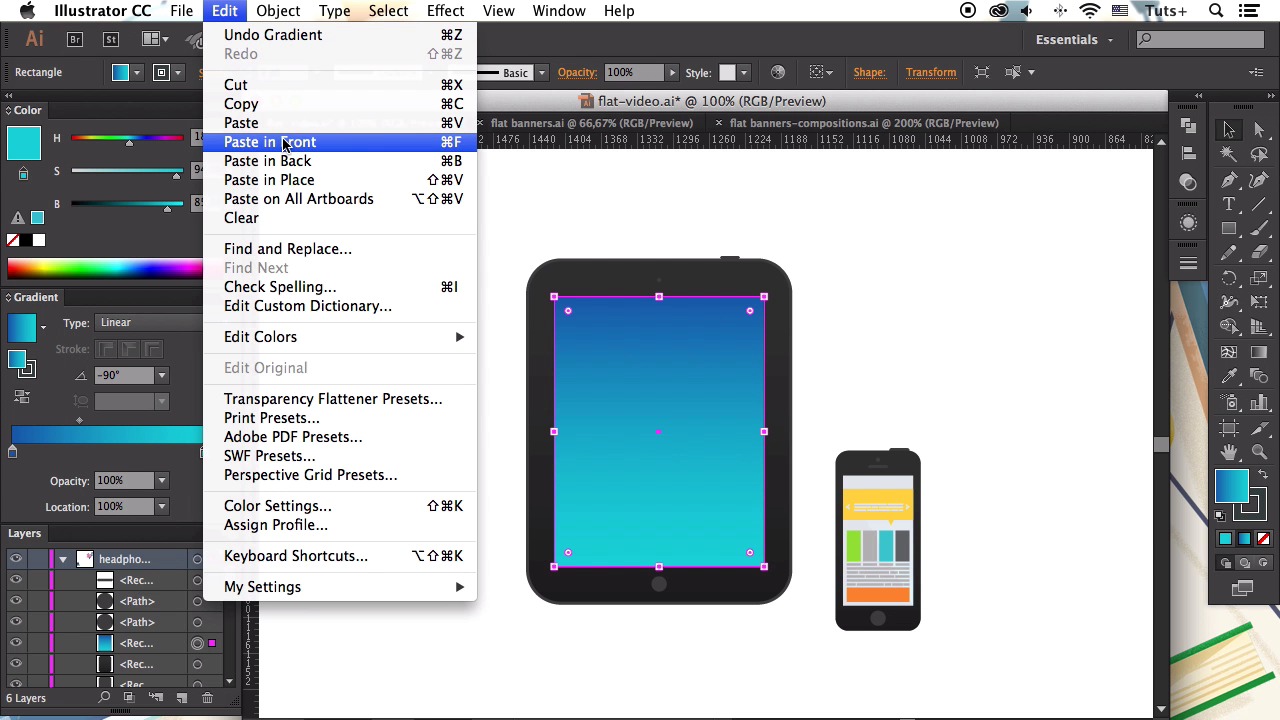
- Overview
- Transcript
3.7 Creating a Tablet
In this video we’ll be creating a front view of a digital tablet, using basic shapes and placing a custom template on its screen.
1.Introduction
1.1Introduction01:40
2.Advertisement Concept Idea
2.1Making a List of Elements03:30
3.Creating a Set of Workspace Elements
3.1Making a Laptop13:40
3.2Drawing a Cup of Coffee06:58
3.3Creating a Sketchbook05:53
3.4Rendering Glasses07:55
3.5Making Headphones06:37
3.6Creating a Smartphone04:59
3.7Creating a Tablet04:10
3.8Drawing a Camera08:32
3.9Designing a Wallet and Credit Cards11:50
3.10Making Stationery08:15
4.Making an Advertisement Template
4.1Creating a Wooden Background06:15
4.2Building a Composition08:26
5.Conclusion
5.1Conclusion02:13
3.7 Creating a Tablet
Greetings everyone and welcome back to creating [INAUDIBLE] works based elements for luxmen course with [FOREIGN] at tuts+. Today we'll be creating a front view of a digital tablet using basic shapes, and then use its screen as a mock up to place any custom template or image there. Let's start. Start by making a 260 x 340 pixel shape with the rectangle tool for the base of our tablet. Make the corners rounded and create a screen from a 210 x 270 pixel rectangle, aligning it to the center of the tablet base. Take the ellipse tool and make a 15 x 15 pixel circle for the button and place it in the bottom of the tablet. Make another circle of 4 x 4 pixel size in the upper part of the tablet for the camera. Add the lock button on top of the tablet, making it 20 x 3 pixels rectangle with rounded corners. Select the base of our tablet and go to object, path, offset path to create a rim. Set their set value to 3 pixels and adjust the position of the lock button above the rim. Let's color the tablet using the eye-dropper tool, and picking the colors from the smartphone, which we made in our previous session. Make the base dark gray and the minor details a bit lighter. Fill this green with bright blue gradient. Copy it and paste it in front. Use the scissors tool to split the shape into two halves. Join the anchor points of the upper half to make the path closed. Switch the blending mode to screen, making a gentle highlight. Make one part of the gradient black to make it transparent. Now, we can take the web page template and place it on the screen of our tablet. Adjust the width of the group of elements so that they fit the screen. Re-size some of the elements making them larger to fill the blank space of the screen. Add more text lines, hold Alt+Shift and drag to copy the shape and press Ctrl+D to repeat the copy action. And the bright orange rectangle in the bottom. Use the eraser tool, holding down Alt to add some gaps and text lines. Put the gaps randomly so that they remind of the real text. Bring the highlight of the screen to front, placing it above the template. Edit the minor flaws if needed. Align the shapes to each other using the align panel. And our digital tablet is finished. Great job, we've created a front view of a semi-realistic digital tablet and now can move on to the next element. In our next lesson, we'll be making a retro style camera with a textured leather surface. Don't miss it.


