
 Lessons: 15Length: 1.7 hours
- Overview
- Transcript
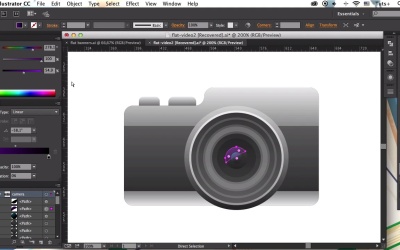
3.8 Drawing a Camera
In this lesson we’ll be creating a stylish retro pocket camera, using built-in Adobe Illustrator swatches to make a realistic textured surface.
1.Introduction
1.1Introduction01:40
2.Advertisement Concept Idea
2.1Making a List of Elements03:30
3.Creating a Set of Workspace Elements
3.1Making a Laptop13:40
3.2Drawing a Cup of Coffee06:58
3.3Creating a Sketchbook05:53
3.4Rendering Glasses07:55
3.5Making Headphones06:37
3.6Creating a Smartphone04:59
3.7Creating a Tablet04:10
3.8Drawing a Camera08:32
3.9Designing a Wallet and Credit Cards11:50
3.10Making Stationery08:15
4.Making an Advertisement Template
4.1Creating a Wooden Background06:15
4.2Building a Composition08:26
5.Conclusion
5.1Conclusion02:13
3.8 Drawing a Camera
Hello guys and welcome back to creating flat rock space elements for course with. Today we'll be creating a stylish retro pocket camera using in-built Adobe Illustrator swatches for a semi-realistic surface texture. Let's start. First of all let's create the base of the camera by making a 165 by 170 pixels rectangle. Let's copy it and paste in back. Squash it to about 150 pixels height. And make it wider to about 280 pixels. And maybe squash it a bit more to about 140 pixels. Select both shapes and unite them in Pathfinder. Make the corners rounded by pulling down the markers of the live corners. Take the rectangle tool and place the stripe over the upper part of the camera. Hold Alt+Shift or Option+Shift and drag it down to the button part, creating the copy. Select all the elements, take the shape builder tool, and hold Alt or Option key to delete the unneeded pieces. Now let's make the most essential part of any camera, the lens. Start by making a 150 by 150 circle using the ellipse tool. And place it almost in the center of the camera, a bit closer to the right. Let's add the shutter button to our camera. Create a 40x20 pixels rectangle. Make its corners slightly rounded. Hold Alt+Shift and drag to create another button, setting its width to 30 pixels. Now we can apply the colors to our camera and add more details. Fill the base of the camera with dark grey linear gradient, placing it vertically. And let's make the upper stripe of the camera silver by applying a light grey linear gradient. Apply the same color to the bottom stripe beginning with the eye-dropper tool. And apply the same similar color to the buttons as well. Send the buttons to back behind the camera. Now let's add more details to the lens. Fill your base with linear gradient of dark gray in the bottom, to silver gray on top. Go to Object > Path Offset > Path. Set the offset value to -7 pixels, creating a smaller circle inside the first one. Fill it with light gray gradient. And go to Offset Path again, but this time set the offset value to -3 pixels. Apply a dark gray gradient with a darker shade of. And apply -7 pixels offset with a bit lighter gradient. And another one with -3 pixels and darker gradient which you can pick with the eye-dropper tool. Continue adding offsets with the same values the colors until you have about ten circles. And this time, set the offset value to -15 pixels for the aperture. Let's copy the smallest circle and place it in front. Fill it with linear gradient from blue to black and set the blending mode to Screen making an overtone. Let's copy this overtone and make it smaller. And place the previous highlight on top by sending it to front. Take the eraser tool and split the top shape into two parts. For the upper part, change the blue color the gradient to lilac, and apply a red color instead of blue for the bottom part. Make the gray shape beneath the highlight a bit darker. Let's group the central shapes and make them a bit larger. Use the select similar objects button on top to select the same colors faster. Add the two colors, making our gradients darker. Now let's add the shadow. Select the bottom circle of the camera, copy it and paste in back. Make the shape a bit larger and switch to Multiply Blending Mode. Fill it with linear gradient from gray to white, and make the gradient go diagonally to the right. Delete the lower part of the shadow with the shape builder tool. Let's make the left side of the camera more dimensional. Draw a rectangle of a height of our camera. Switch the blending mode to screen and fill the shape with gradient forming the highlight. Duplicate the shape and drag its left side to the right, attaching another rectangle next to the first one. Use the Eyedropper tool to pick the appearance from the shadow under the lens, and put the gradient horizontally, making a shadow. Let's add some minor details. Make a 50 by 30 pixels rectangle and place it in the top right corner of the camera. Make it a bit rounded and pick the color from the dark base of the camera. The ply the offset path was -10 pixels offset value. Pick the color from the light circle of the lens from the flash. Make another rectangle 30 by 10 pixel size. Align it to the top of the flash. And fill with a bright yellow linear gradient. Make a 20 by 20 pixel circle and apply silver color. Copy the circle and reduce its size to 10 by 10 pixels. Pick the yellow color with the eye dropper tool. Make the base of the camera a bit darker. Copy it, and paste in front. And now let's make the base of the camera more textured using the in-built patterns of Adobe Illustrator. Open the Swatches panel in the window Swatches. Go to the Swatches library > Patterns > Basic Graphics > Basic Graphics_Textures. Here we have some nice realistic textures which create a detailed and fancy look. Let's find something which imitates a leather surface. For example, this one, called intricate surface. Click to apply. And let's double-click the Scale tool. Here, uncheck all the options except the Transform patterns box and set the Uniform Scale Value to 90%. Other tools, whether it'd be Illustrator work with the patterns as well. For example, let's double click the rotate tool. Check the transform patterns box and set the angle to, say, 30 degrees. Switch the blending mode of the pattern shape to multiply. And decrease the opacity to 30%. And here we have it, our camera is ready. Great job, we've created our detailed camera was semi-realistic leather texture and now can move on. In our next lesson, we'll be making a leather wallet with a couple of credit cards. Stay tuned.


