
 Lessons: 15Length: 1.7 hours
- Overview
- Transcript
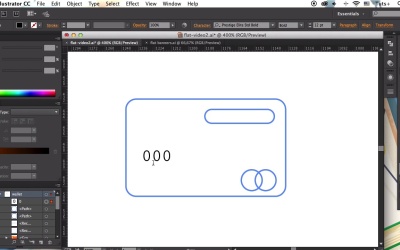
3.9 Designing a Wallet and Credit Cards
In this lesson we’ll be using basic shapes and Stroke options to render a textured leather wallet. Then we’ll continue by making a front view of a credit card with an elegant design and its back surface with all the details.
1.Introduction
1.1Introduction01:40
2.Advertisement Concept Idea
2.1Making a List of Elements03:30
3.Creating a Set of Workspace Elements
3.1Making a Laptop13:40
3.2Drawing a Cup of Coffee06:58
3.3Creating a Sketchbook05:53
3.4Rendering Glasses07:55
3.5Making Headphones06:37
3.6Creating a Smartphone04:59
3.7Creating a Tablet04:10
3.8Drawing a Camera08:32
3.9Designing a Wallet and Credit Cards11:50
3.10Making Stationery08:15
4.Making an Advertisement Template
4.1Creating a Wooden Background06:15
4.2Building a Composition08:26
5.Conclusion
5.1Conclusion02:13
3.9 Designing a Wallet and Credit Cards
Hello, folks and welcome back to creating foot workspace elements for advertisements course with Advanced Plus.. In this lesson we'll be using basic shapes and stock options for rendering a leather wallet, and the front and back view of a credit card. Let's start. We'll start by making a leather wallet. Make a 120 by 90 pixels rectangle. Make its corners rounded to about 12 pixels corner radius. Let's make another rectangle for a stripe of 40 by 20 pixels size. Align it to the vertical center and to the right side of the wallet. Make the left side of the strap rounded. Make a round button on the strap, and create a small circle on top for the fuchsia highlight. Group the shapes. Let's call it the wallet. Select the base and the bilinear gradient from light brown on top to darker brown on the bottom. Apply the same color to the strap using the eye dropper tool. use the gradient tool to change the direction of your linear gradient. Click right mouse button to isolate the button group. And fill the button with some metal gray radial gradient. Fill the highlight with gray color and switch to the screen blending mode. Copy the strap and paste it in back. Make it a bit larger and switch to multiply blending mode. Adjust the colors a bit, making the shadow semitransparent. Now duplicate the base of the wallet twice. Move the copy down and to the right a bit. Use minus front function of Pathfinder to cut the shape and switch the remaining piece to screen mode. Make a gentle highlight.. Duplicate the base of the wallet twice one more time, and this time move the copy up and to the left a bit. Cut off the unwanted parts with minus front, and switch to the multiplier [INAUDIBLE]. Adjust the gradient to make a shadow, adding dimension to the wallet. Let's add some minor details for more realism. Select the base and go to Object > Path > Offset Path. Save the offset value to minus five pixels. Set the strobe color of the shape to light brown. Open the Stroke panel in Window, Stroke. Here let's check the Dashed Line box and play with the values, adjusting the size of the stitches of our wallet. Set the cap and corner to middle positions. Set the dash value to 2 pixels and the gap value to 3 pixels. The weight of the stroke equals 1. Extend the shape to the left outside the wallet. Use the Add Anchor Points Tool to make two additional anchor points on the edge of the wallet. Take scissors tool and click the created points to split the shape. Delete the piece outside the wallet. Switch the blending mode of the stitch to the screen. Create a narrow rectangle across the wallet. Use the Eyedropper tool to pick the appearance from the highlight on the left part of the wallet. Let's make the wallet more textured. Copy the base and paste it in front. Go to the Swatches panel and apply the Intricate Surface pattern which we've used for our camera. Use the Scale tool to decrease the pattern scale to 60%. Let's try and see which blending mode is better. Select screen, and set the opacity to 30%. Now, let's make a front view of a credit card. Draw a 115 by 70 pixels rectangle. Make the corners slightly rounded. Make another rectangle of 50 by 10 pixels size for the label in the upper part of the card. Make its corners fully rounded. Create a 15 by 15 pixel circle, and place it in the right bottom part of the card. Hold ALT + Shift or Option + Shift and drag to the left, creating a copy. Now let's add the card number. Select the Type tool and go to Character panel on top. Select some thin typewriter style font, like Courier or Prestige Elite. Type a number of 16 digits. Set the appropriate font size, in our case it is 8.3. Align the number to the center of the card, add the name in the bottom left part of the card. Create a 20 by 15 pixels rectangle for the microchip. Make it slightly rounded and align it to the card. Let's apply the colors. Apply a linear gradient with bright orange shades. Make the label in the top part and the microchip silver, by applying a light gray gradient. Apply red and yellow colors to the circle logo types in the bottom of the card. Divide the circles in Pathfinder, and color the overlapping part to orange. Let's make some simple and stylish design to our card. Make a 120 by 20 pixels rectangle of a bright orange color. Go to Effect > Distort & Transform > Zig Zag. Here in the options menu, set the points to smooth, readjust segment to 4, and the size value to 6 pixels. Click OK to apply the effect, and Object Expand Appearance on the shape. Move the wave under the elements of the card. Make it a bit wider. And use the Shape Builder tool, holding down ALT or Option key, to delete the pieces outside the card. Select the wave and isolate it. Take the Direct Selection tool and let's deform the wave by moving some of its parts up, and the others down. Select the anchor points and use the arrow keys of your keyboard. Copy the shape and paste it in back. Move the copy down a bit and fill it with a darker color. Finally, let's add highlight. Duplicate the base of the card and bring it to front. Use the scissors tool to split the shape diagonally. And delete the lower half. Click right mouse button and join the points of the upper shape. Switch the blending mode to Screen. And make one part of the gradient black. The black color becomes transparent in the screen blending mode. Add a glossiness to the card through the gentle overtone, and make some minor adjustments, changing the colors of the text to white, and then resizing some elements if needed. Now let's duplicate our card and create its backside. Move the highlight up for now. We'll return it to its place later. Delete all of the parts, leaving the base of the card. Change its color to silver, begin the gradient from one of the elements. Make a 115 by 20 pixels narrow rectangle for the magnetic strip. Align it to the card and apply a dark gray gradient. Make another rectangle of 75 by 15 pixels, and place it in the right side of the card. Use the Eyedropper tool to pick the orange gradient from the front side of the card. Make another rectangle of 50 by 15 pixels size or even a bit smaller to make all the elements fit the card. Fill it with darker gray gradient. Now let's make a barcode. Pick the dark color from the magnetics chip, and use the rectangle tool to make a narrow vertical stripe in the bottom left corner of the card. Hold Alt+Shift or Option+Shift and drag to the right making a copy. Press Ctrl+D or Cmd+D multiple times creating about 20 copies. Select some of the tracks and make them shorter than the others. Then select some of the stripes again, and make them narrower, making the barcode more realistic. Group the stripes and now, let's place the highlight back on the card. Select the shape and align it with the card. Finally, bring the shape to front and adjust the color, making a glossy overtone. And our wallet and cards are ready. Great job, We've created a semi realistic wallet with leather texture and a couple of credit cards with front and back view. Now we can move and try a group with the last elements from our list. Those will be some minor stationary objects like pencils and paper. See you in the next lesson.


