- Overview
- Transcript
3.10 Making Stationery
In this video we’ll be making some minor details, such as sheets of paper and pencils, which will help us to fill up the blank spaces of our future composition.
1.Introduction1 lesson, 01:40
1.1Introduction01:40
2.Advertisement Concept Idea1 lesson, 03:30
2.1Making a List of Elements03:30
3.Creating a Set of Workspace Elements10 lessons, 1:18:49
3.1Making a Laptop13:40
3.2Drawing a Cup of Coffee06:58
3.3Creating a Sketchbook05:53
3.4Rendering Glasses07:55
3.5Making Headphones06:37
3.6Creating a Smartphone04:59
3.7Creating a Tablet04:10
3.8Drawing a Camera08:32
3.9Designing a Wallet and Credit Cards11:50
3.10Making Stationery08:15
4.Making an Advertisement Template2 lessons, 14:41
4.1Creating a Wooden Background06:15
4.2Building a Composition08:26
5.Conclusion1 lesson, 02:13
5.1Conclusion02:13
3.10 Making Stationery
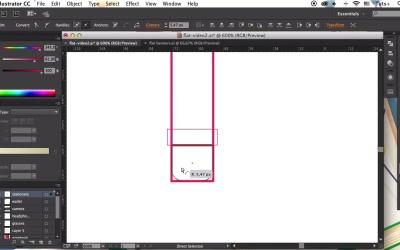
However on. And welcome back to Creating Flat Workspace Elements for Advertisement course with you as a goal at Dot's plus. In today's lesson we'll create the last elements from our list. We'll be making some minor details such as sheets of paper and pencils which will help us to fill up the blank spaces of our future composition. Let's do it. We'll start by making a sheet of paper from a sketchbook. Create a 180 by 260 pixels rectangle. Take the Ellipse tool, and make a 16 by 16 pixel circle in the upper left part of the rectangle. Move it up a bit. Hold ALT+ Shift and drag to the right to make a copy. Press CTRL+D to create more copies. Select the circles, click right mouse button. And make compound path. Use minus front function of the Pathfinder panel to cut out the circles. Fill the shape with slight base gradient, making the paper surface more realistic. Now let's form the grid lines. Take the line segment tool and draw a horizontal line across the paper shape. Apply a bright blue stroke color. Hold Alt+Shift and drag the line down to create a copy and press Ctrl+D to repeat the last action several times. Fill the bottom line with a bright red color. Now let's make another sheet of paper, the one from the copy book. Make it 270 x 370 pixels rectangle. Fill it with the same light beige paper color gradient. Draw a horizontal line across the paper, picking the blue color from the previous sheet of paper with the eye dropper tool. Make more copies. And add a vertical line in the right to the paper shape. Fill it with the red color. And let's add another paper sheet beneath this one. Copy the shape and paste it in back. Move the shape down and to the left a bit. Make it darker, adding contrast and dimension to our objects. Now let's render the pencils. Make a 20 by 256 pixels narrow rectangle for the base. Go to object, Path, add anchor point. Take the direct election tool and select the upper left and right and anchor points, and drag them down forming the tip of the pencil. Make the tip a bit rounded using the live corners function. Draw another narrow rectangle above the base of our pencil, not covering the tip. Duplicate it and squash the shape, forming a small stripe in the bottom part of the pencil. Change the width of the stripe from 20 pixels to 24 pixels. Duplicate the base once again, and drag it's top part down forming a smaller eraser in the bottom part of the pencil. Select the bottom anchor points and make this part of the shape rounded. Now let's add the slate to the tip of our pencil. Draw and ellipse overlapping the tip of our pencil. Select both shapes and use the Shape Builder tool to cut off the piece outside the pencil. Let's apply a light orange color to the wooden part of our pencil. And let's make its middle part, or the base, bright yellow. Duplicate the base and resize it, dividing its width by three by typing /3 in the width value bar. Make the shape a bit lighter. Apply silver gray color to the bottom stripe of the pencil. And bright pink color to the eraser. Fill the slate tip with dark grey color. Delete the outlines. Now let's select the middle driver far our pencil and go to object, path, add anchor points. Make the shape pointed by dragging the top side anchor points down. Take the add anchor points tool and add two points above, on the base dark yellow shape. Drag these points down as well, connecting the shapes. Finally let's add some dimension to the pencil. Group all the parts together and duplicate the shape. Unite the copy shape in the Pathfinder, making a silhouette. Copy the silhouette and move the copy to the right a bit. Use function to cut out the larger piece of the copy. Switch the remaining part to multiply blending mode and fill it with light yellow gradient. Making a subtle semitransparent shadow. Let's make another pencil. Copy the one that we've already created. Delete the metal stripe and the eraser. Select the shadow and delete its lower part with the eraser tool. Select its lower anchor points and drag them down, so that they feed the pencil. Switch the color of the shadow to blue. And make the color of the pencil blue as well. Make the middle stripe light blue. Hold Alt+ Shift and drag to copy the blue pencil. Recolor the base of the new pencil to bright magenta. Make the middle stripe a bit lighter, and change the blue color of the shadow to dark orange. And that's it. Our stationary set is ready. Great work. So now we have a couple of paper sheets and some colorful pencils. We can move on and use all the created items for building a composition. But first, we need to make a nice workspace background with a realistic wooden surface. Stay tuned for the next lesson.


